
Objective
The objective of this project is to create a modern SharePoint intranet page that displays approved documents stored in a Shareflex Document Management System (Document Control).
Although Shareflex provides a comprehensive and feature-rich user interface for document management, many end users only need quick access to approved documents. For these users, the standard Shareflex interface can expose more functionality than required for day-to-day document retrieval.
The goal is therefore to build a highly user-friendly and intuitive document portal that focuses on simplicity. Users should be able to quickly locate documents using a small number of metadata filters, browse the results in a clean card-based layout, and open documents directly in Microsoft Word Online with a single click.
The Shareflex DMS remains the authoritative source for document storage, workflows, permissions, versioning, and document approval. The SharePoint intranet page acts purely as a simplified read-only presentation layer, providing an attractive and efficient way for users to find and access valid documents.
We used PnP Modern Search for this project
PnP Modern Search is an open-source solution developed by the Microsoft 365 community that extends the search capabilities of SharePoint Online. It provides configurable Search Results and Search Filters web parts that use the SharePoint Search Index to retrieve and display content.
Instead of developing custom SharePoint applications, organisations can use PnP Modern Search to build highly customised search pages using HTML, Handlebars templates, CSS, and managed search properties. This makes it an ideal solution for creating modern document portals with a tailored user experience while relying on the standard SharePoint search infrastructure.
https://microsoft-search.github.io/pnp-modern-search/
https://github.com/microsoft-search/pnp-modern-search
Result
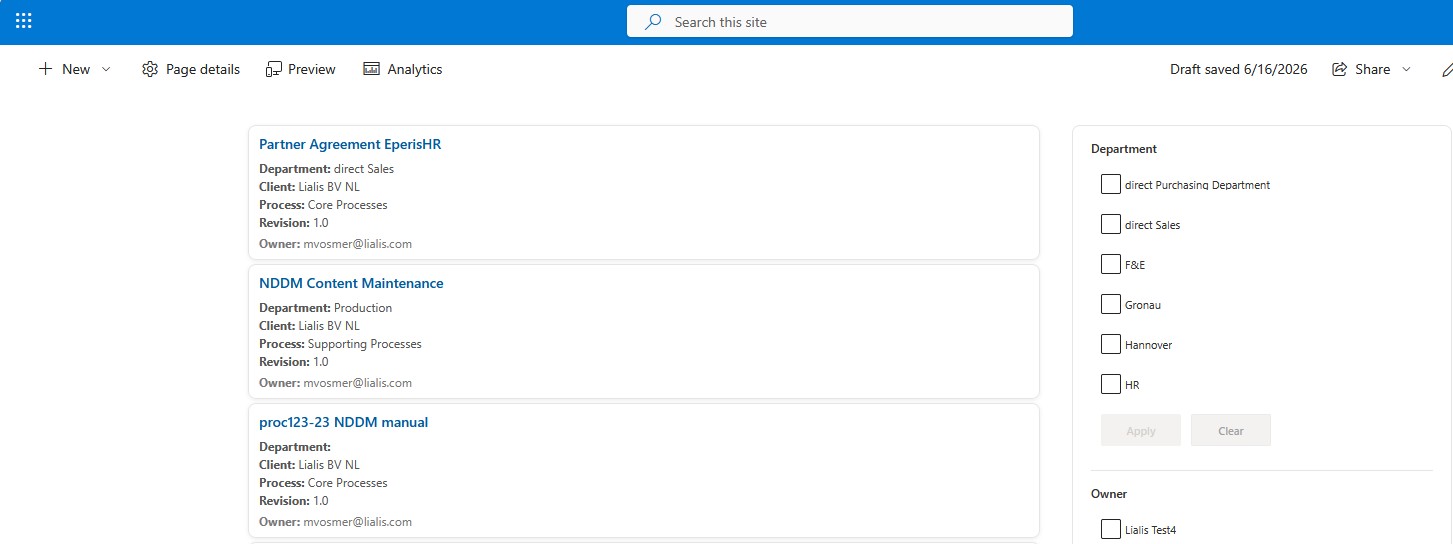
The result is a modern, intuitive SharePoint intranet page that allows users to quickly find and open approved Shareflex documents without navigating the full Shareflex user interface.
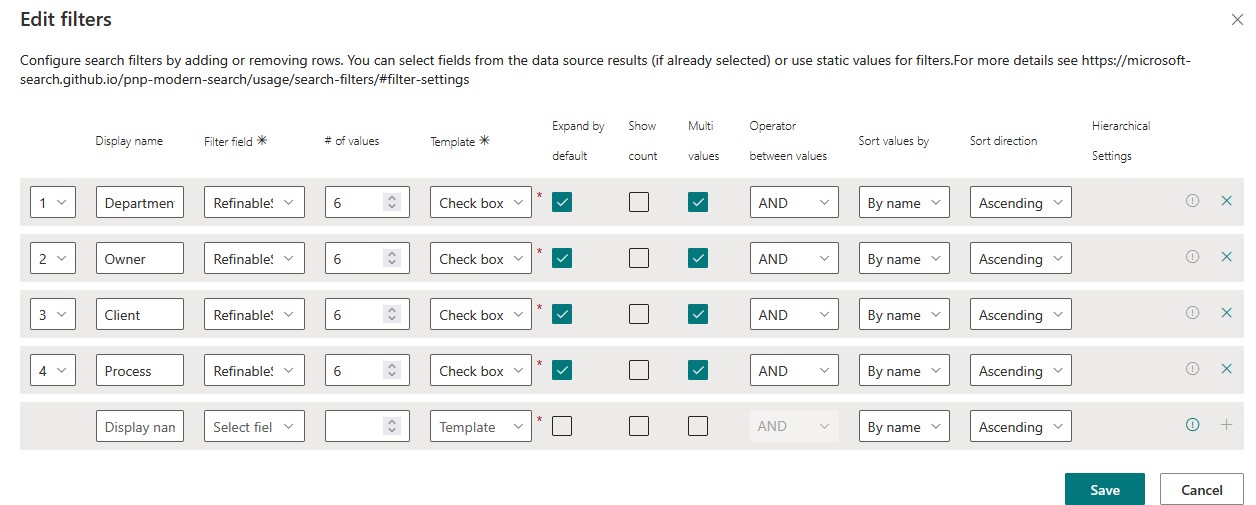
Users can search and filter documents using familiar business metadata such as Department, Client, Process, Owner, and Revision. Search results are presented in a clean card-based layout, and documents can be opened directly in Microsoft Word Online with a single click.
Installing PnP Modern Search
PnP Modern Search is delivered as an SPFx (SharePoint Framework) solution that must be installed in the SharePoint App Catalog of your Microsoft 365 tenant.
Step 1 – Open the SharePoint App Catalog
Navigate to your SharePoint App Catalog:
https://yourtenant.sharepoint.com/sites/appcatalog
Step 2 – Download the Latest Release
Download the latest PnP Modern Search package from the official GitHub releases page.
1. Open the PnP Modern Search Releases page.
2. Scroll to the Latest release.
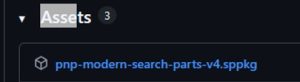
3. Expand the Assets section.
4. Download the package:
pnp-modern-search-parts-v4.sppkg
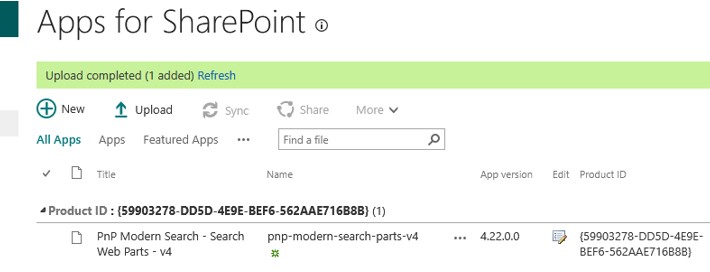
Step 3 – Upload the Solution
In the SharePoint App Catalog, navigate to:
Apps for SharePoint
Upload the downloaded package:
pnp-modern-search-parts-v4.sppkg
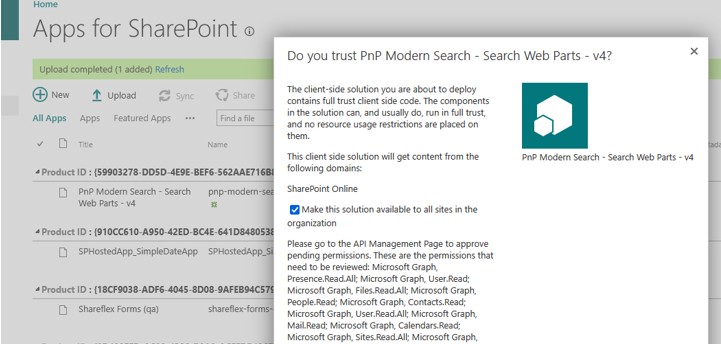
Step 4 – Deploy the Solution
After uploading the package, SharePoint will display a deployment dialog.
Select:
Deploy
Make this solution available to all sites
Once deployed, the PnP Modern Search web parts become available throughout the tenant and can be added to modern SharePoint pages.
Configuring SharePoint Search Managed Properties
One of the most important parts of this solution is configuring the SharePoint Search managed properties correctly.
Unfortunately, this is also one of the weakest parts of SharePoint Online. Search indexing is not immediate, changes are often delayed for many hours, and troubleshooting can be frustrating. For this reason, it is highly recommended to carefully plan your search configuration before making any changes.
Before configuring PnP Modern Search, decide exactly which Shareflex document metadata should be:
Displayed in the search results
Used as search filters
Used for sorting
Changing these mappings later is possible, but because of SharePoint’s search indexing delays it can become a slow and time-consuming process.
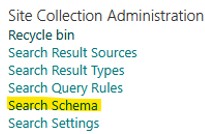
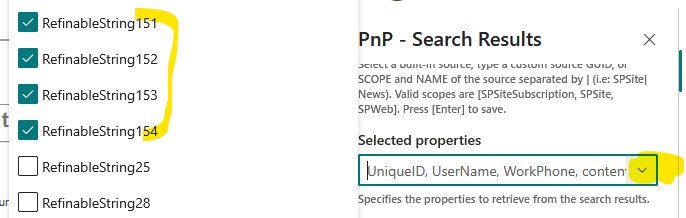
Step 1 – Configure Managed Properties
Navigate to:
Site Settings → Search Schema
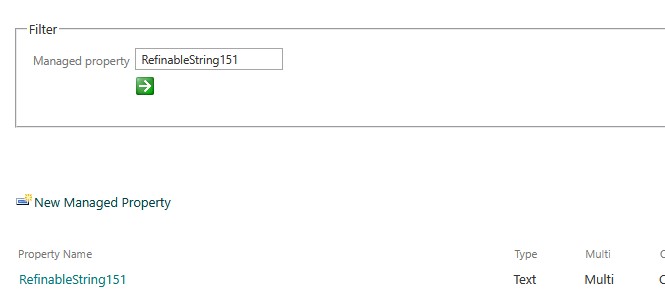
Select the RefinableString managed properties that will be used by your document portal and map them to the corresponding Shareflex crawled properties. Only use RefinableStrings for this purpose, as they are free to be used for this purpose.
Below the RefinableStrings I used and the Shareflex metadata values I assigned to them.
RefinableString151 | ows_q_TEXT_qmDepartment
RefinableString152 | ows_q_TEXT_qmProcess1
RefinableString153 | ows_q_TEXT_qmClient
RefinableString154 | ows_q_USER_qmOwner
The actual crawled property names depend on your Shareflex implementation and custom content types.
Edit the property and add a mapping at the bottom of the page.
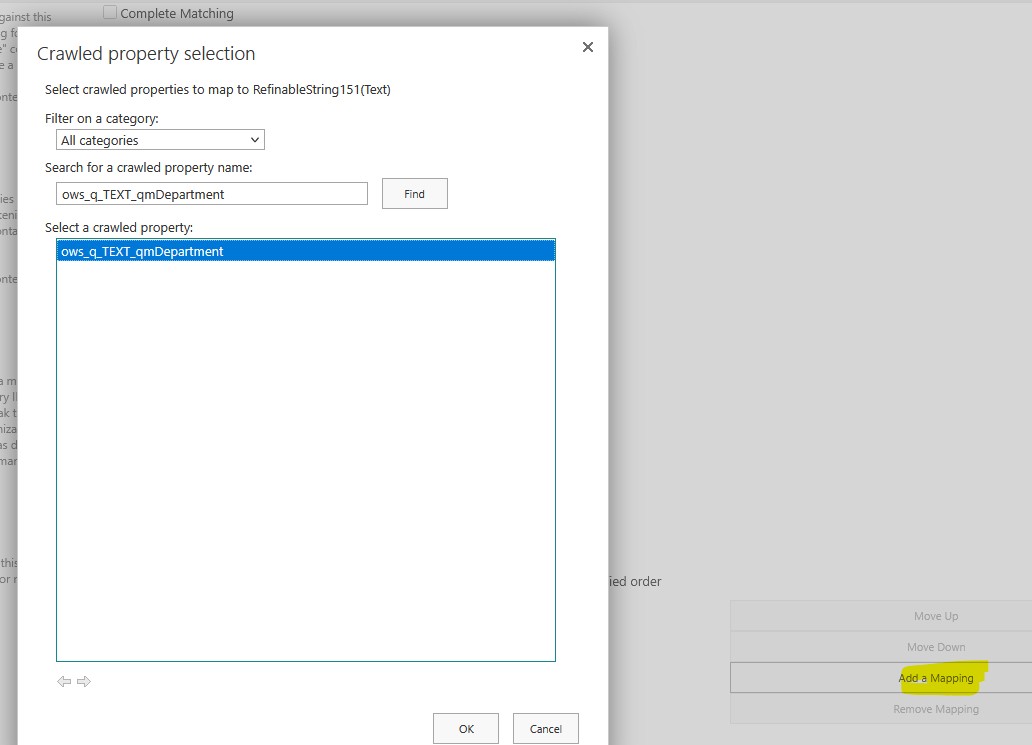
After saving a managed property mapping, reopening the same RefinableString may NOT show the mapping as empty (at least in my tenant). Don’t worry—this appears to be a SharePoint Online UI issue.
Instead, verify the mapping by checking the Crawled Properties section. If, for example, ows_q_TEXT_qmDepartment is listed under RefinableString151, the mapping has been saved correctly.
I also found that removing existing mappings was unreliable and, in some cases, seemingly impossible. Overall, the SharePoint Online Search Schema interface is one of the weakest parts of the platform and can be quite frustrating to work with.
Step 2 – Reindex the Library
After updating the managed property mappings, navigate to your Shareflex document library Valid Documents:
Library Settings → Advanced Settings → Reindex Document Library
Request a reindex of the library.
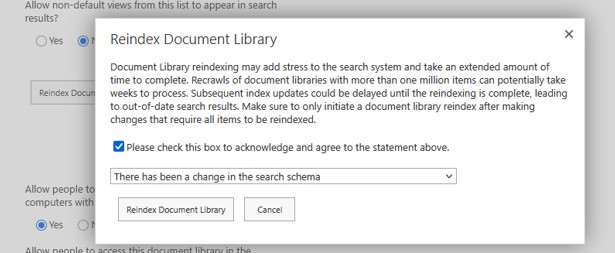
Be Patient. Even after saving the managed property mappings and requesting a library reindex, SharePoint Search may require several hours before the new managed properties become available in search results and in PnP Modern Search. For this reason, it is strongly recommended to finalize your managed property design before starting the user interface development.
Creating the SharePoint Search Page
Once the managed properties have been configured and the document library has been reindexed, the SharePoint search page can be created.
Step 1 – Create a Modern SharePoint Page
Navigate to:
Site Contents → Site Pages → New → Site Page
Create a new page, for example:
Quality Documents
Step 2 – Create a Two-Column Layout
Edit the page and add a Two Columns section.
The left column will contain the document search results, while the right column will contain the search filters.
Step 3 – Add the PnP Search Results Web Part
In the left column, add the PnP – Search Results web part.
This web part is responsible for querying the SharePoint Search Index and displaying the approved Shareflex documents.
Important settings are displayed in the images below.
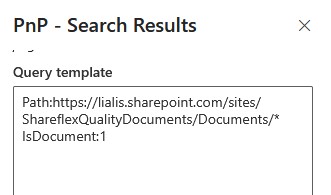
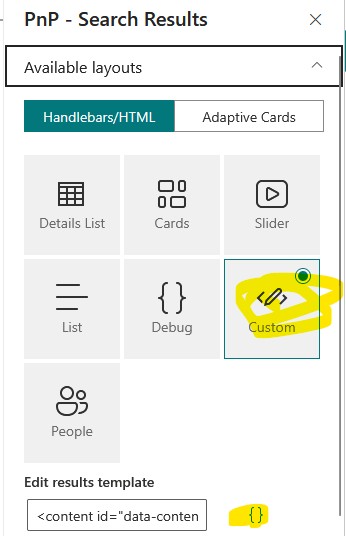
Leave the default settings in place. The appearance of the results will be customized later using a custom Handlebars template and CSS.
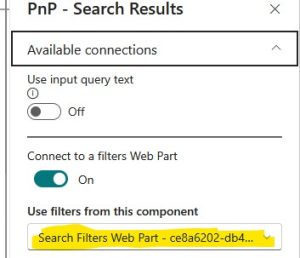
Step 4 – Add the PnP Search Filters Web Part
In the right column, add the PnP – Search Filters web part.
Configure it to connect to the PnP Search Results web part that was added in the left column.
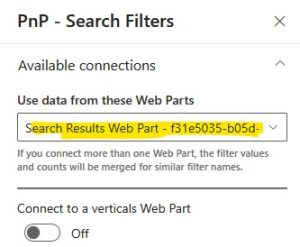
Once connected, the filters will automatically retrieve their values from the search results.
Step 5 – Publish the Page
Publish the page. At this point you should have a functional SharePoint search page where users can search and filter Shareflex documents. Although the page will still use the default PnP layouts, all functionality is now in place and the user interface can be customised in the following chapters.