End User Manual Document Management
We provide two types of document management applications:
- Shareflex Document Control. This is a comprehensive, strictly controlled document management application for quality management systems.
- The Document Management solution that we describe on this page is less strict because it is intended for regular document management in SharePoint Online.
Please also check out this post in which we compare these two document centric applications.
Link to the product page for Shareflex Document Management Software for SharePoint.
Shareflex Documents Management are customized DMS solutions providing integrated, document-centric business applications. The standard document management features of SharePoint remain available in Shareflex within the respective business application. However, in addition to SharePoint’s standard offerings, Shareflex provides extra DMS features when needed from the perspective of the respective business application. These may include linking, copying, moving, or resubmitting files and documents.
In this manual, we showcase an example of a DMS solution for the sales process. Of course, it’s easy for us to set up any other process in Shareflex Documents.

In the following sections, we cover in depth all the features of Shareflex Documents, accompanied by sample screenshots to give you a better idea of the solution.
The homepage/cockpit of the application consists of 3 sections.
The middle pane (green) contains tiles that point to lists, libraries, forms, actions, etc. The tiles displayed here are fully customizable.
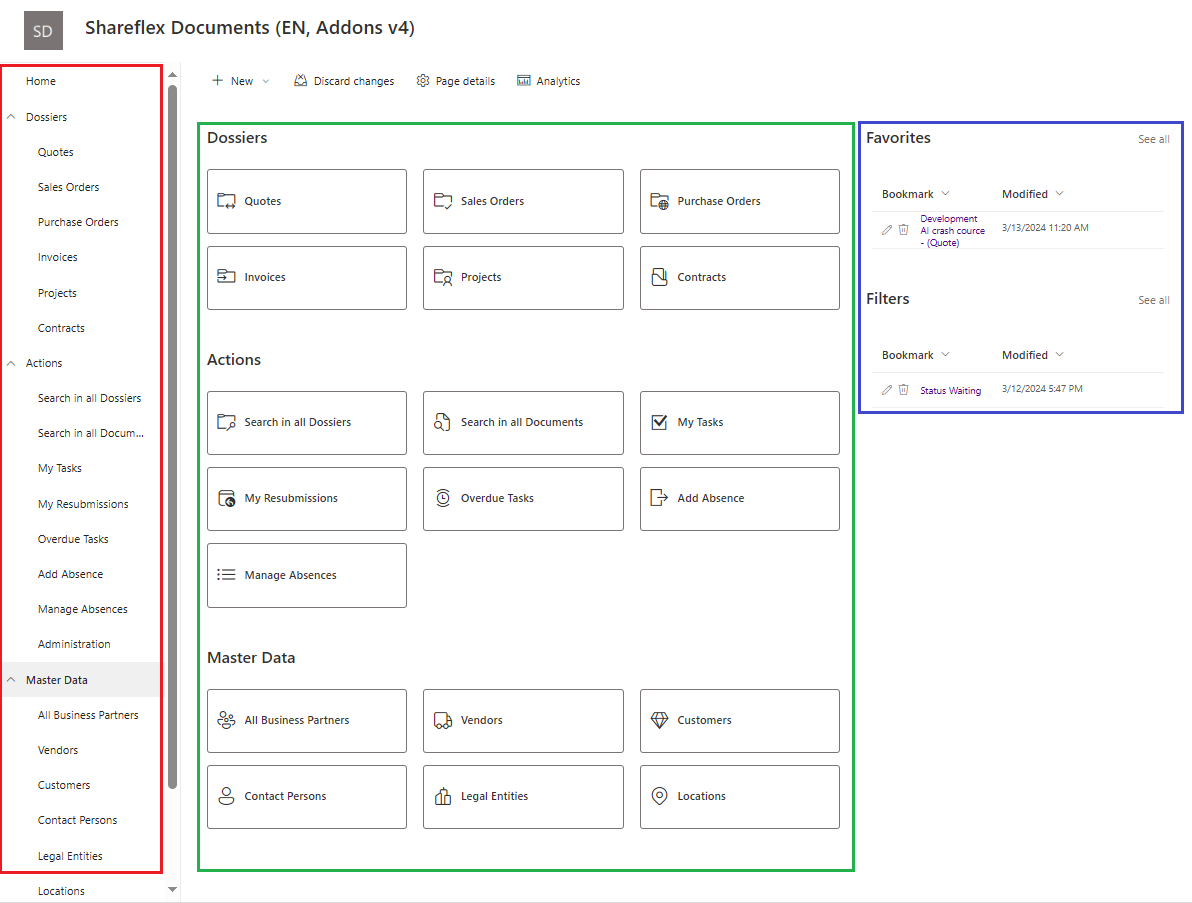
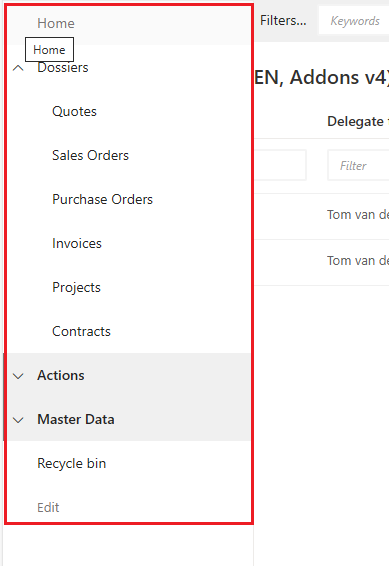
The left pane navigator (highlighted in red) is particularly helpful when you are not on the homepage. Utilize this navigator to switch to a different list directly, bypassing the need to return to the homepage.
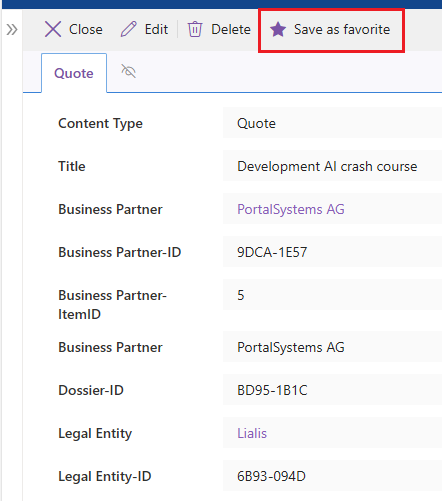
On the right (blue), bookmarks for your favorite items and filters are displayed. Click the “Save as favorite” button at the top of the item to save the bookmark, and remove the bookmark with the “Delete Favorite” button![]()
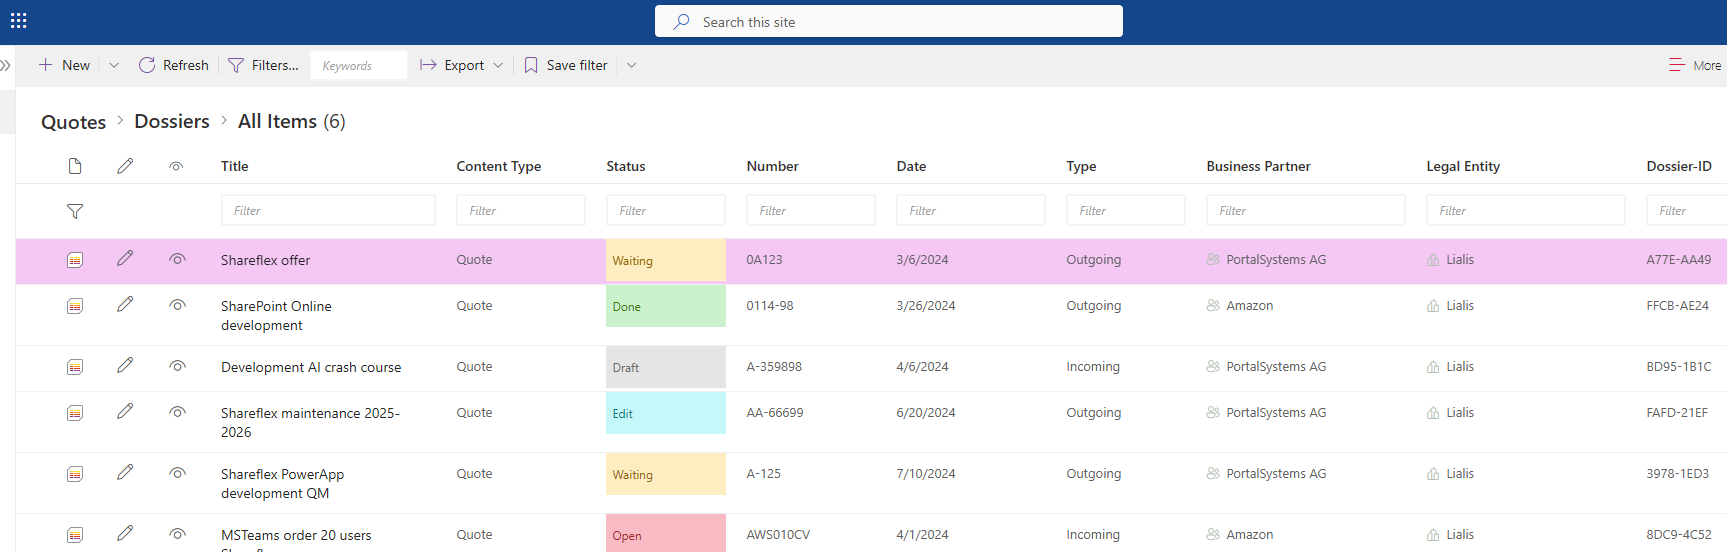
To easily retrieve items, a filter can be applied to each list. Click the “Save filter” button to add the current filter to your list, eliminating the need to configure it again.
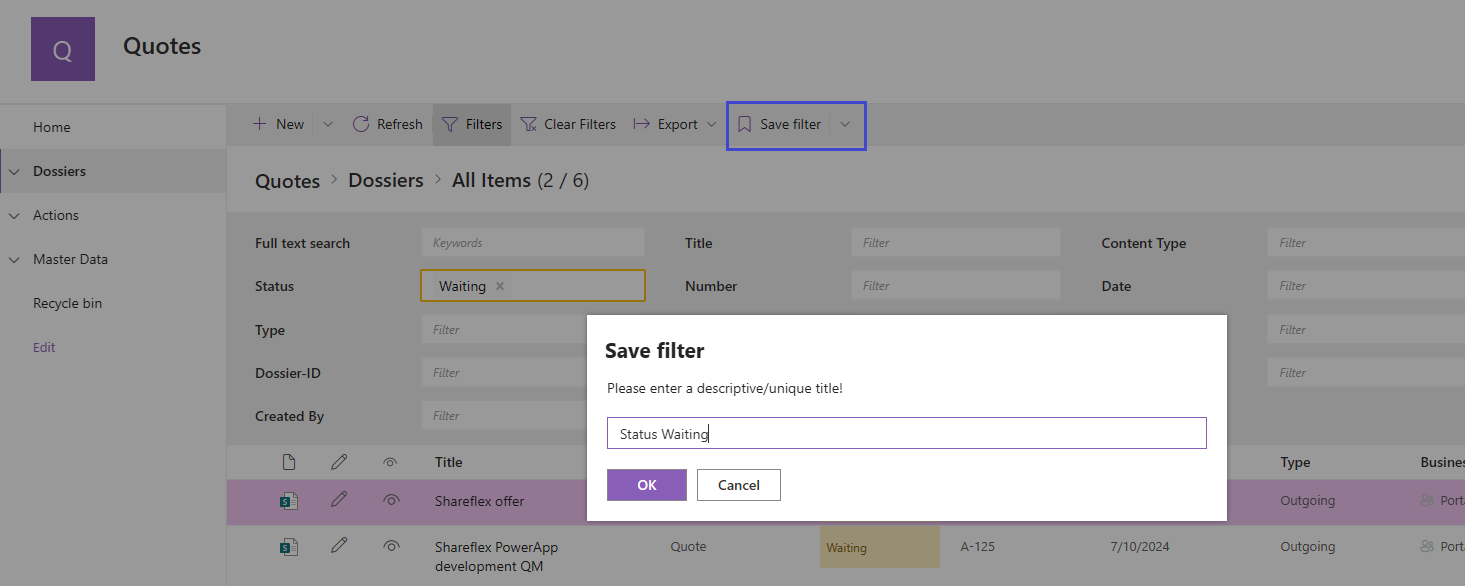
Custom filters are set up for each list, allowing for highly specific searches based on the values of multiple fields simultaneously.
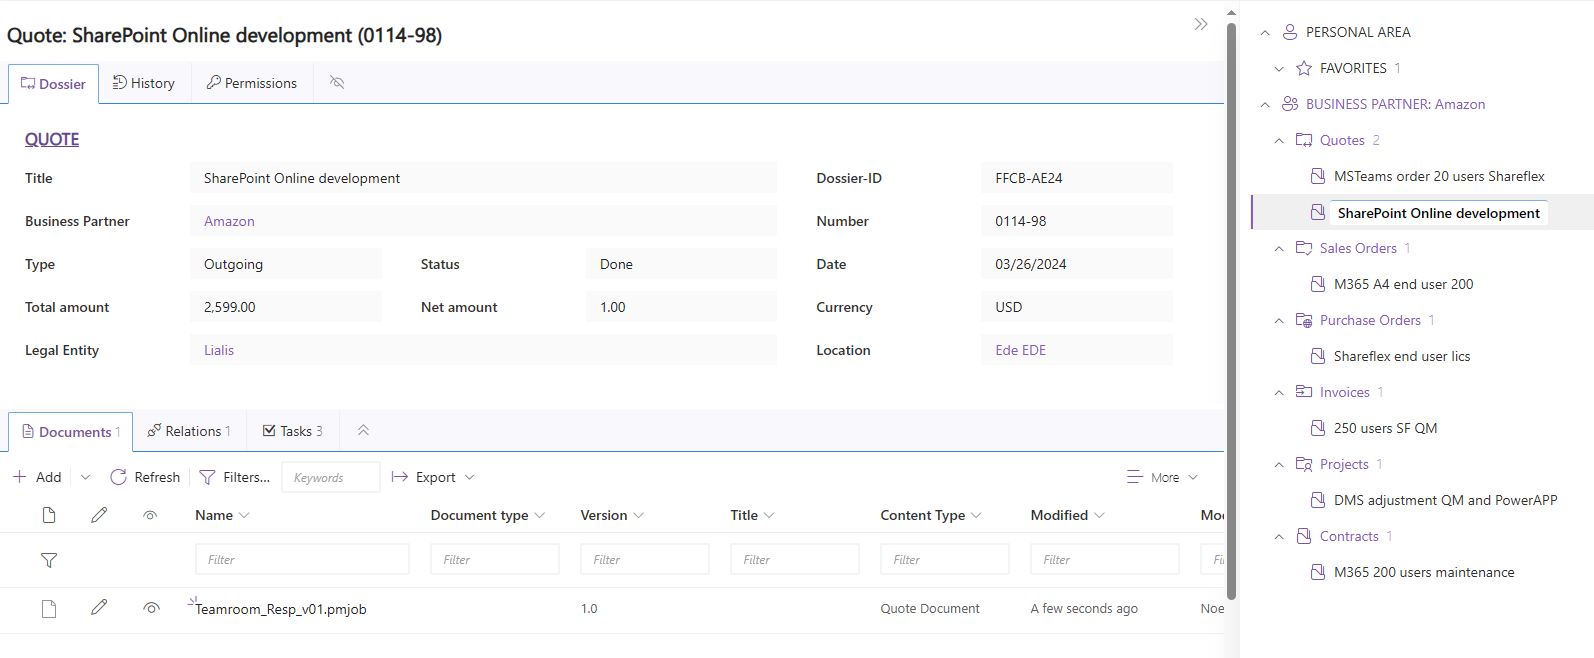
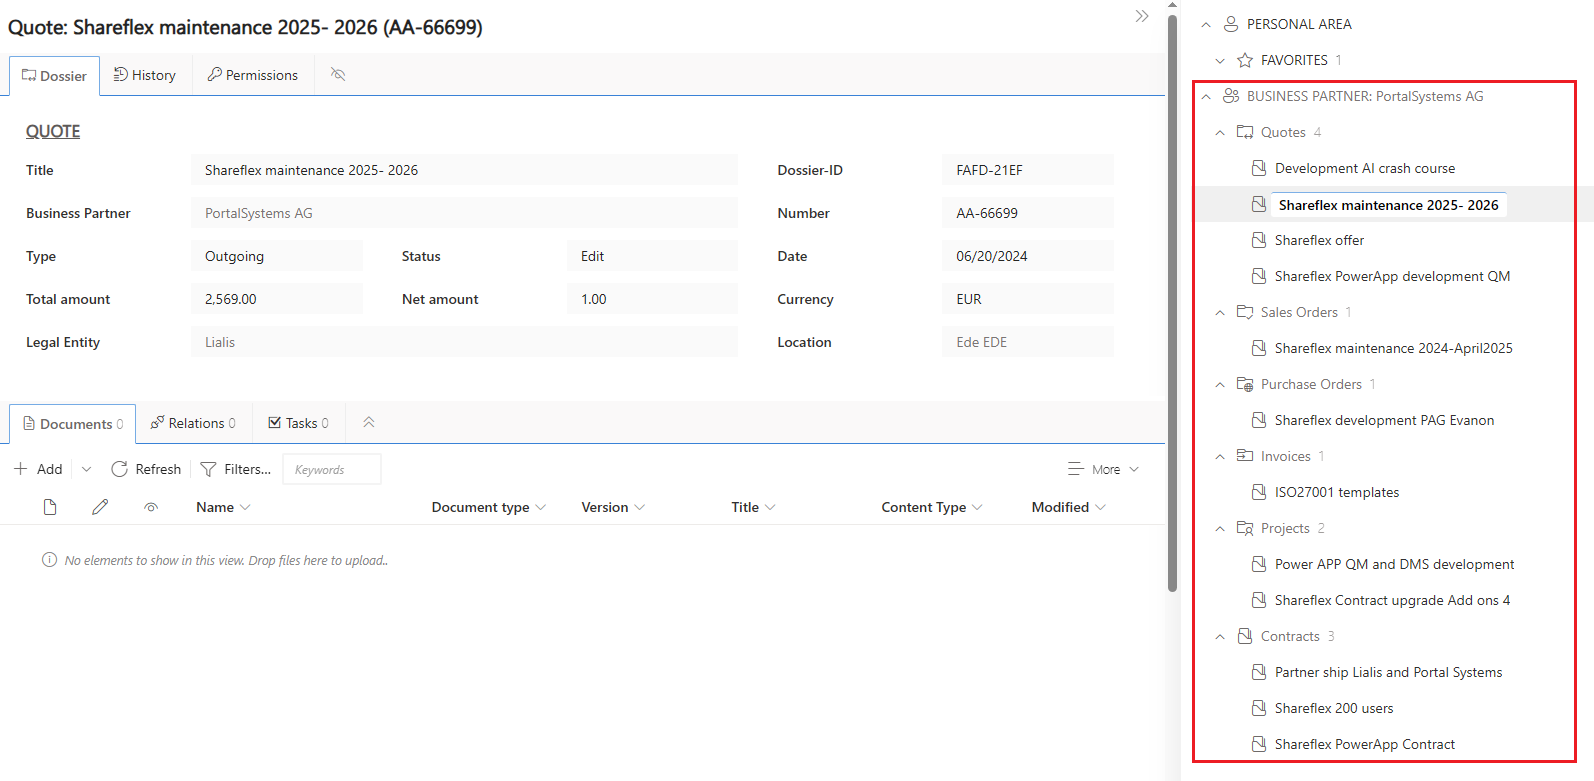
Items related to each other are organized and displayed hierarchically, allowing for effortless navigation between related items. The right panel shows the item’s position within the structure. At the bottom of the left panel, subordinate items such as documents, relationships with other documents/dossiers, and tasks associated with this item are displayed.
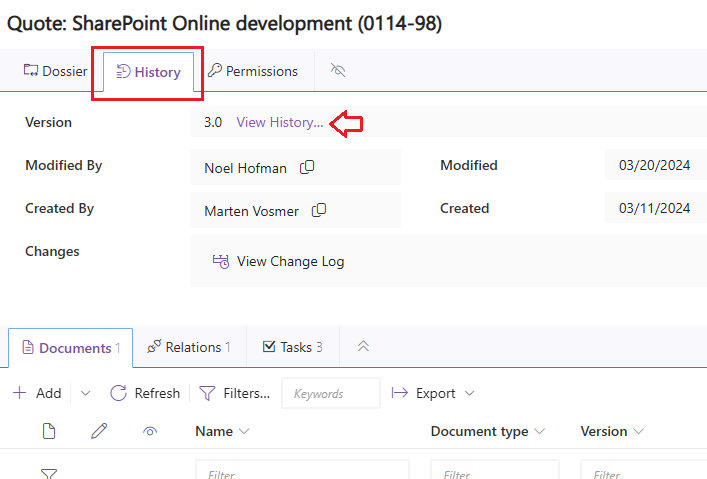
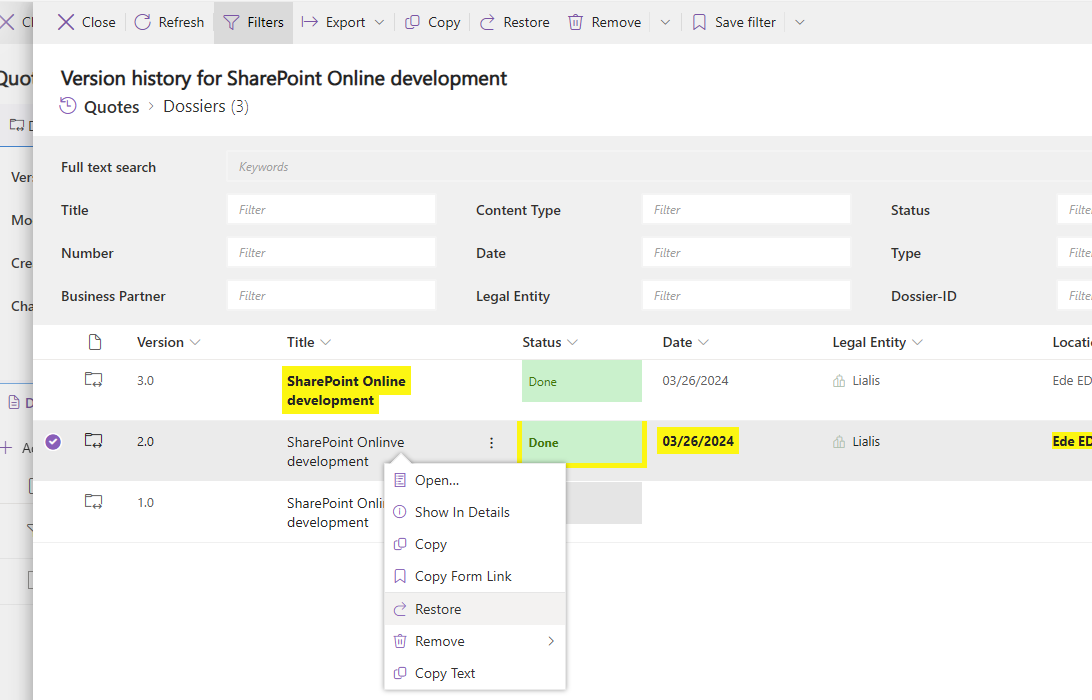
The History tab shows the version history of the item.
A right-click context menu provides convenient functions, such as restoring an old item. The context menu is accessible across the entire application.
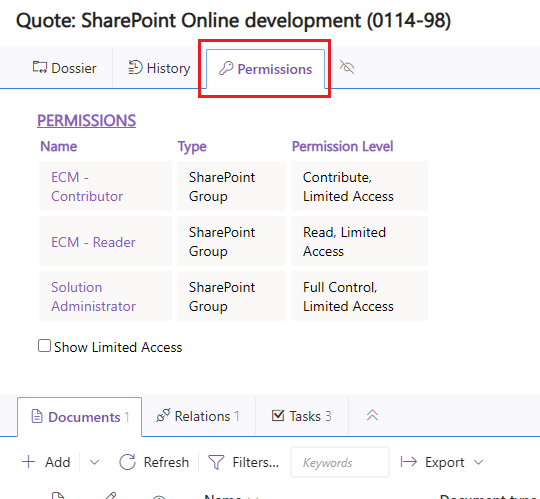
The Permissions tab displays the item’s access level at a given stage and updates accordingly, such as when a workflow is active on the item.
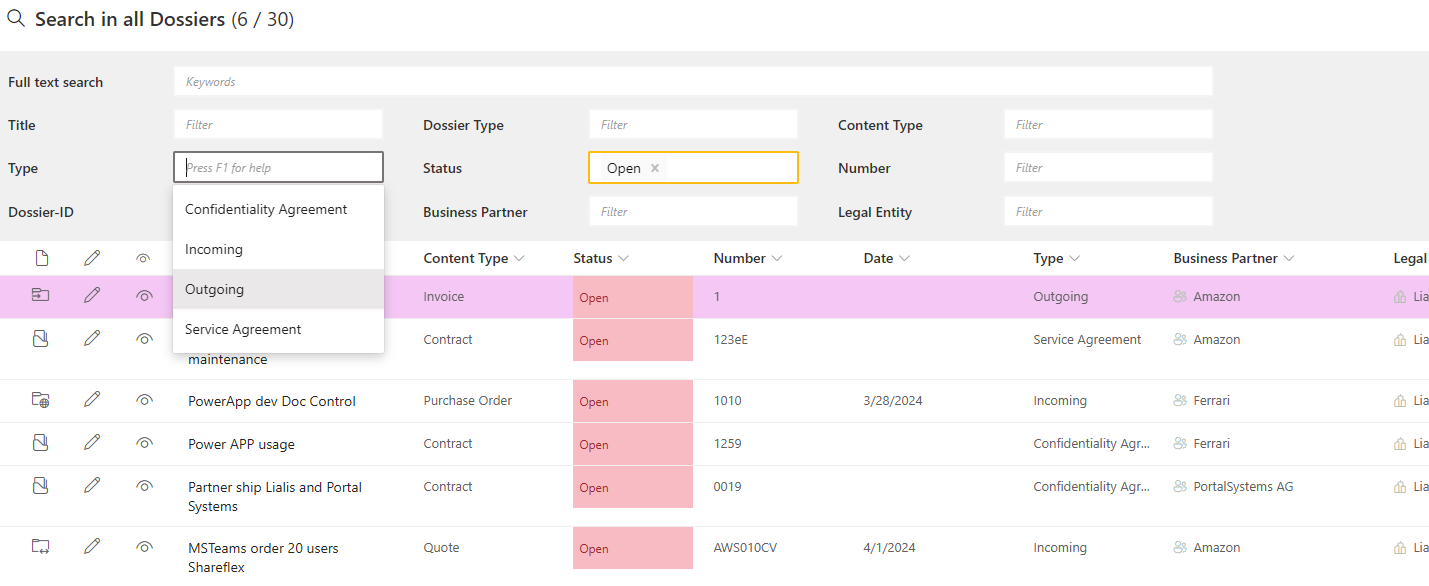
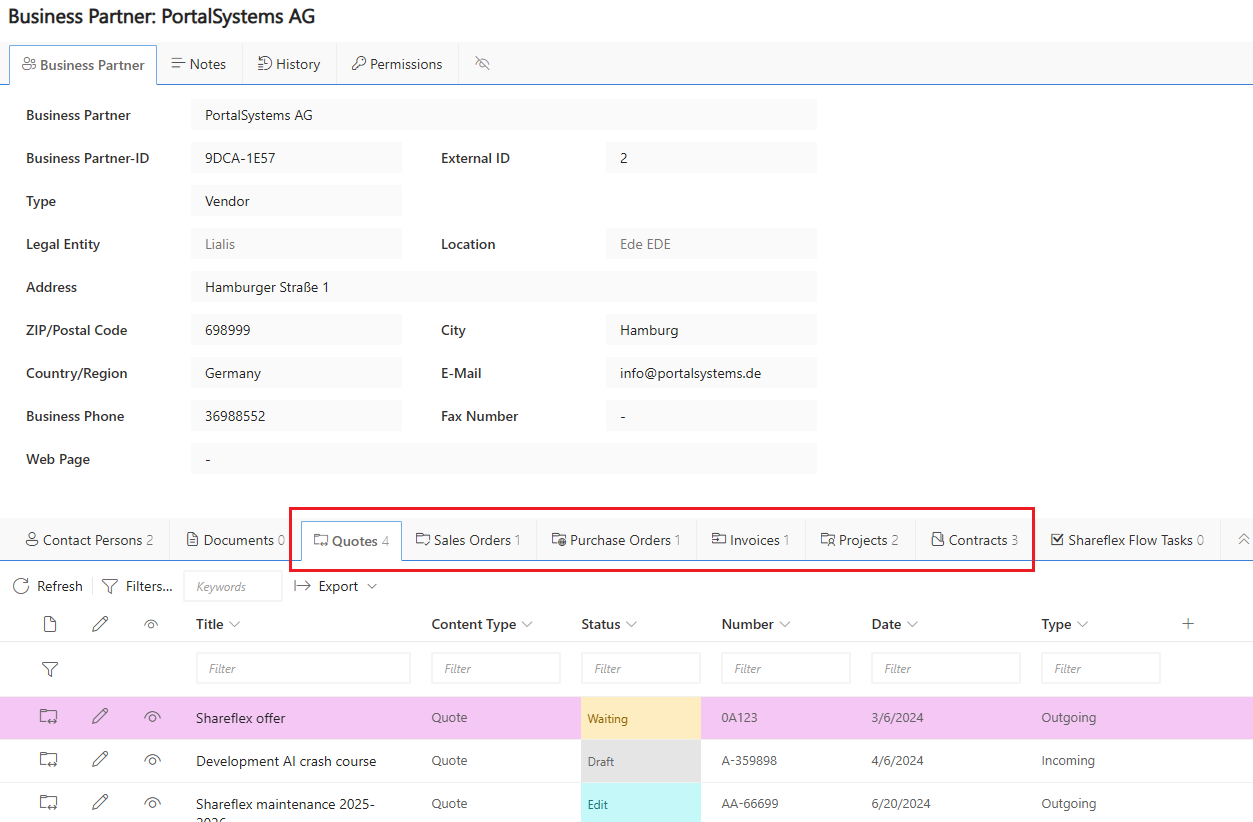
Dossiers (case files) store all relevant information (e.g. scans, text documents, emails, etc.) in a common context. On the home page you will find links to the various types of dossiers.
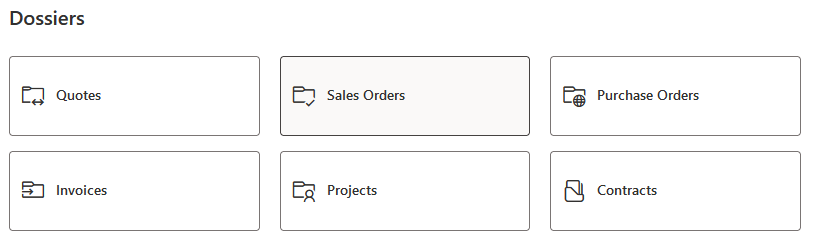
When you start creating a dossier, the desired dossier type must be selected. After selecting the dossier type (eg. Quotes), all existing dossier files are listed.
All Dossier forms look pretty identical and share more or less the same fields:
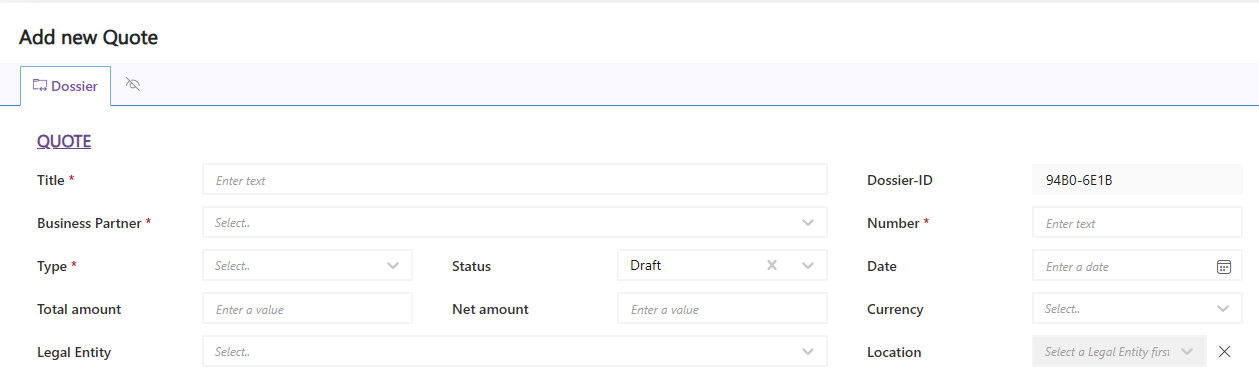
All dossier types display the same 3 secondary tabs:
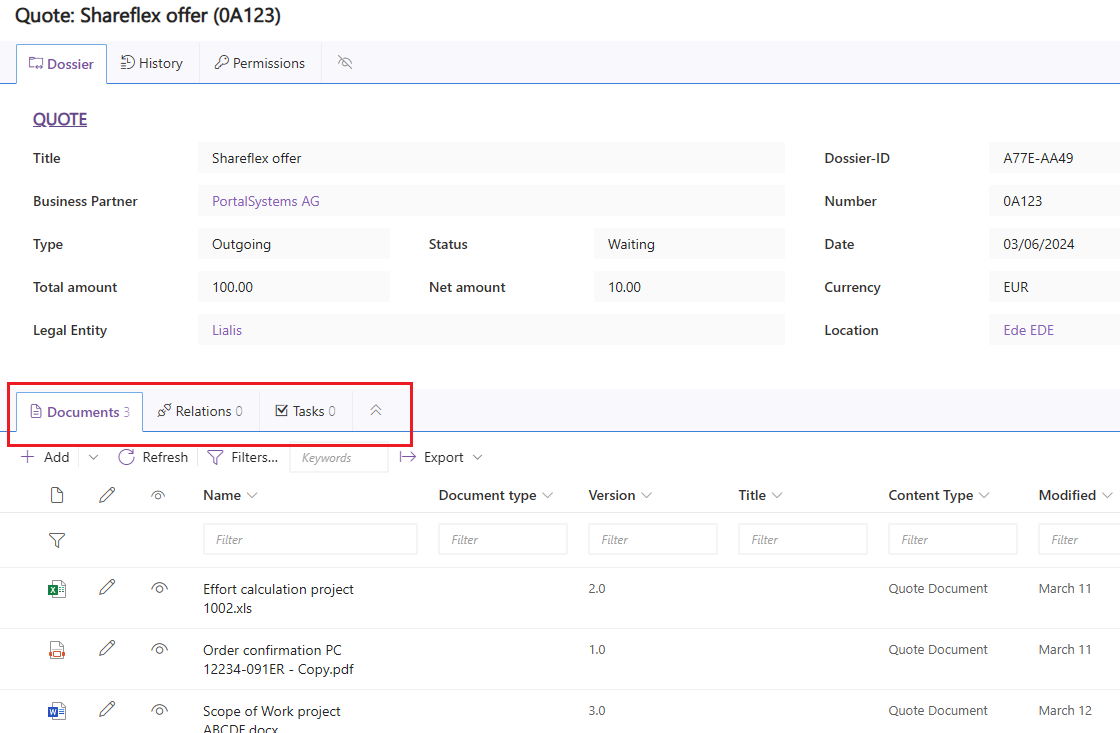
- Documents: here you can upload files
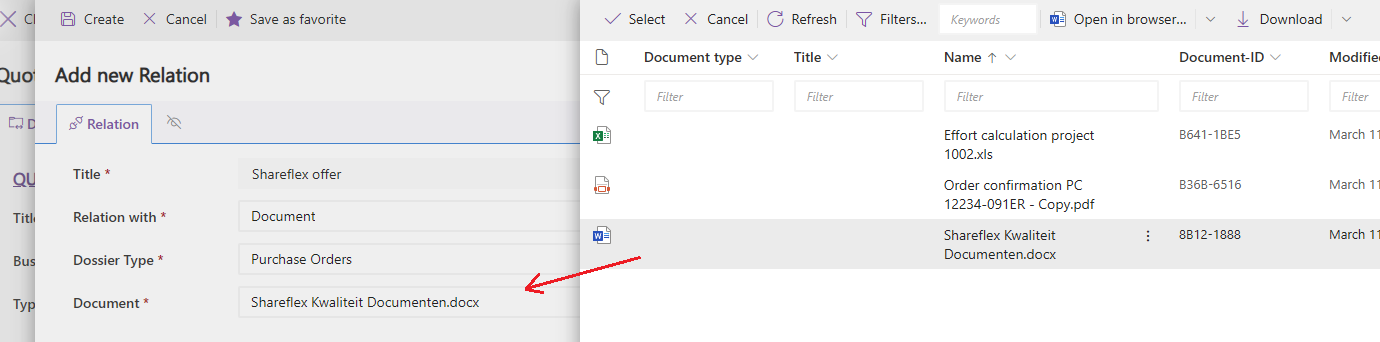
- Relations: here you can create links to other dossiers…
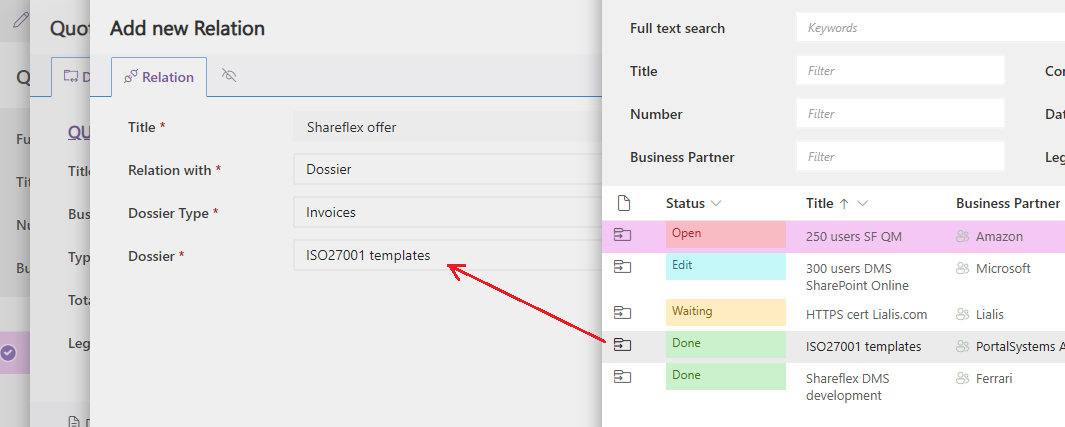
…or to documents within other dossiers.
- Tasks: here you will find tasks that are assigned to you
1. Quotes
Serve to manage offers that signify a declaration of intention, wherein the offeror invites a specific individual to purchase a particular product under predetermined conditions. It doesn’t matter whether it is a sell offer (outbound) or a buy offer (inbound).
2. Sales Orders
Used to manage legally binding agreements between the contractor and the client, entailing respective rights and responsibilities.
3. Purchase Orders
Used to administer the buyer’s statement of intention to the seller.
4. Invoices
Used to manage documents that contain the billing of a delivery or other service.
5. Projects
Used to manage one-off projects that have a specific goal and a defined start and end.
6. Contracts
Used to manage agreements between a business partner and clients (contracting parties).
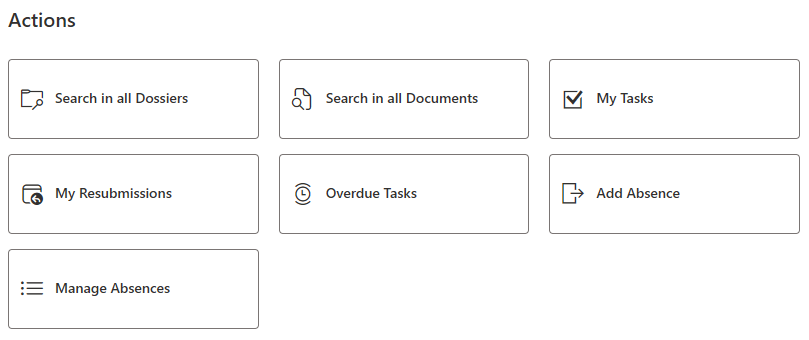
The tiles “Search in all Dossiers/Documents” open the respective lists and provide a filter with drop-down lists to search for specific entries.
The same applies to “My Tasks”, “My Resubmissions” and “Overdue Tasks”, displaying tasks filtered by assignee resp. due date.
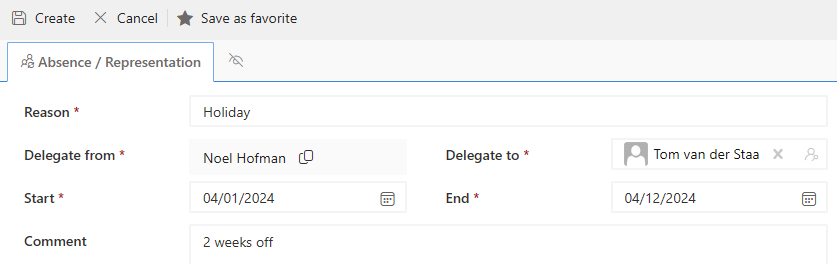
Furthermore, an Absence/Representation can be set to take over your workflow tasks and permissions in the application during your absence. You can activate and deactivate the representation profiles.
The root web of the application contains the master data lists. These include business partners, vendors, customers, contact persons, legal entities and locations. The respective list can be accessed with one click via quick links in the cockpit and the left navigation.
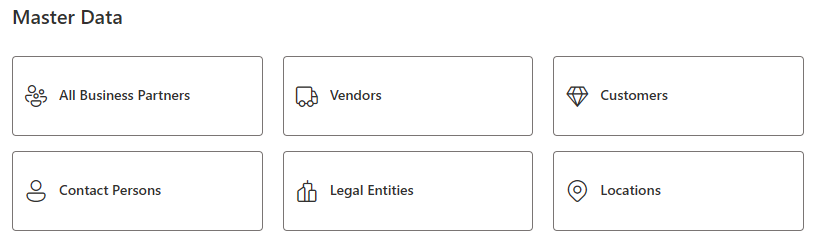
All Business Partners
A Business Partner can be a Vendor or a Customer. Each Business Partner has been allocated their own set of dossiers encompassing the various types.
On opening a secondary information item (eg. a quote), all secondary information for this Business Partner is displayed in a structured and detailed clickable overview in the right pane
Vendors
Business Partners that are categorized as Vendors
Customers
Business Partners that are categorized as Customers
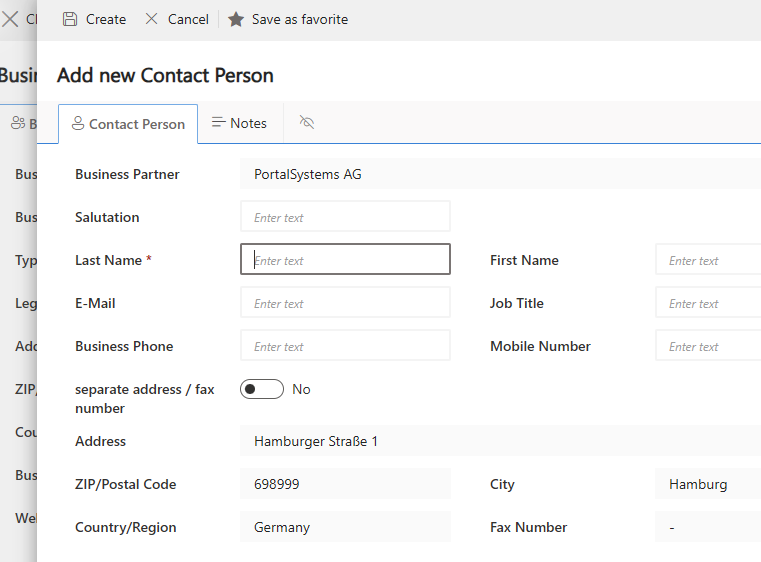
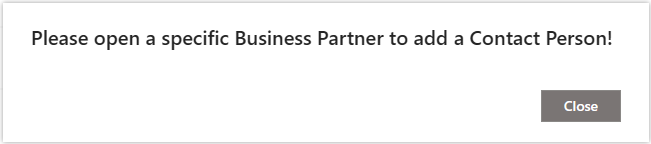
Contact Persons
Contact persons are created via a Business Partner entry. Open a Business Partner and click on “New” in the Contact Persons tab.
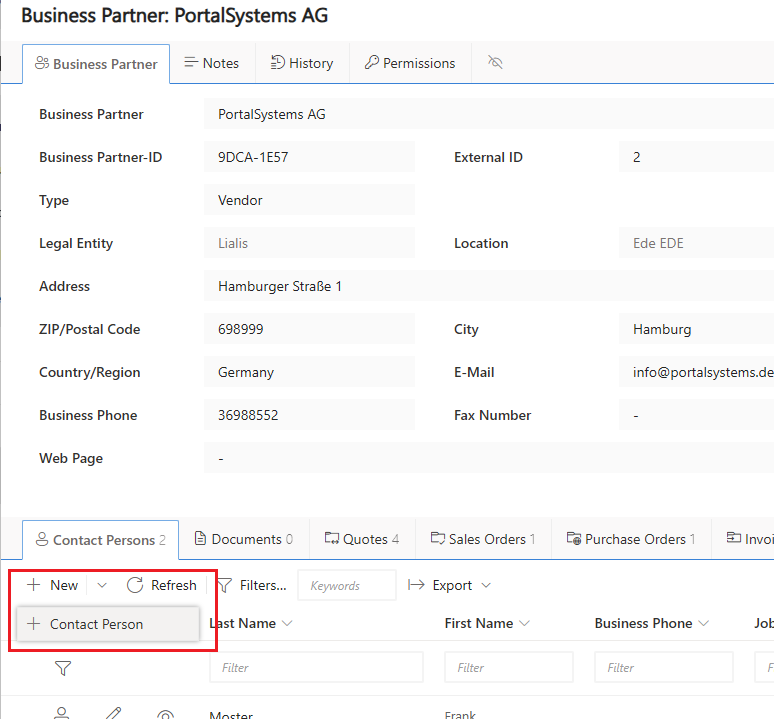
You cannot create a Contact Person from the Contact Persons view directly:
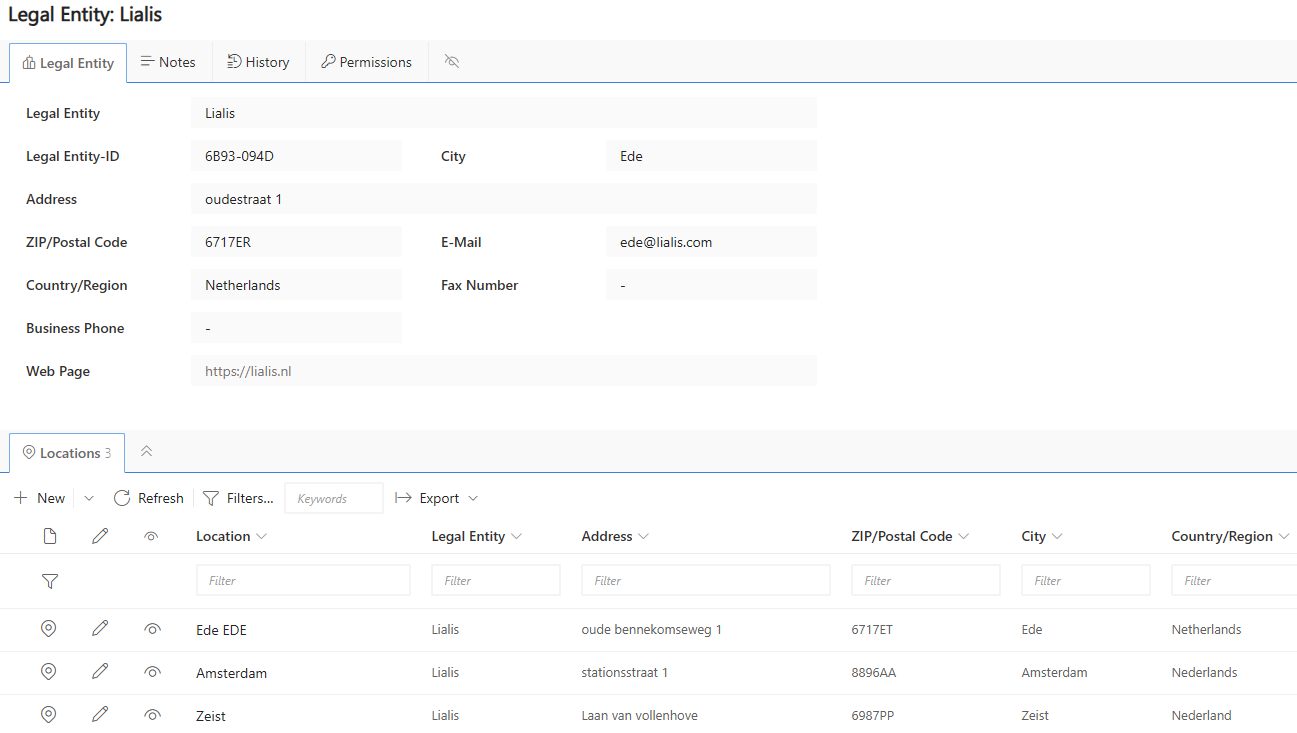
Legal Entities
Here you can add Legal Entities. Multiple locations can be assigned to each legal entity.
Locations
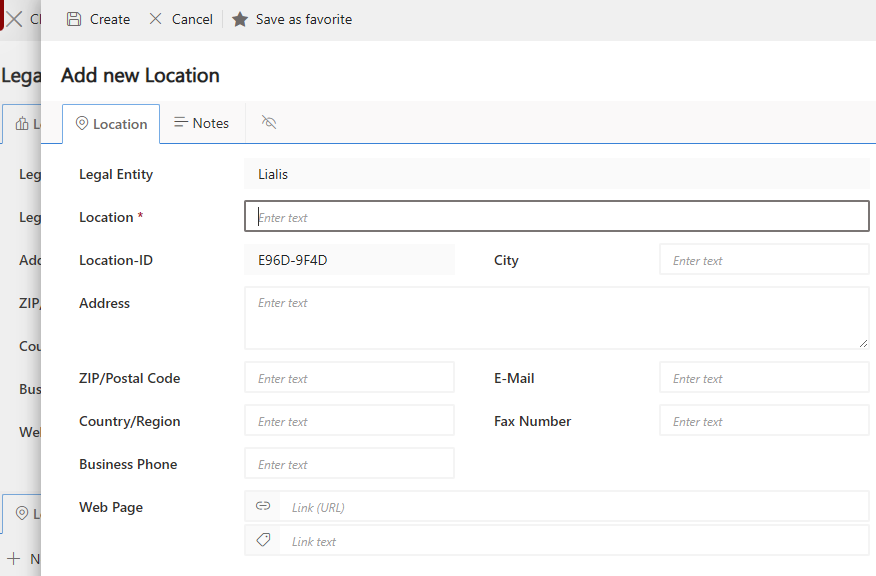
Locations are created via a Legal Entity entry. Open a Legal Entity in the client and click on “New” in the “Locations” tab.
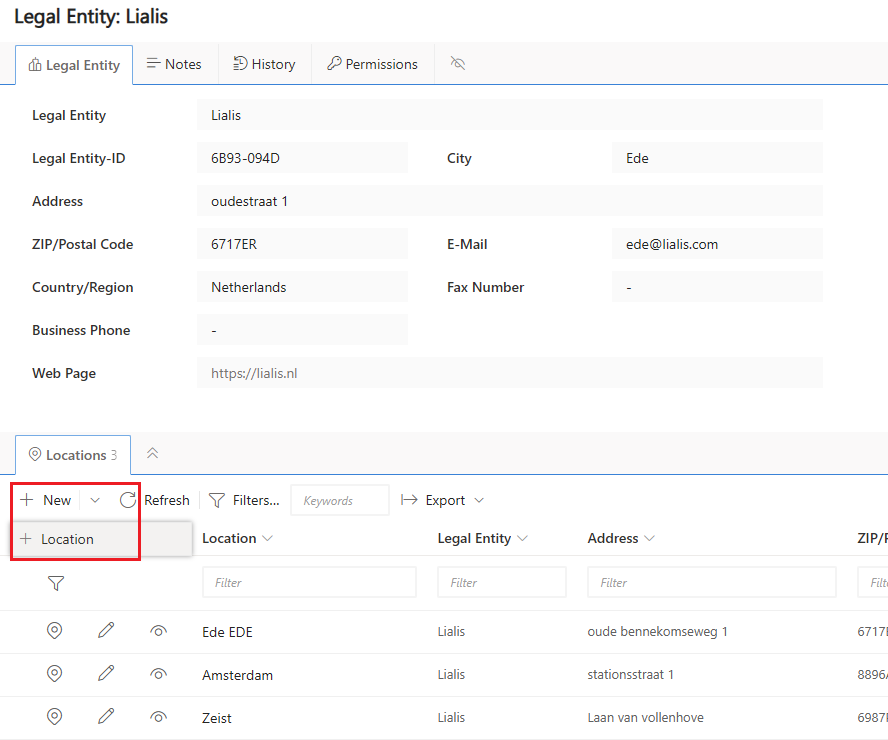
Similarly to Contact Persons, you cannot create a Location directly from the Locations view.
The administrative part of this application is set by the application administrators. It is located at /sites/ShareflexDocuments/administration, and can be expanded at will. At the deployment stage, it contains settings for workflows, permissions, and notifications.
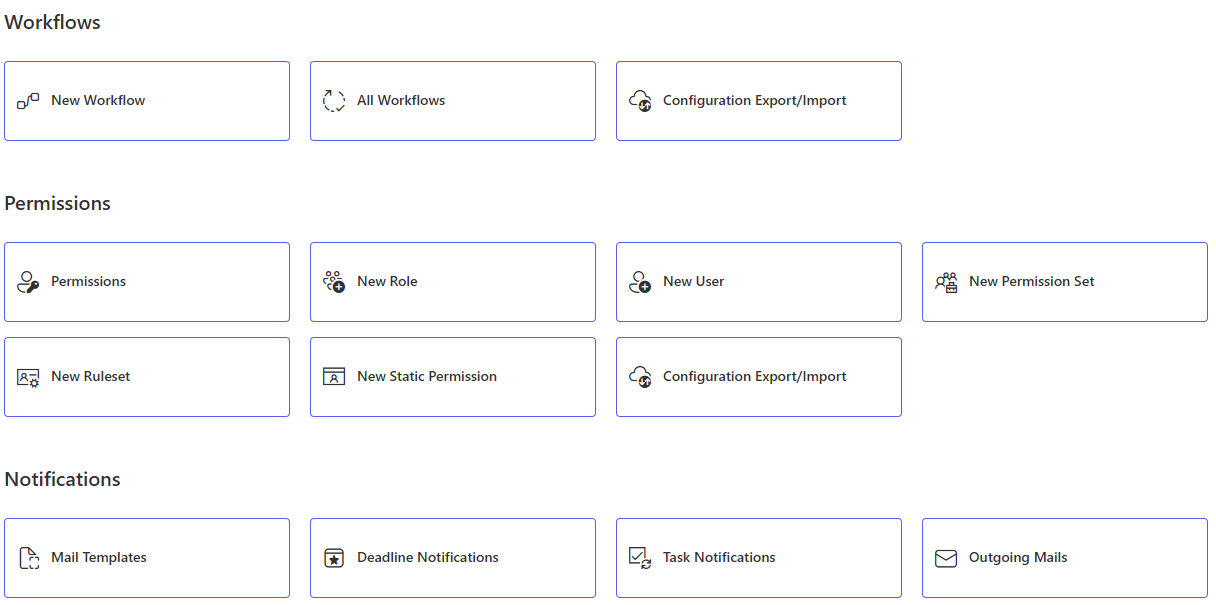
Workflows
For this application, no default workflows are configured. The administrator can create a new workflow, and/or export/import it via the ‘Configuration Export/Import’ tile.
Permissions
Normally, list items inherit permissions from the list itself. However, when list items are updated, the permissions for these items may change, especially when items go through a workflow.
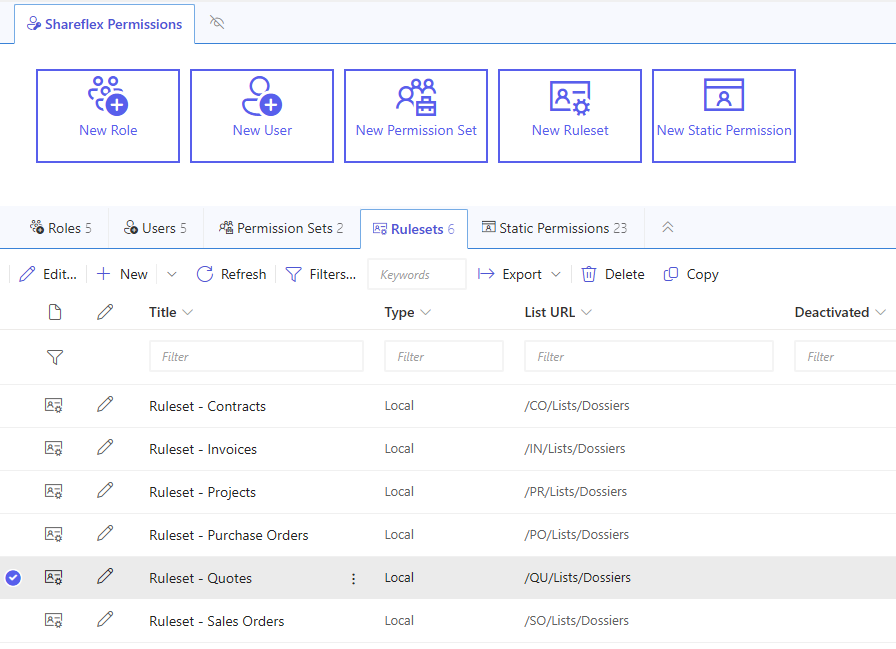
In the Permissions section of the Administration site, you can configure the permissions, add application users, assign roles to these application users, and create/configure sets of permission rules that should be applied to an item at some stage.
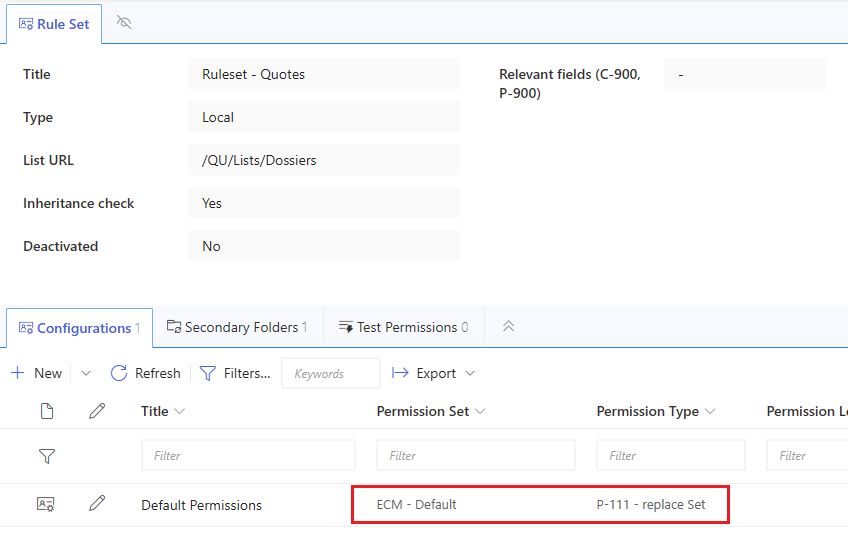
For each list, a Permission Ruleset is defined. This is a collection of rules and specification on which element (site, list/lib) these rules apply. For instance, the ‘Ruleset – Quotes’ applies to the list containing the Quotes dossiers ‘/QU/Lists/Dossiers’.
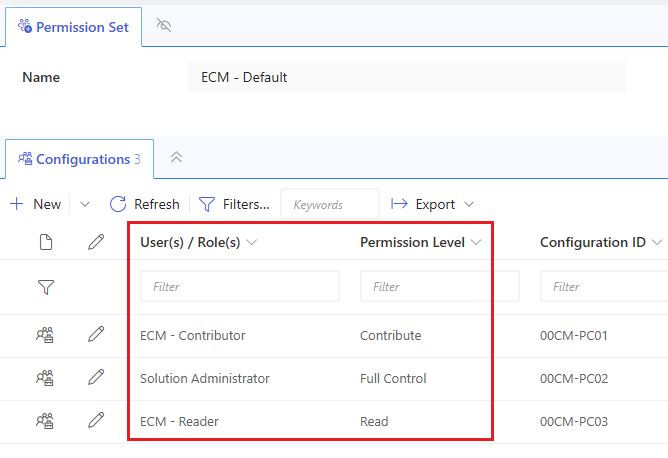
Each Permission Ruleset contains a set of rules that are applied to the item at some stage. In this case, only one rule ‘Default Permissions’ is defined. This rule defines a Permission Set ‘ECM – Default’, that is applied on the item. A Permission Set is a collection of users/roles/groups with associated permissions.
This means the following permissions are set on the item:
A Rule defines when and how a set of permissions is applied.
When: the Condition Type of a rule decides the moment at which item permissions are updated. In the ‘Default Permissions’ rule, it is specified that item permissions should be replaced with the ECM Default permissions, as soon as field edmDossierID is filled. Because an item is automatically assigned a Dossier ID at creation, this means that the ECM Default permissions are set on the item as soon as the item is created.
Triggering item permission changes through field value changes (including workflow status fields) are used frequently. Permission changes can also be triggered based on formulas.
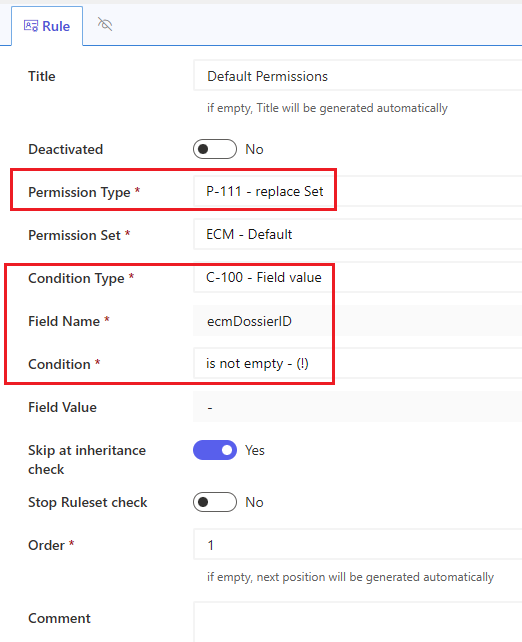
How: In this example the type of permission is ‘replace Set’, which means that all permissions on the item are replaced with the set specified in the ‘ECM – Default’ permission set. Other Permission Types are to add or remove permission sets, roles, users, and groups to the existing permissions.
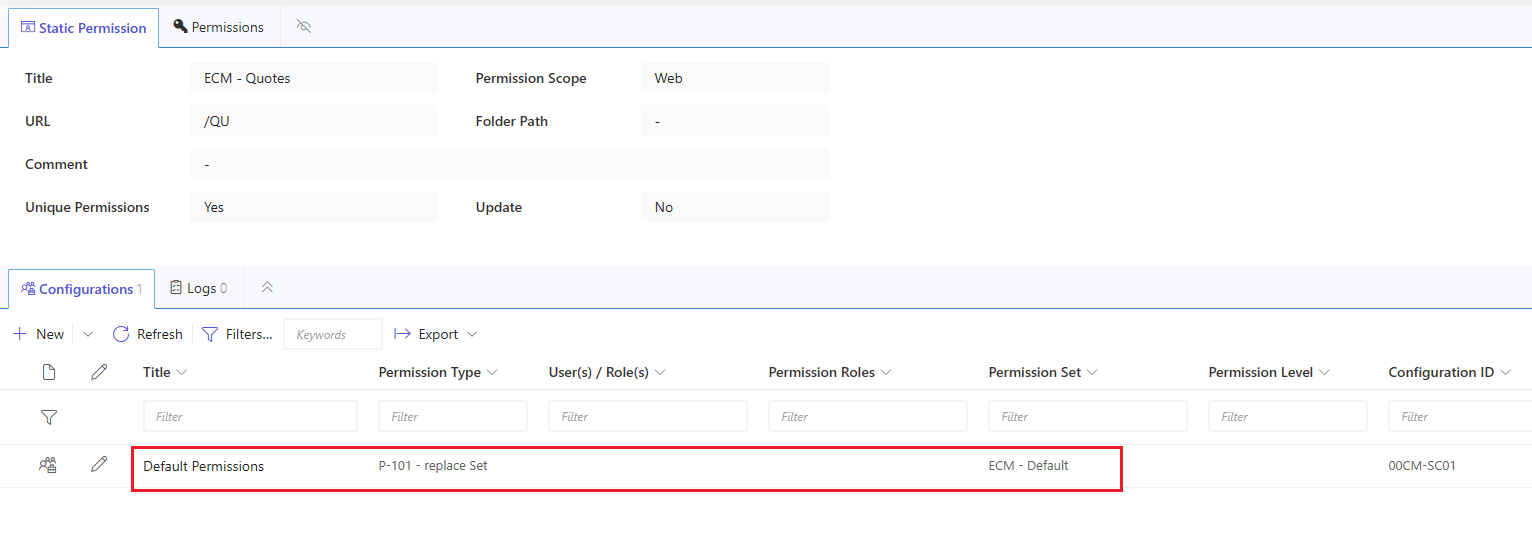
Static permissions define permissions at the web site, list and library level. You can for instance use these to stop inheriting list permissions from the parent site.
Notifications
You have the option to enable the application to automatically send emails in various situations, such as when a user is assigned a workflow task or when a deadline is nearing. A default notification template is defined, which you can use.
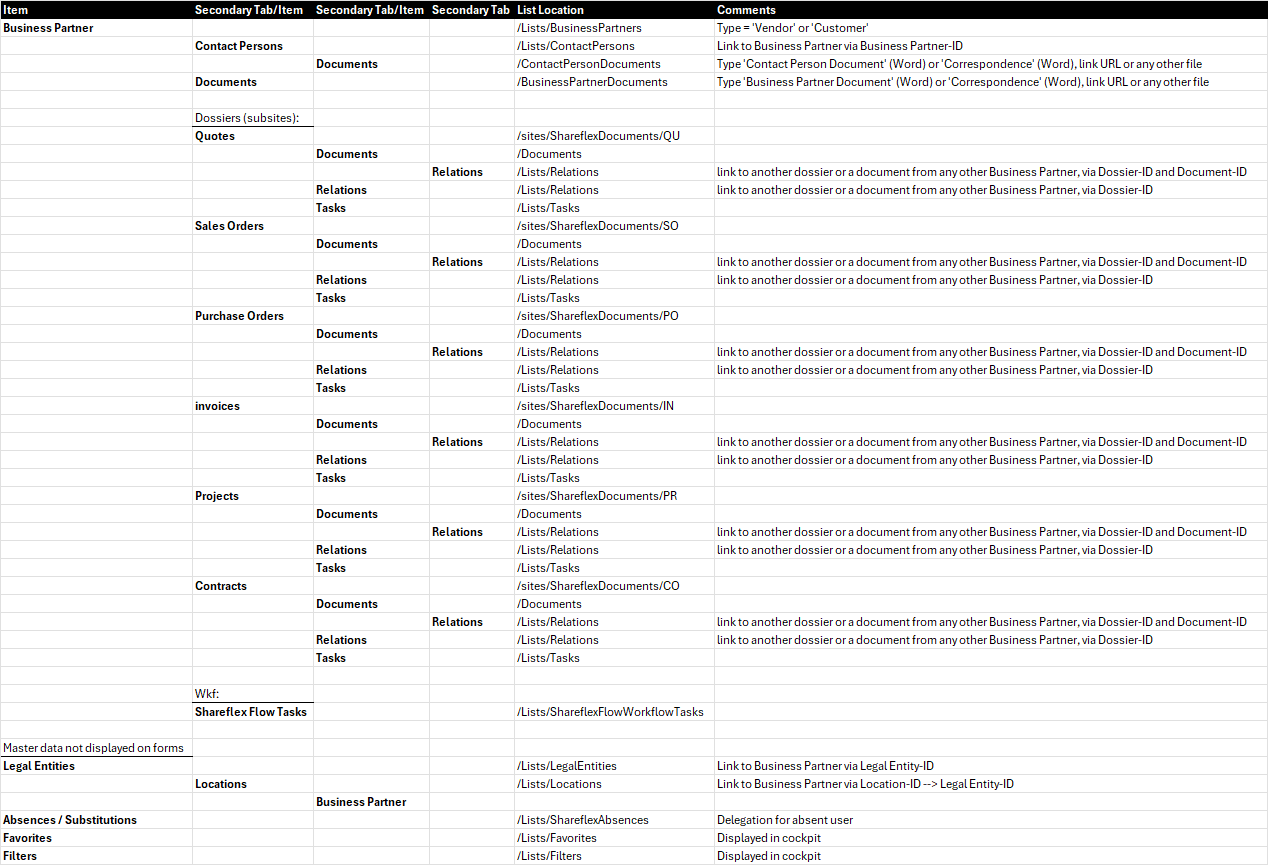
This table shows the Shareflex DMS site collection structure. Note that for each Dossier type, a subsite is used.