

![]()
Nintex versus Shareflex comparison
Nintex and Shareflex are solutions to create business applications for SharePoint Online as well as SharePoint On Premise. In this article we only compare the SharePoint Online features between both solutions.
High level Conclusion of this comparison
Nintex Office 365 and Shareflex differ significantly. Our high level conclusion is that:
- Nintex and Shareflex can both be used to create simple to medium complex apps (no to low code) on SharePoint Online with low development costs and limited functions
- For more complex to very complex apps with endless functions on SharePoint Online use Shareflex
- Nintex stores the majority of the content on their proprietary Nintex cloud. When the Nintex subscription ends all your content is deleted after a while
- Shareflex stores all content, attachments, form design, etc, on your SharePoint Online environment. Hence no content is deleted.
- The Shareflex license model is more attractive compared with Nintex
- Shareflex has a powerful scripted app deployment function in DTaP
- Shareflex is more advanced in attachment functions compared with Nintex
- Nintex has more out of the box integrations with other systems
Details
The comparison is done on the following areas:
- User perspective; what will the end users see on their screens
- SharePoint Application Development; how easy or difficult are the tools, what, how and where can functions be programmed, what are the development limits of the tools
- Administration; storing of forms and coding, logging, problem solving and deployment of the tools
- Integration; which integration options does the platform offer
- Pricing; License Model and pricing levels
Comparison
1. User Perspective
There is a major difference between how Nintex SharePoint and Shareflex input forms are displayed to the end user.
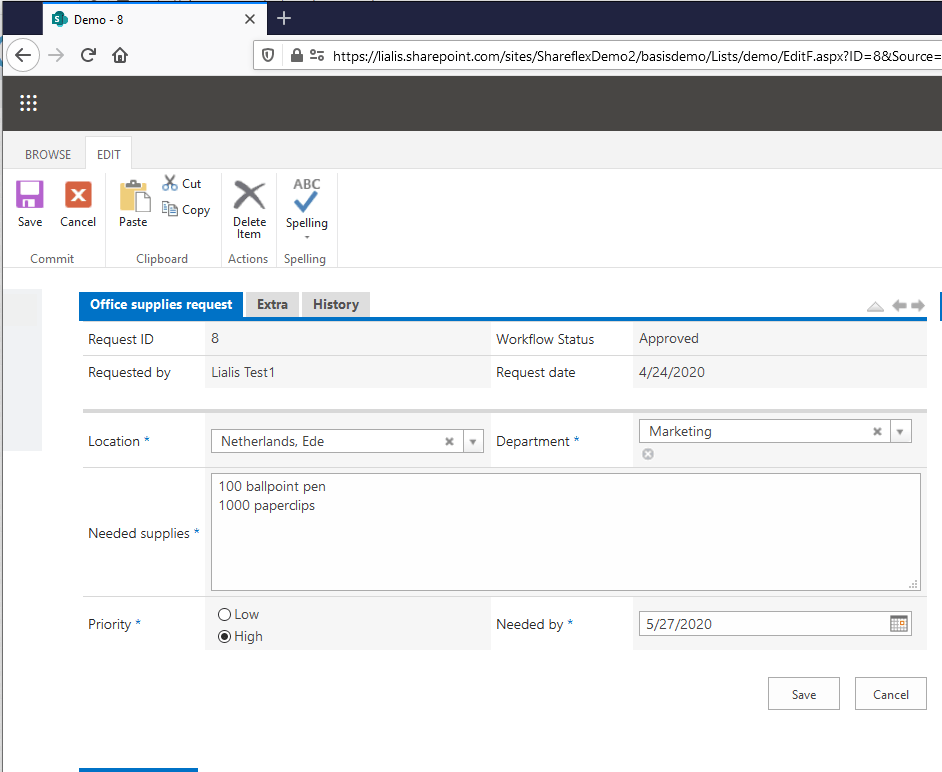
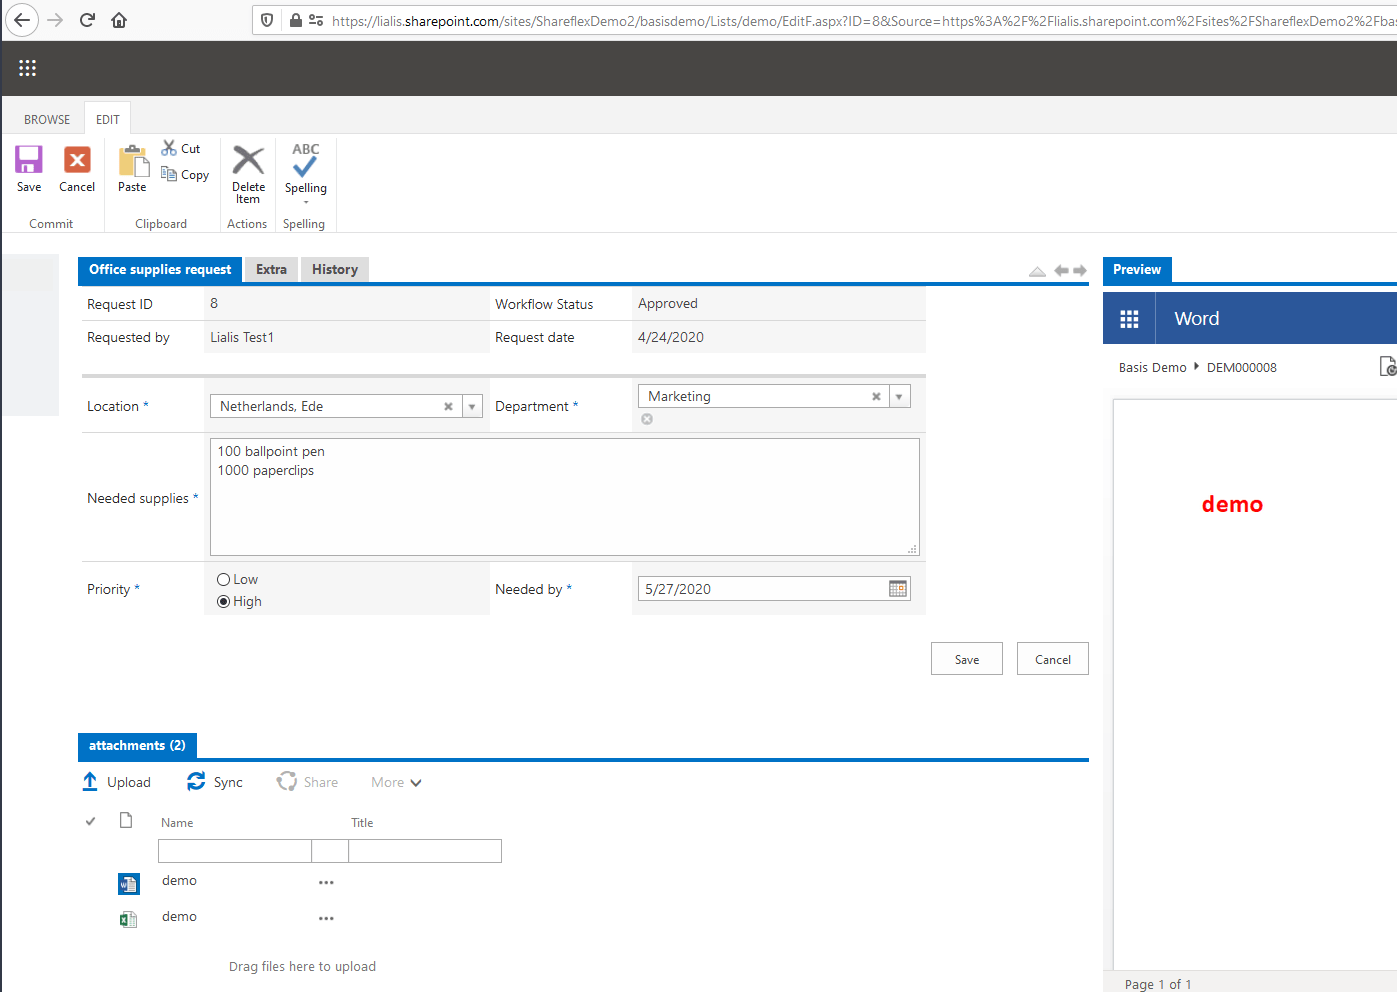
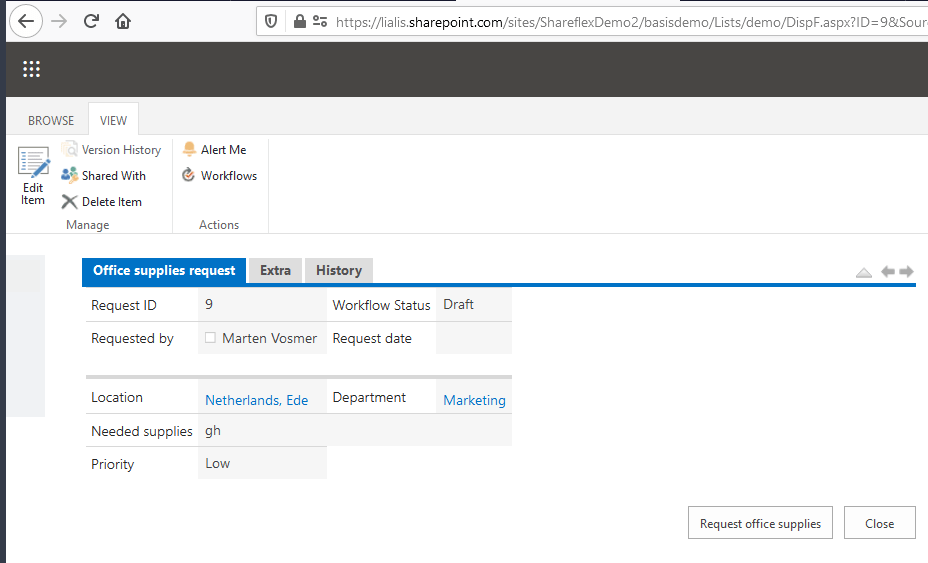
The Shareflex form is an integral part of the SharePoint experience. It is displayed in the SharePoint Online user interface and the Forms looks very SharePoint alike. The SharePoint ribbon is visible for the user.
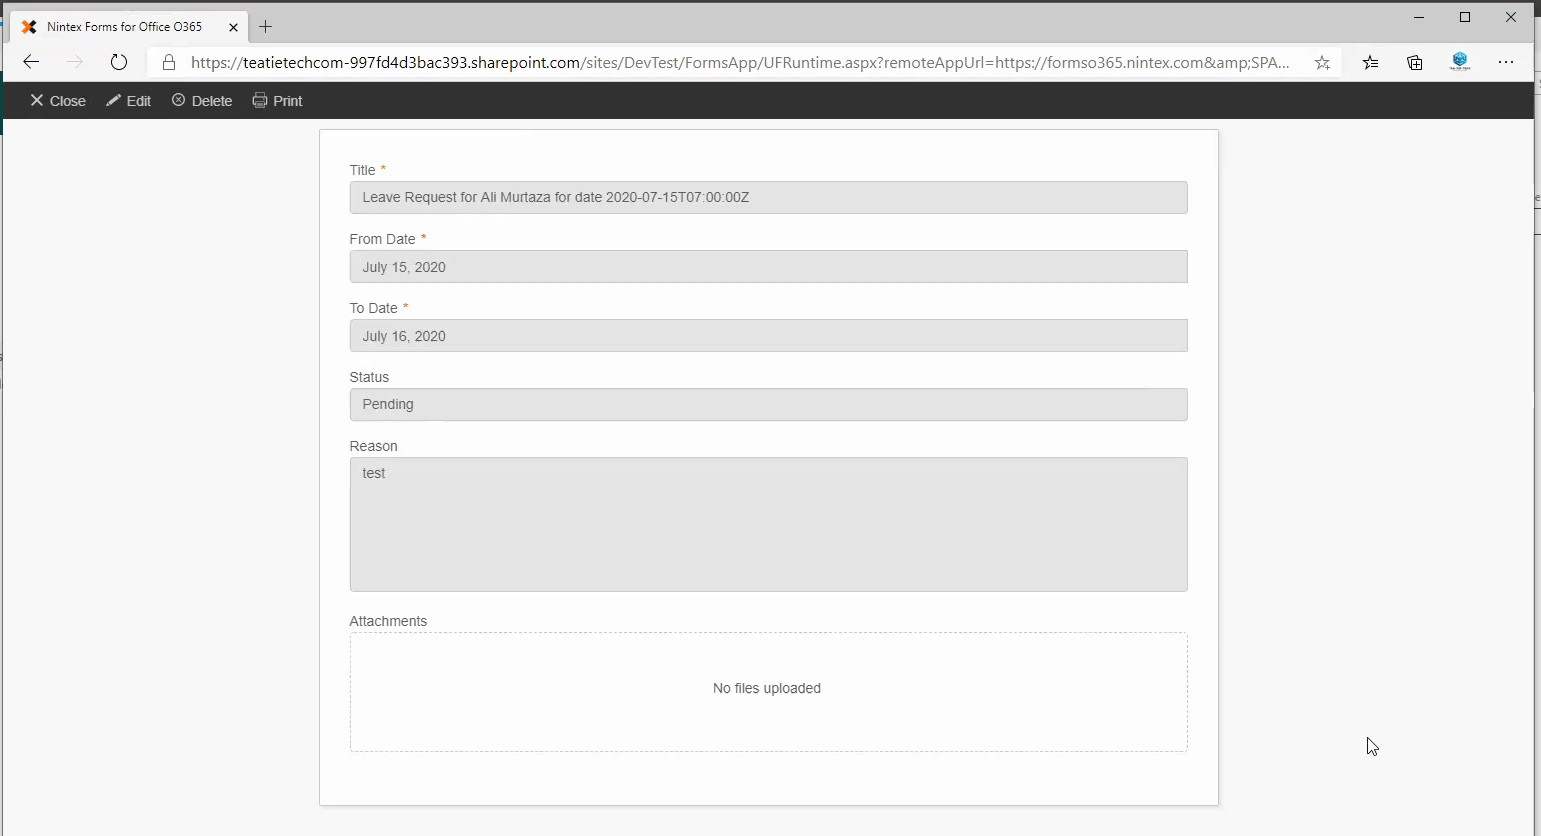
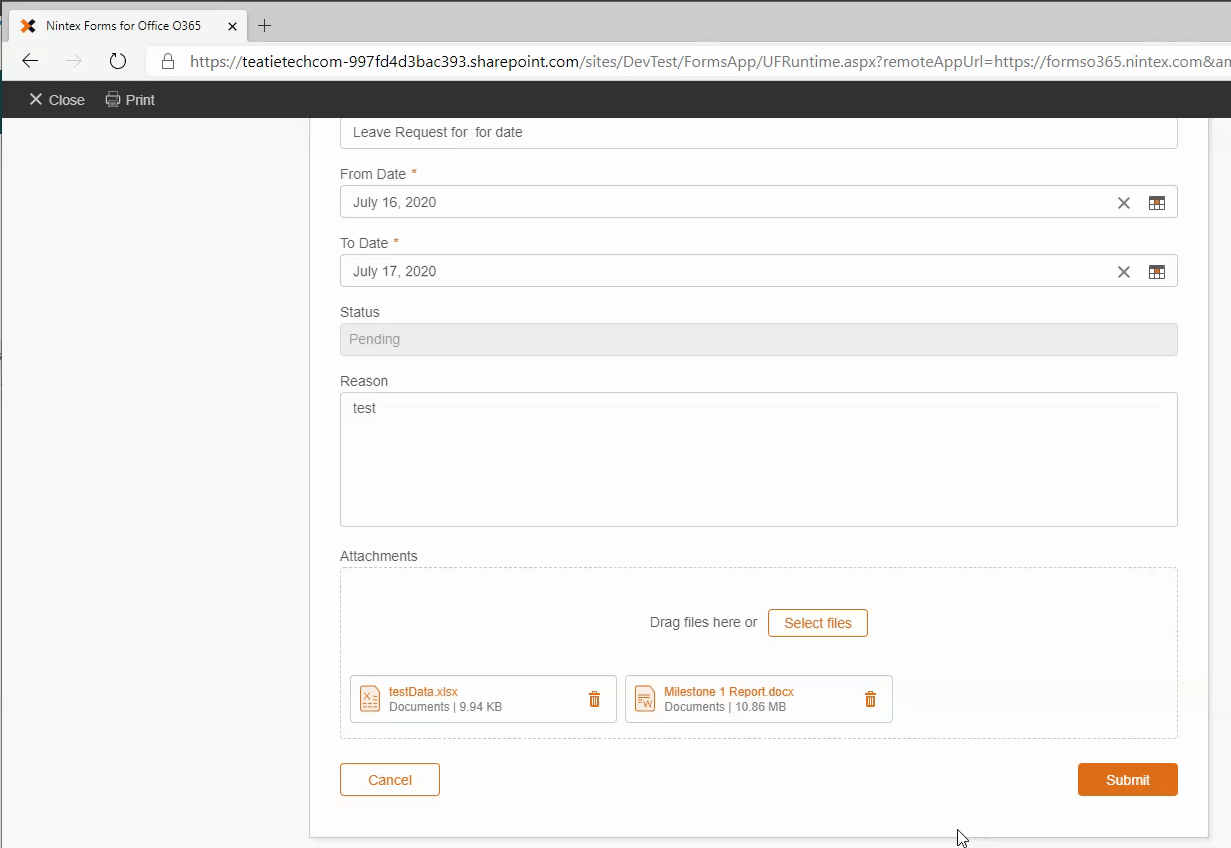
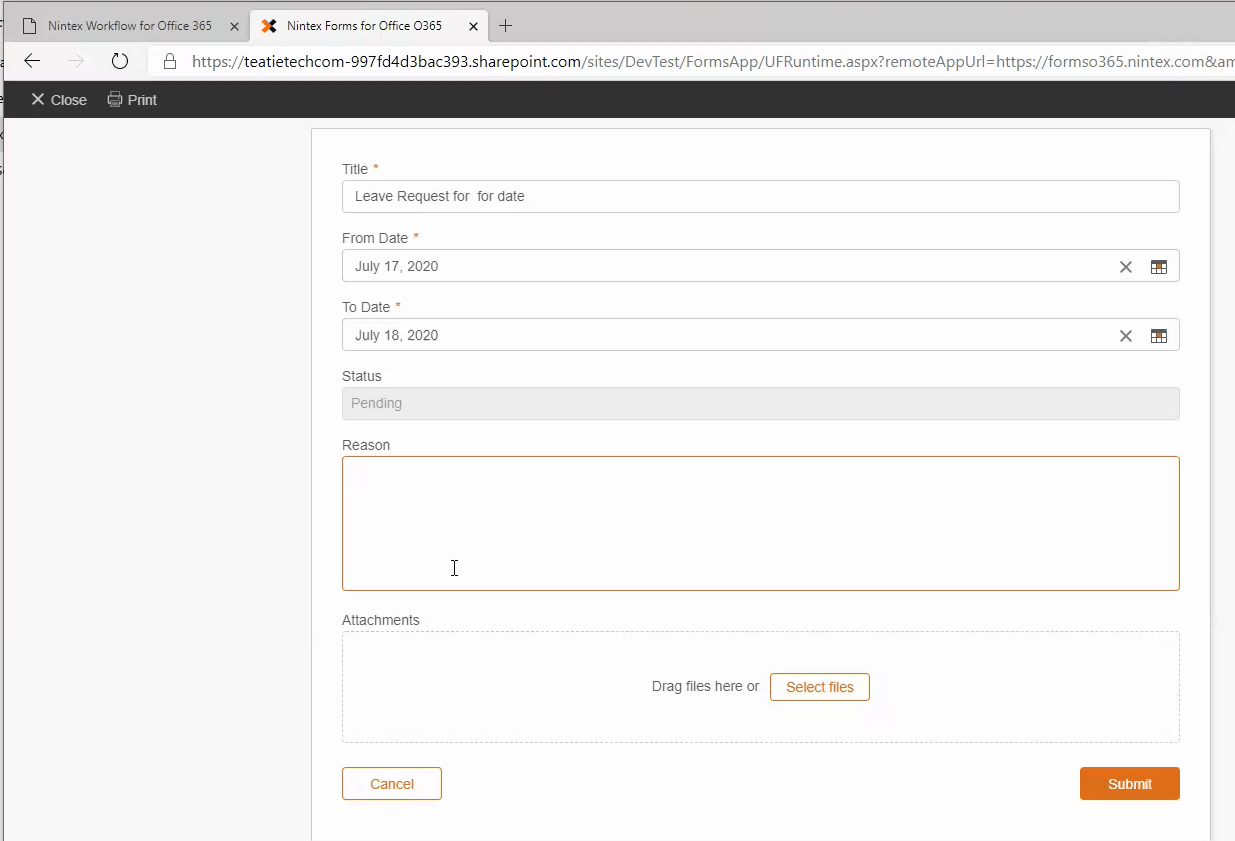
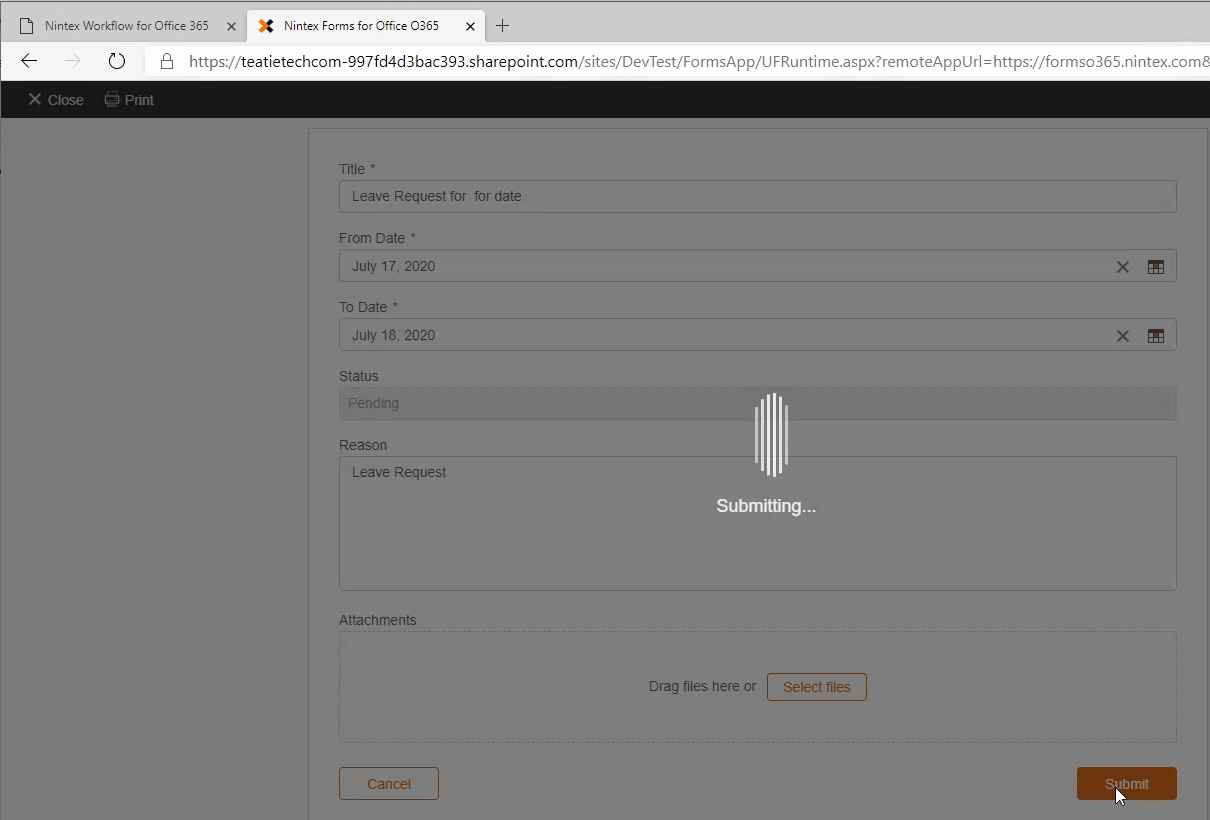
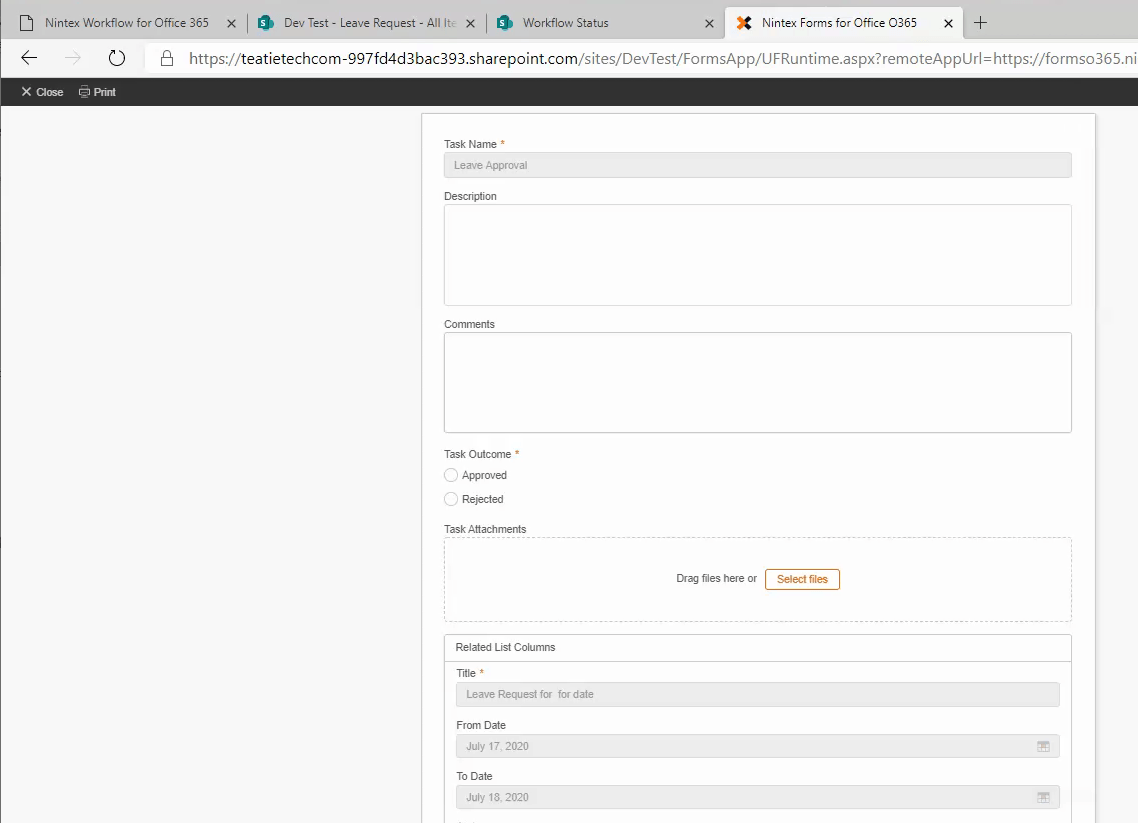
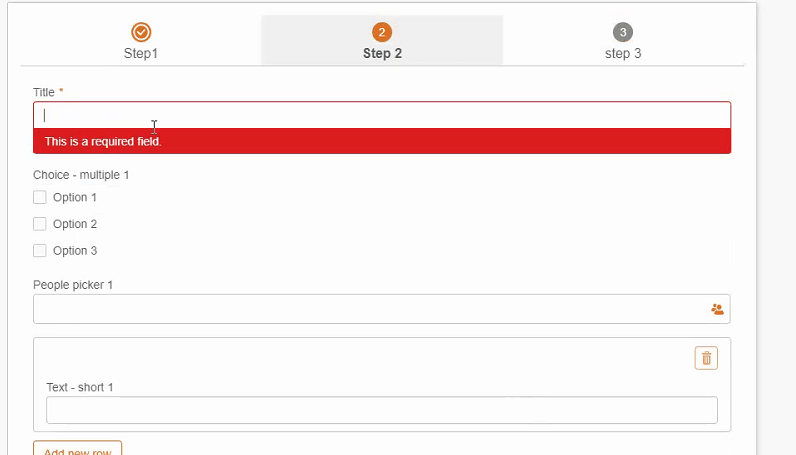
The Nintex cloud Form is not presented in a SharePoint look and feel. Therefore, implementing a customer branding is difficult. You can see in the screenshot below that the SharePoint ribbon is not visible.
There is no difference between the viewing of items in lists, nor the way you create new items.
The first image below shows a list in SharePoint with Shareflex Forms.
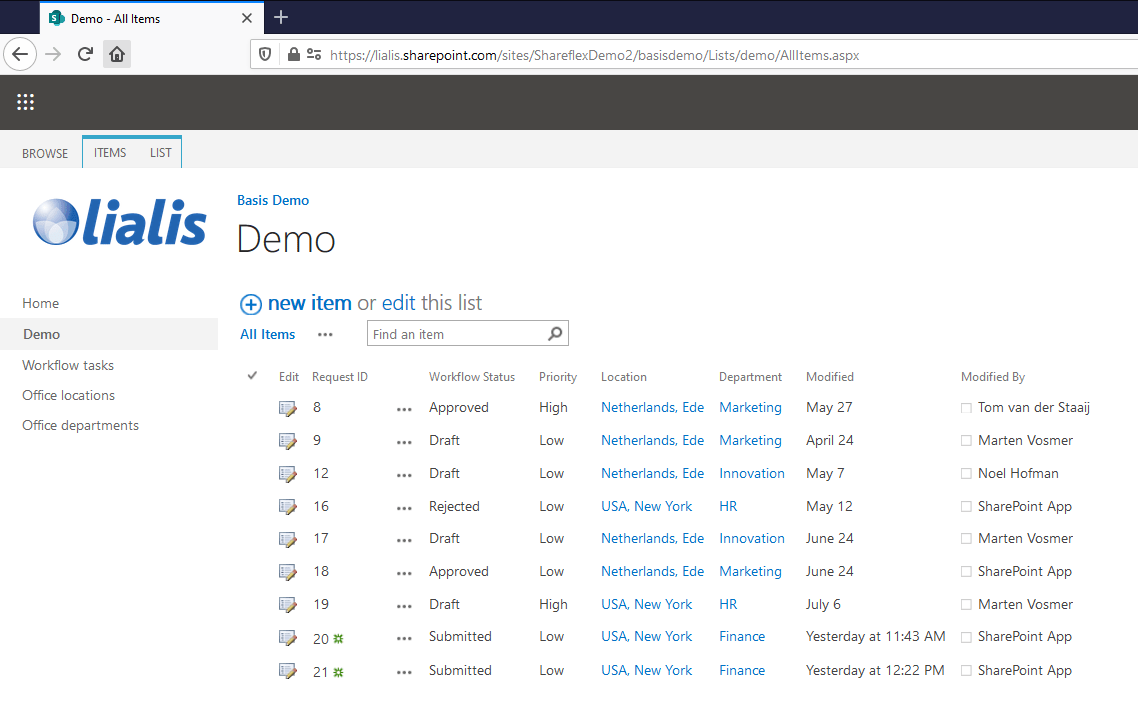
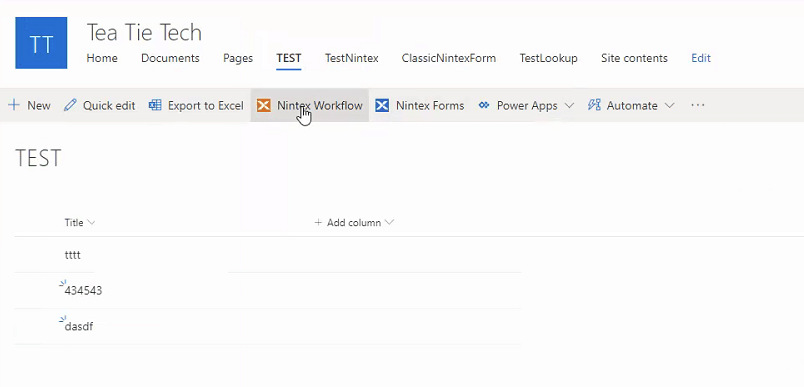
The second image shows a SharePoint list with a Nintex form.

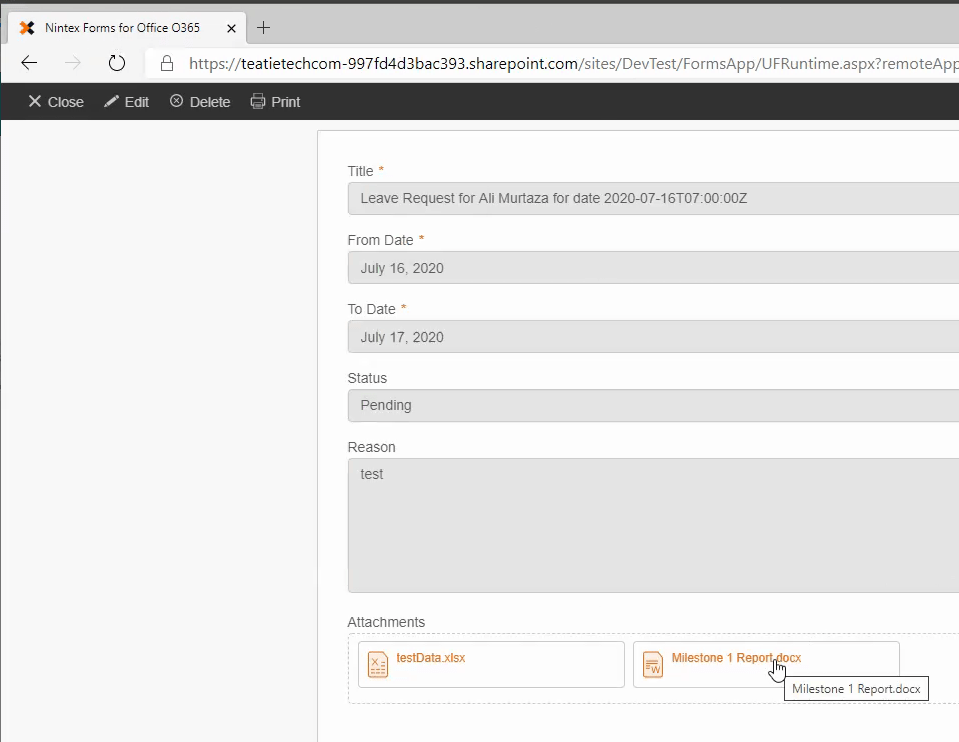
On the following screenshot you can see a Nintex Form with a few uploaded attachments. The attachments are stored in the list item of Nintex.
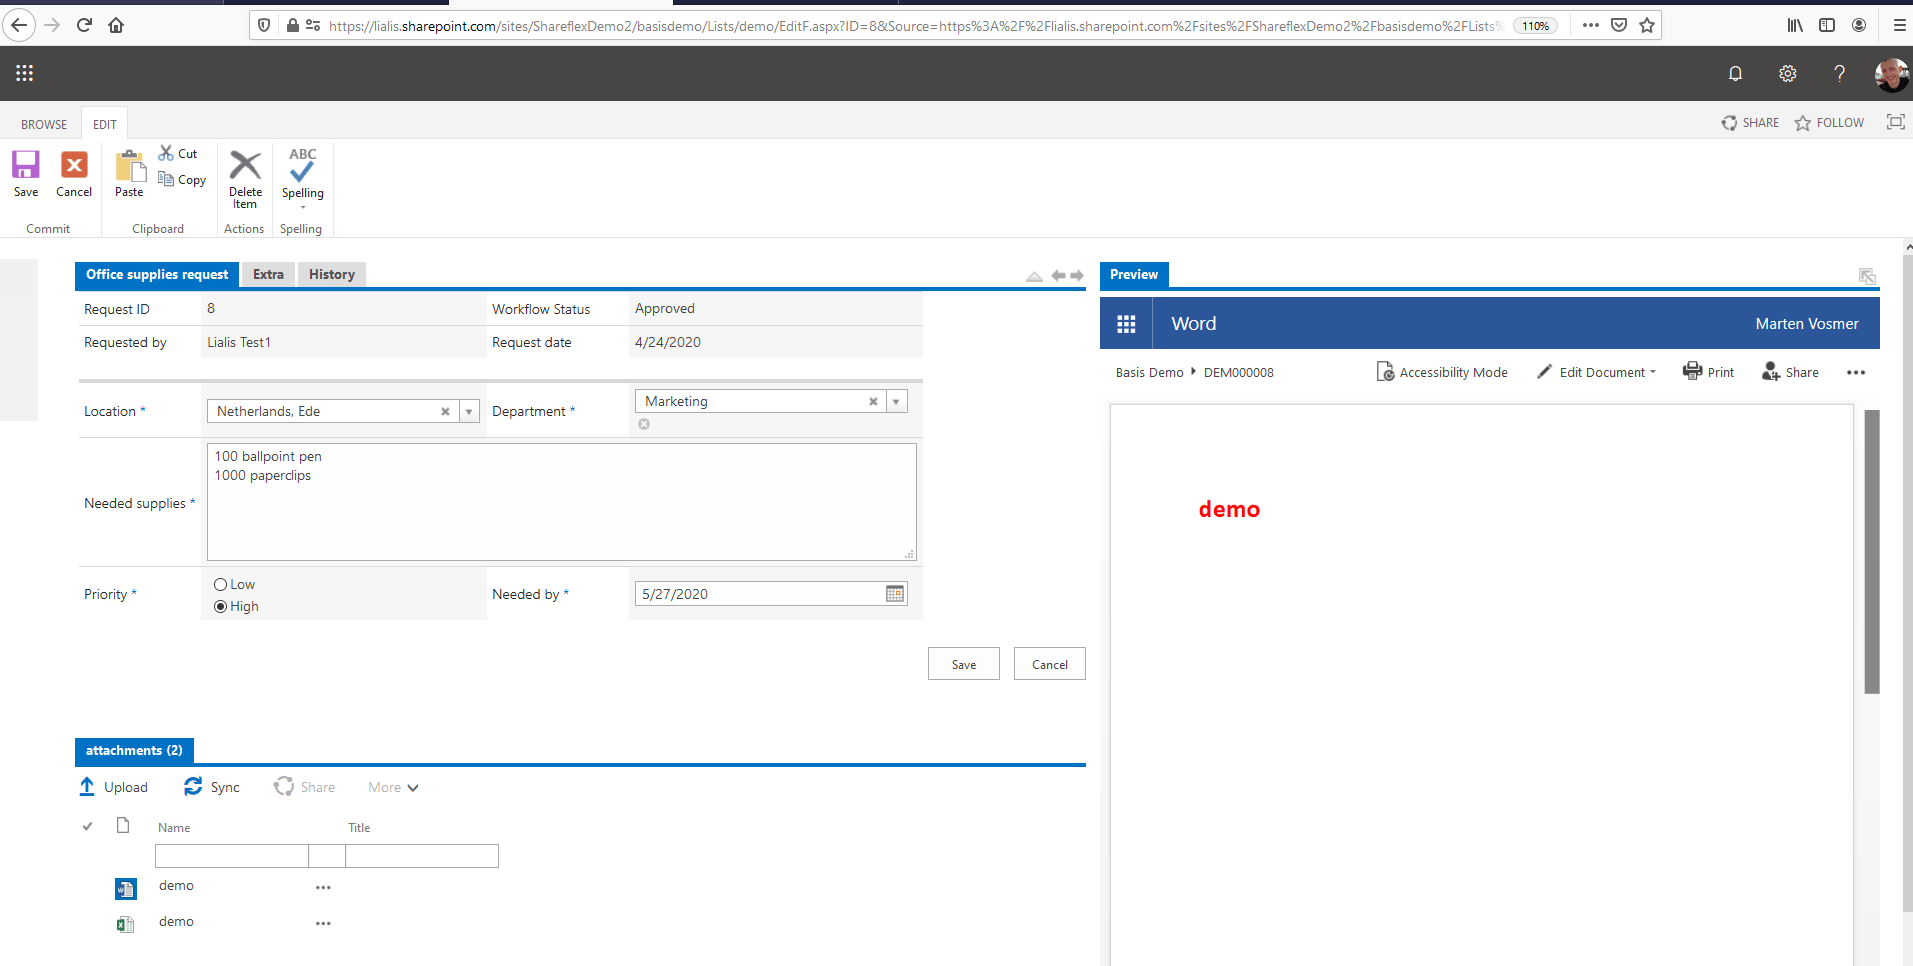
Next you can see how you can add attachments to a Shareflex form. Shareflex stores attachments in a SharePoint Document Library. Therefore the listing of the attachments looks very SharePoint alike.
Attachments
There is a big difference between Nintex and Shareflex when a user works with the attachments.
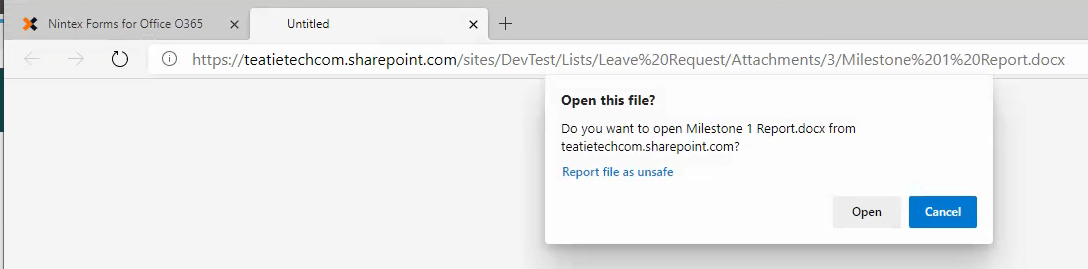
As an example, Nintex saves the attachments as part of the form. There is no attachment version history available. Only the list item version history is available.
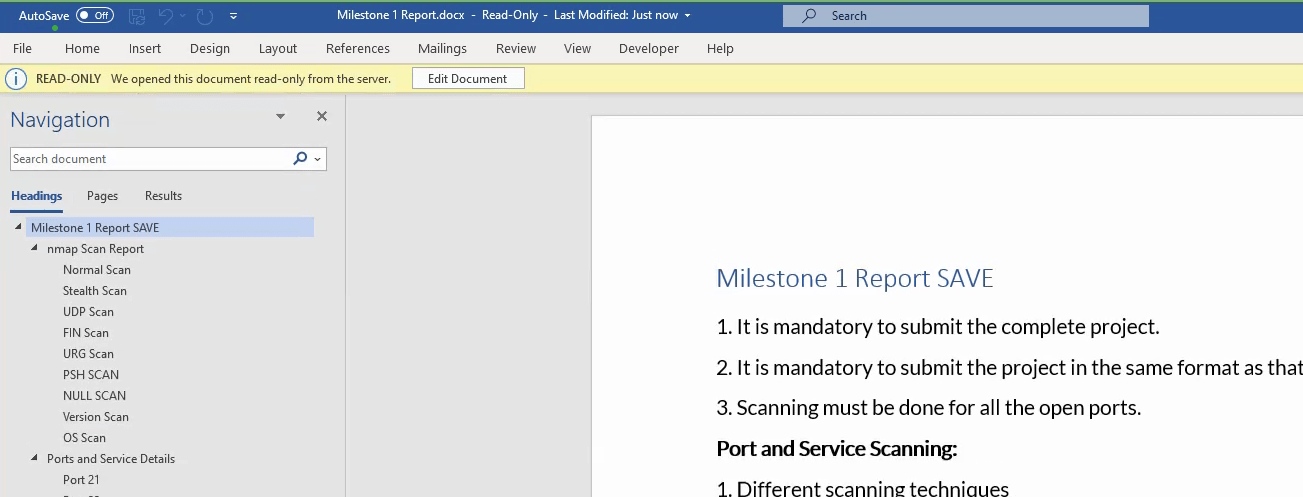
Another difference is that in Nintex it is only possible to edit the attachment in Word and not in Word Online contrary to Shareflex, where both options are available to the user.
Nintex saves attachment files as list item attachments by default. If you want to save attachments in SharePoint Document Libraries it has to be done with a Nintex workflow. However, this adds more complexities, such as:
- You need to save attachments in Document Libraries using the workflow actions
- After each addition/modification you need to run the workflow and add the attachments in a Document Library with correct references and other information.
With Nintex, added attachments cannot contain additional Metadata such as ‘created date’, ‘category’.
Shareflex stores uploaded attachment files in a SharePoint Document Library. In this example the Library “Audit Documents”.
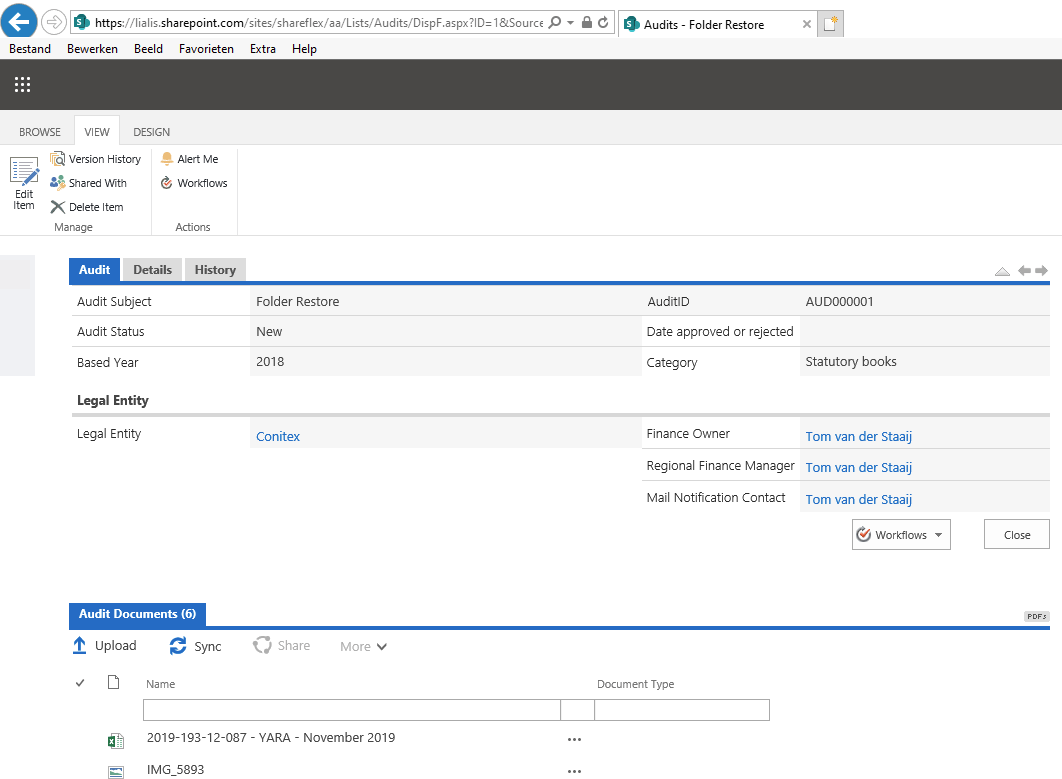
Furthermore, a user can find the attachments on the list item form itself, which is very convenient.
Finally, since Shareflex uses the full power of document libraries, attachment versioning is available by default.
In this section we discuss the Nintex and Shareflex workflow functions.
Starting a workflow
Both Nintex and Shareflex offer options to start a workflow manually, automatically or conditionally.
Nintex example: starting a workflow by clicking on the ‘Submit’ button.
Shareflex example: starting a workflow by clicking on the ‘Request office supplies’ button.
E-mail mechanism
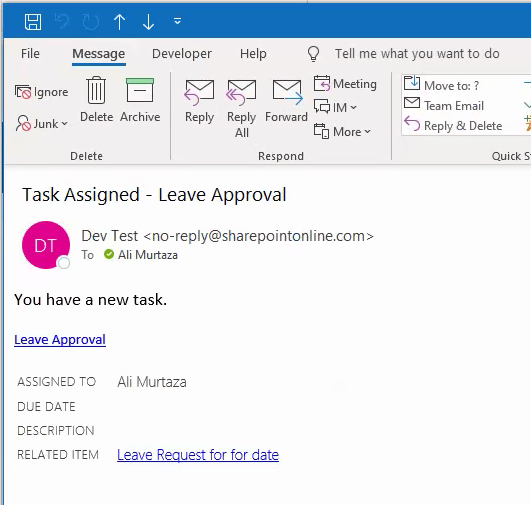
The workflow e-mail mechanism of the two platforms is similar. The image below displays a Nintex workflow notification e-mail.
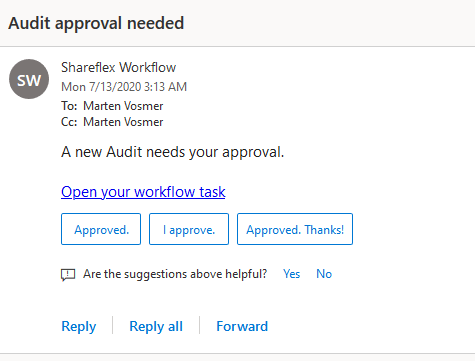
A sample Shareflex workflow notification e-mail looks like this:
Workflow task form
The Nintex and Shareflex workflow task pages look similar as well. In both cases the workflow options are shown at the top of the page, and the list item details at the bottom.
The possibility to add attachments to the task form itself (instead of to the submitted list item) is exclusive to Nintex.
The Nintex workflow task page looks as follows:
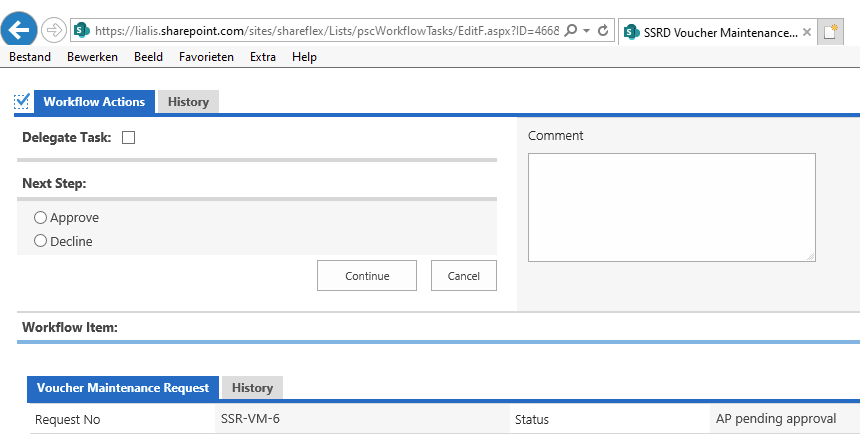
While the Shareflex workflow task page has the following look & feel:
Workflow tasks list
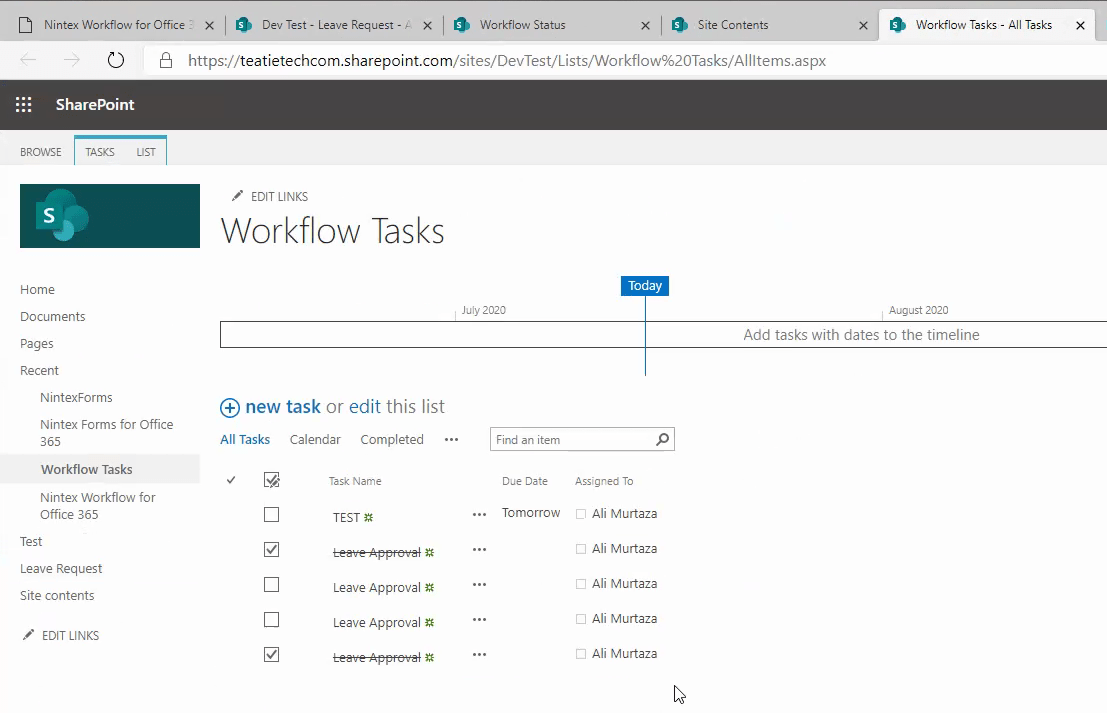
Nintex and Shareflex are both able to present a user an overview of all workflow tasks that have been assigned to that specific user. Of course admins will be able to see tasks assigned to all users.
Screenshot of the Nintex workflow tasks list:
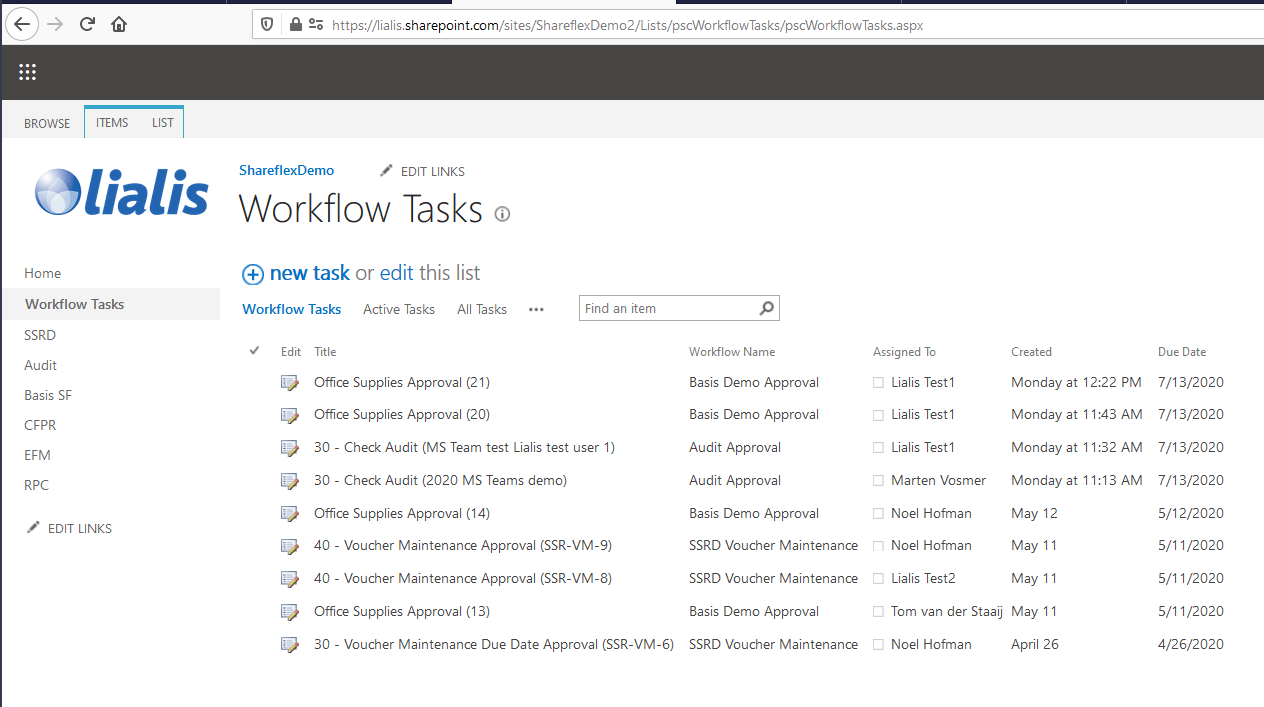
Screenshot of the Shareflex workflow tasks list:
2. Development
Nintex
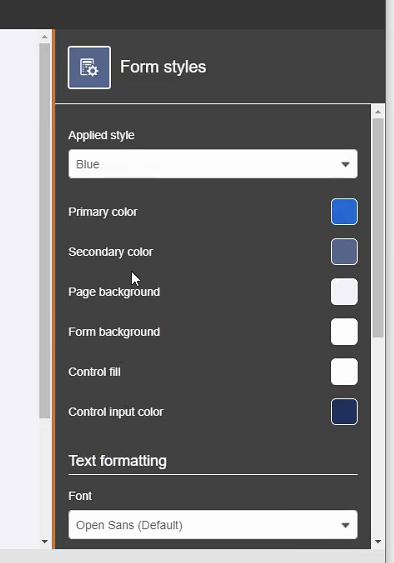
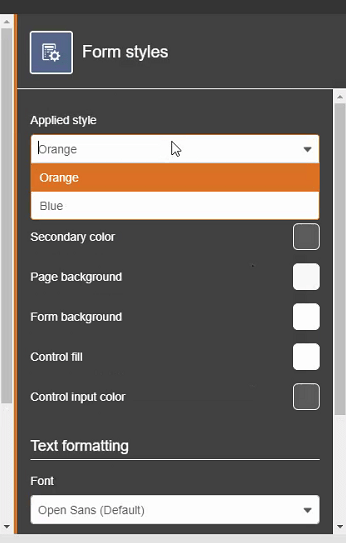
Nintex allows you to customize the front-end form style. However, you cannot use the SharePoint branding the way Shareflex does.
Both Shareflex and Nintex can display fields in horizontal form tabs. However, only Nintex supports vertical form tabs.
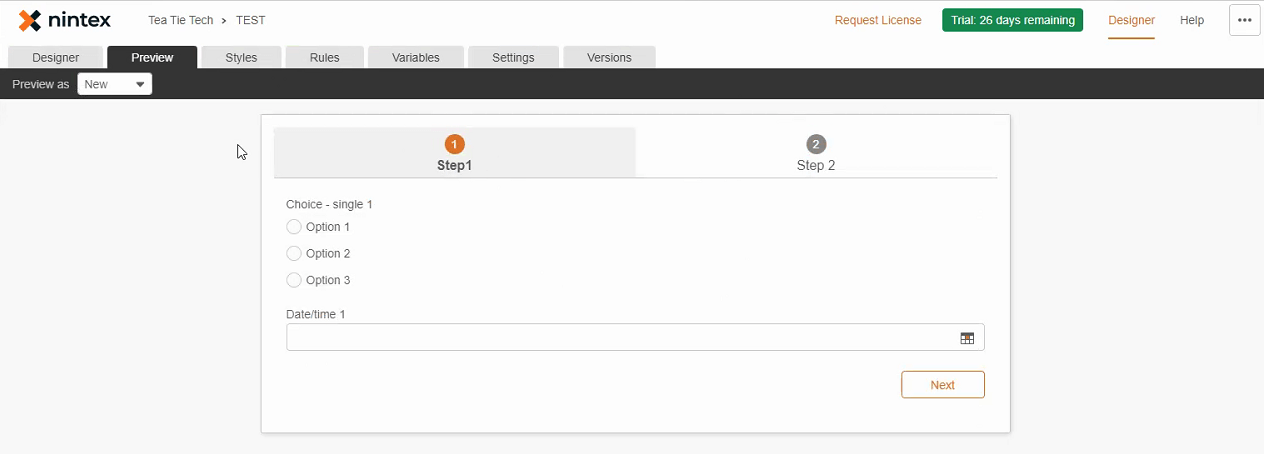
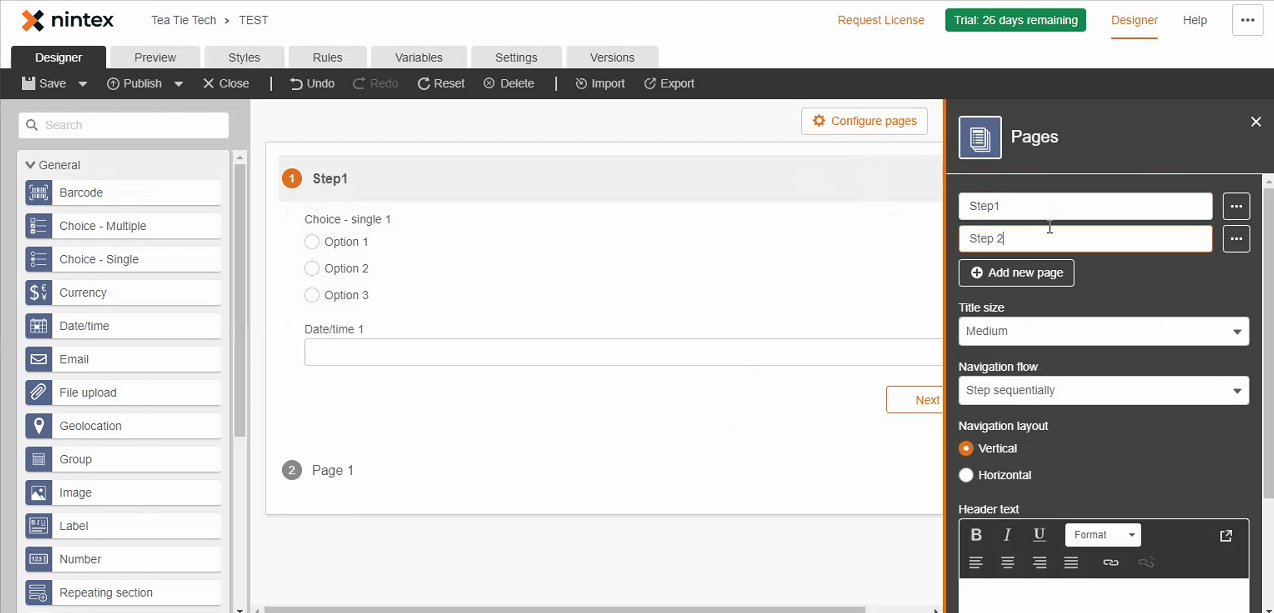
Nintex vertical tab layout:
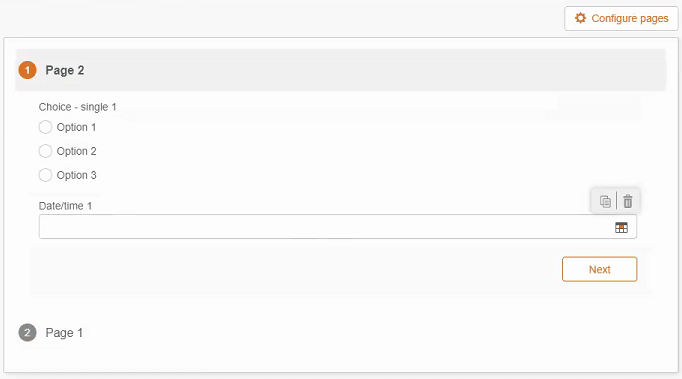
Nintex horizontal tab layout:
The navigation flow can be:
a. Sequential – You need to enter values first before you can go to the next page.
b. Non-sequential – You can go to the next page and back at any time.
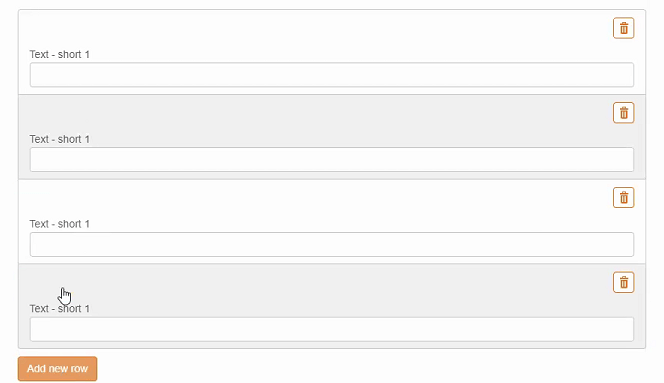
Specific for Nintex forms is the use of the ‘repeating sections’ form element:
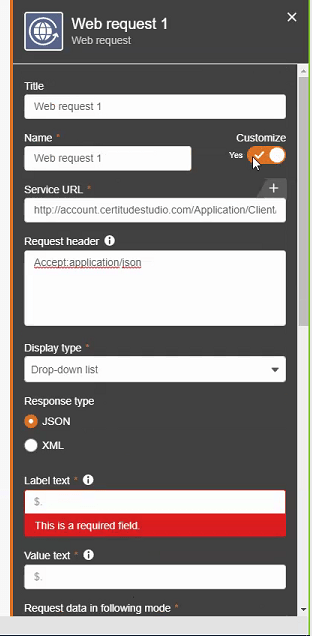
Nintex can help execute a web request on the forms and workflows. The biggest advantage of this is that you can more easily integrate with other systems.

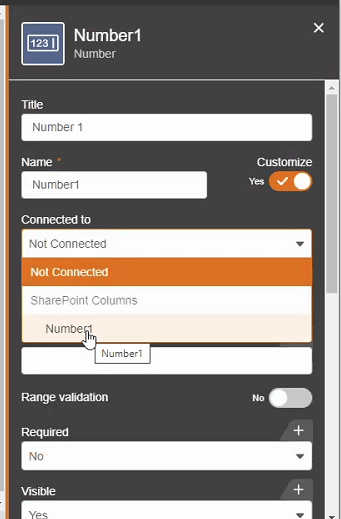
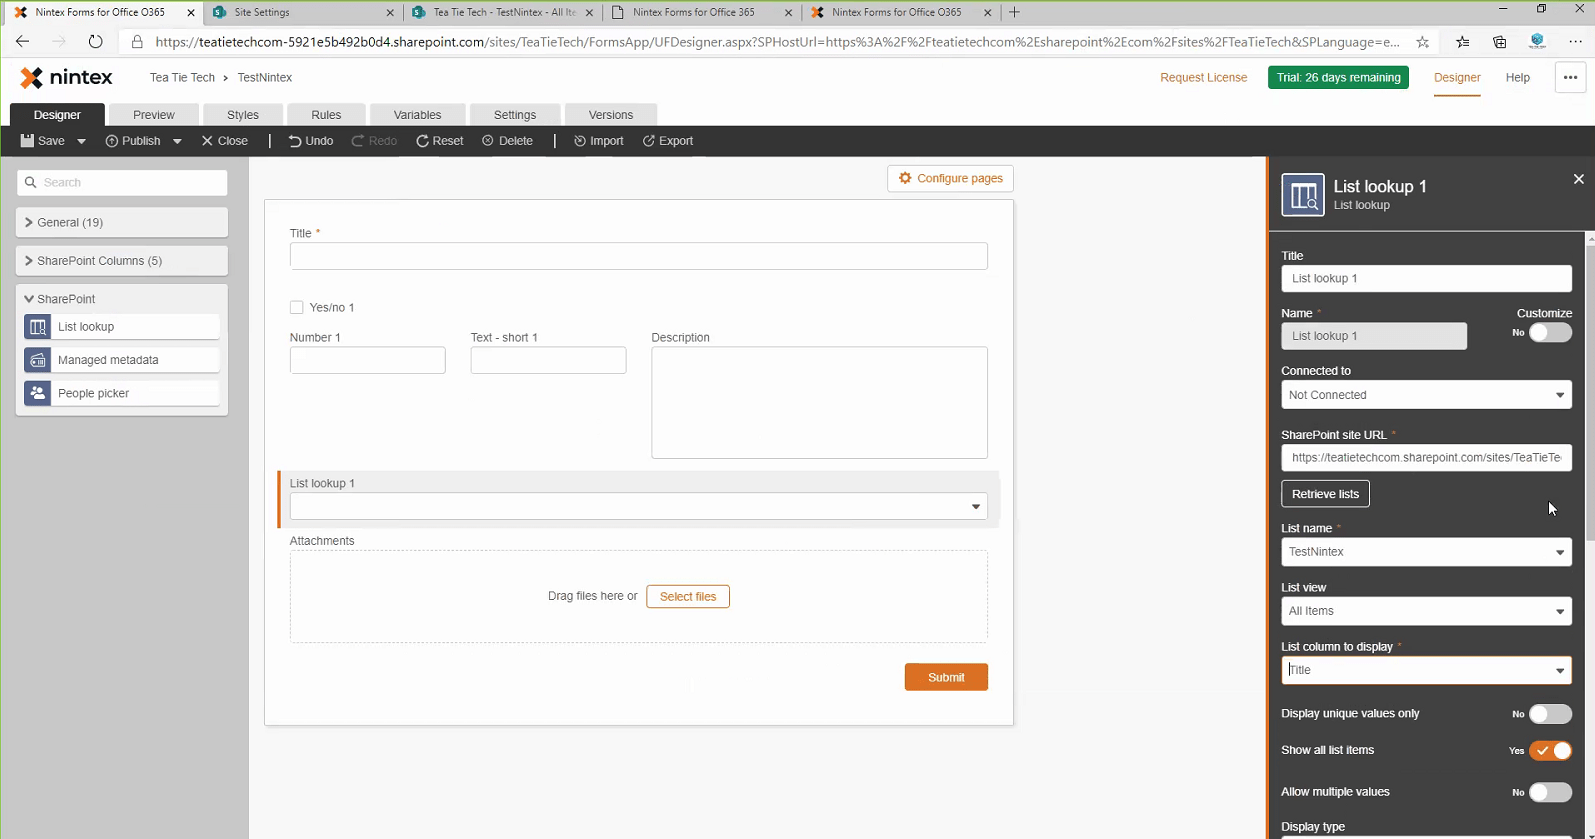
When you create a form field in the Nintex forms designer, it will store the field and content in the Nintex cloud instead of SharePoint. To save the field content in SharePoint instead, you will need to connect all Nintex fields to existing SharePoint columns. The Nintex forms designer cannot create these SharePoint columns automatically.
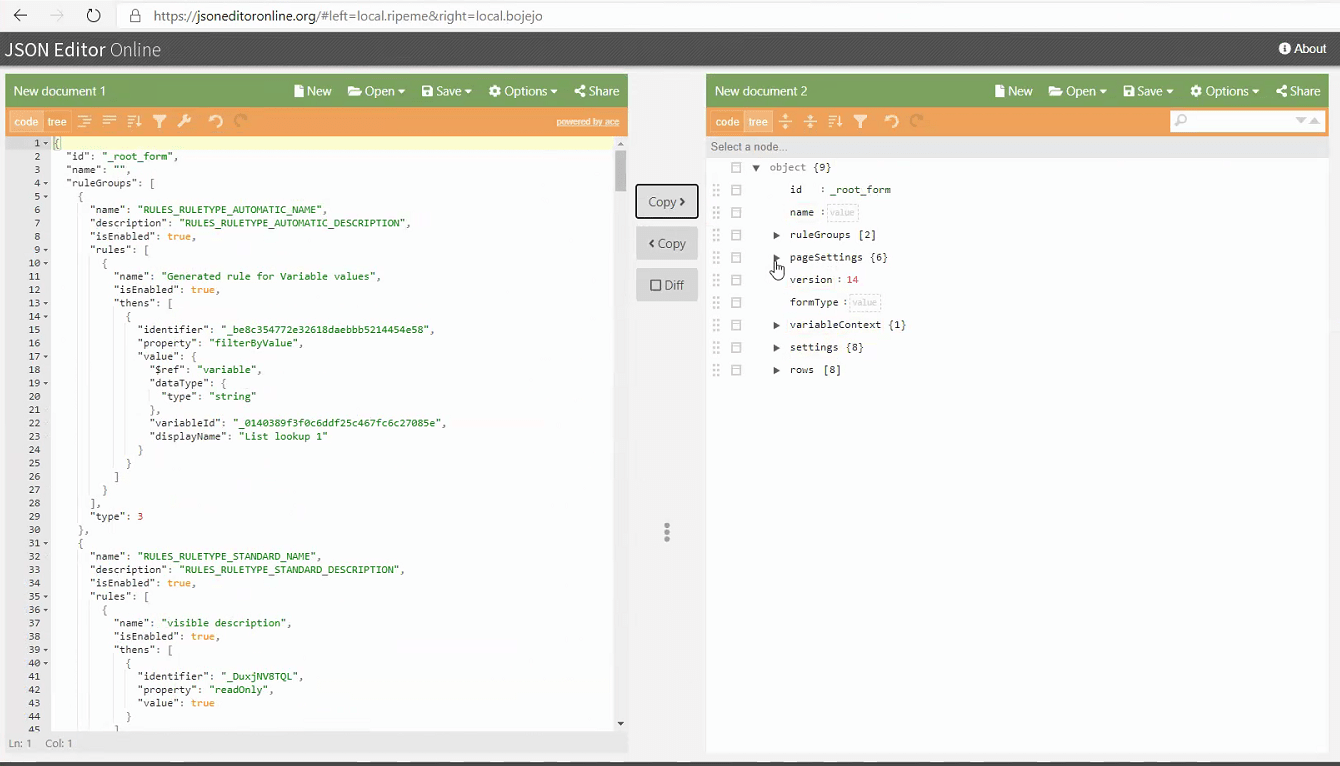
You can also export a form to the JSON format.
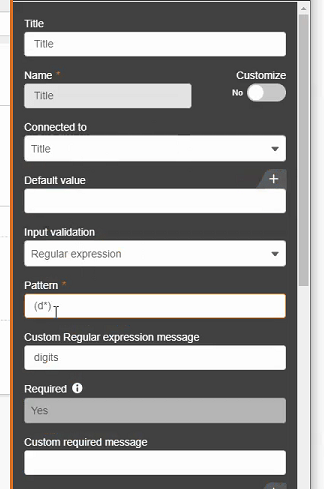
Field input validation: length, text mask, Regular expression
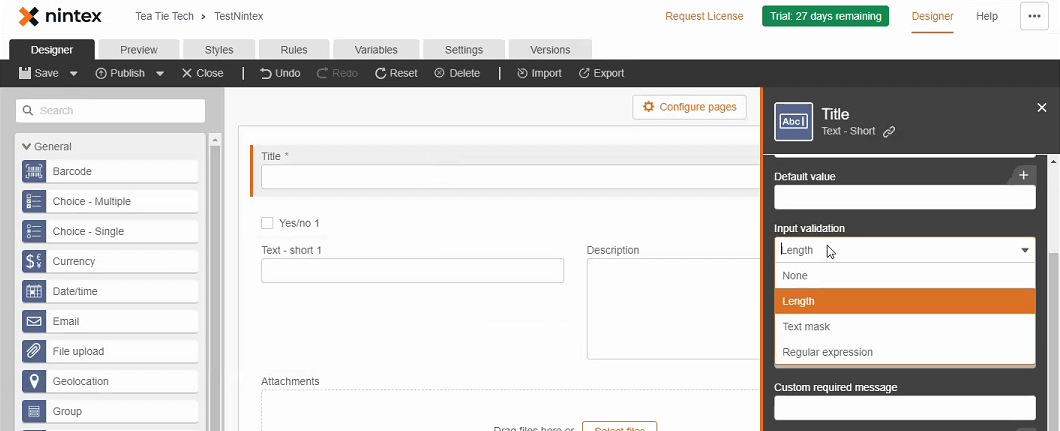
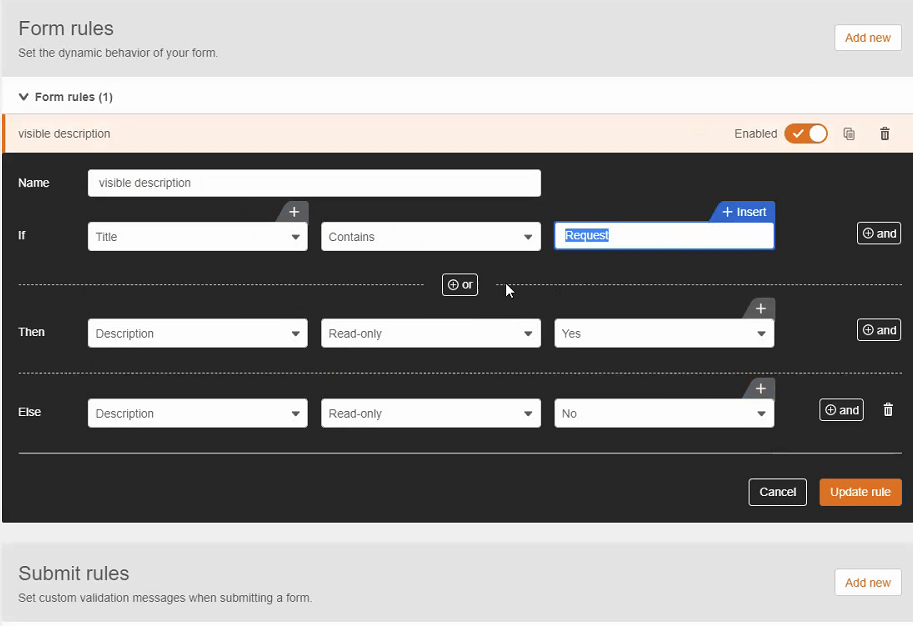
The Rules function allows you to configure Nintex Form validation and more (e.g. conditional field visibility).
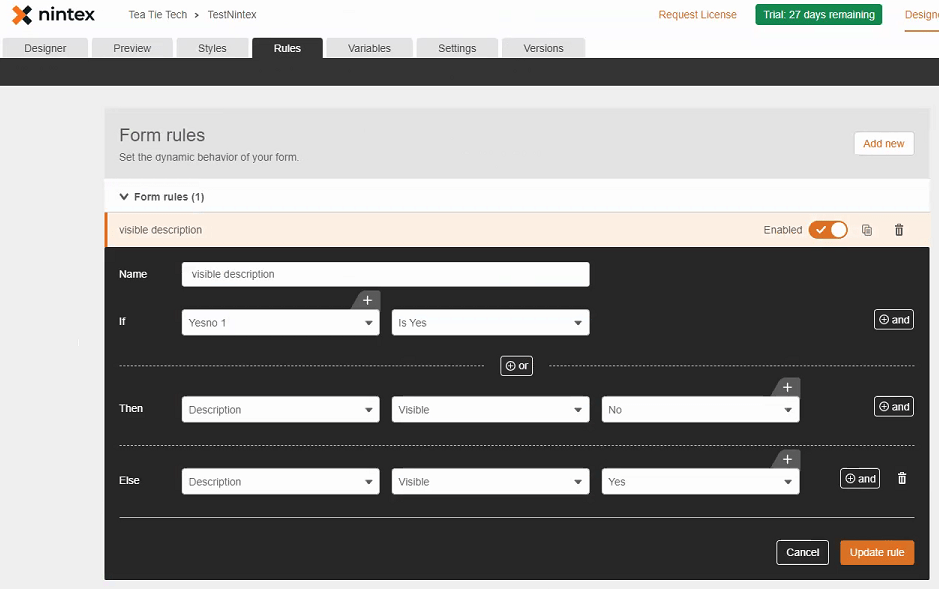
Nintex allows you to set fields to read-only by default.
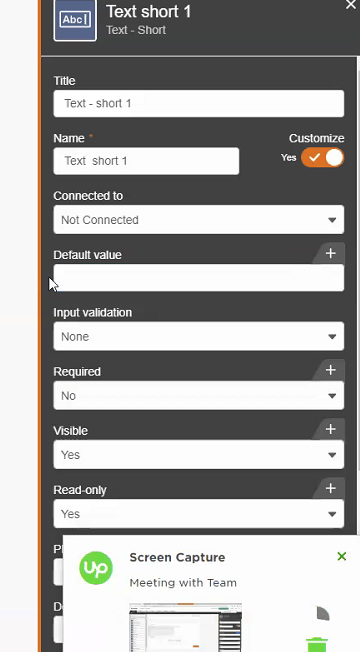
However, you can also set fields to read-only on the fly by using rules. For instance if Title contains “Request”.
The solution also offers:
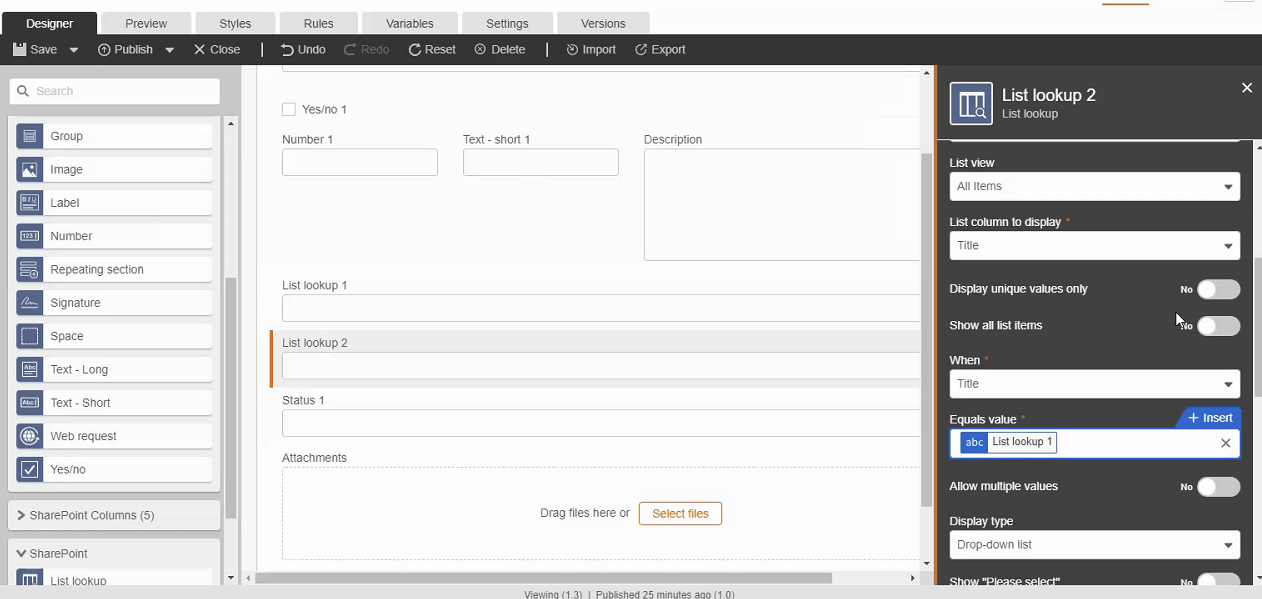
a. A lookup field that displays all values from a specific column from a specific list.
b. A Cascaded Dropdown: This means that the selected value from lookup field 1 is used as input for lookup field 2, which is used as input for lookup field 3, etc. Again, this is not programmable with JavaScript.
Shareflex
Shareflex forms can be developed with the Shareflex Form Designer. This tool enables you for example to:
- Create a list form
- Add tabs and tables with fields under the tabs
- Add secondary libraries on the form, and
- Add and remove tabs, fields and columns
- Move fields around the form
- Apply some settings and features like:
- Enabling a Document Preview, and
- Opening the list item directly after a new item has been saved.
You don’t need any code to configure the form with its secondary library views. All code that enables the generation of unique IDs keeps track of related files in the secondary list. Also other features (document preview, re-open after save, etc.) are added automatically.
Form fields are arranged in tables, which, in turn, are organized under tabs. With Shareflex Form Designer you can easily rename and rearrange these tabs.
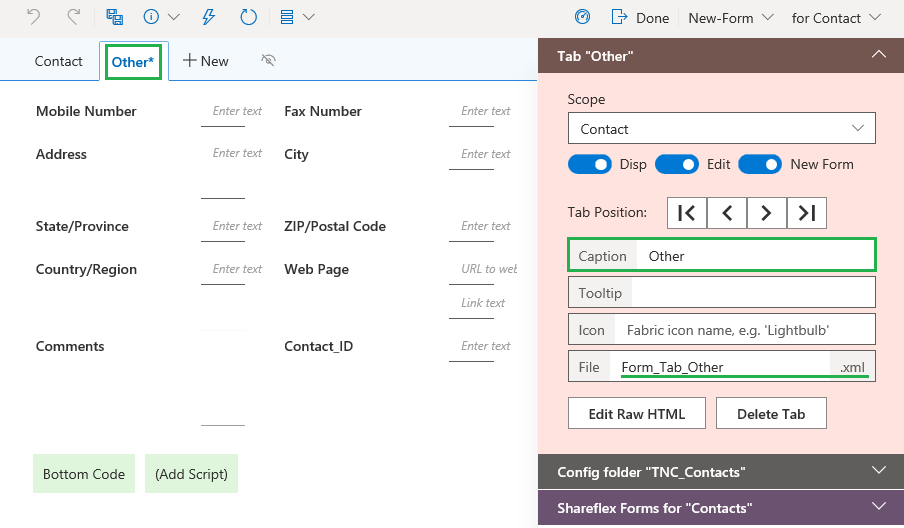
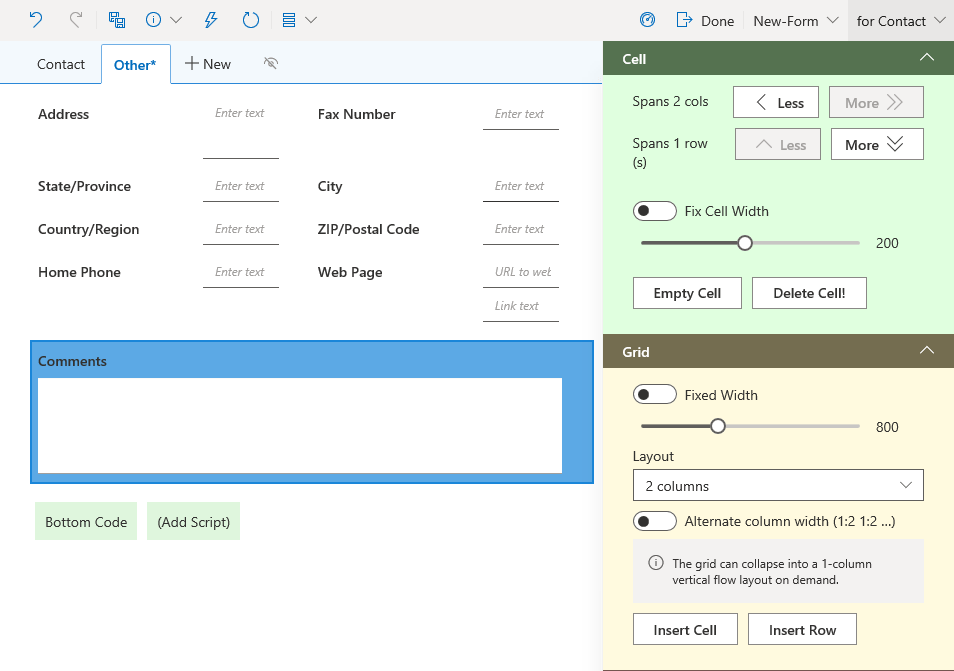
Under each tab you can:
- Adjust the number of table columns (up to 16)
- Add and remove table rows and cells
- Span rows and columns
- Adjust the cell width.
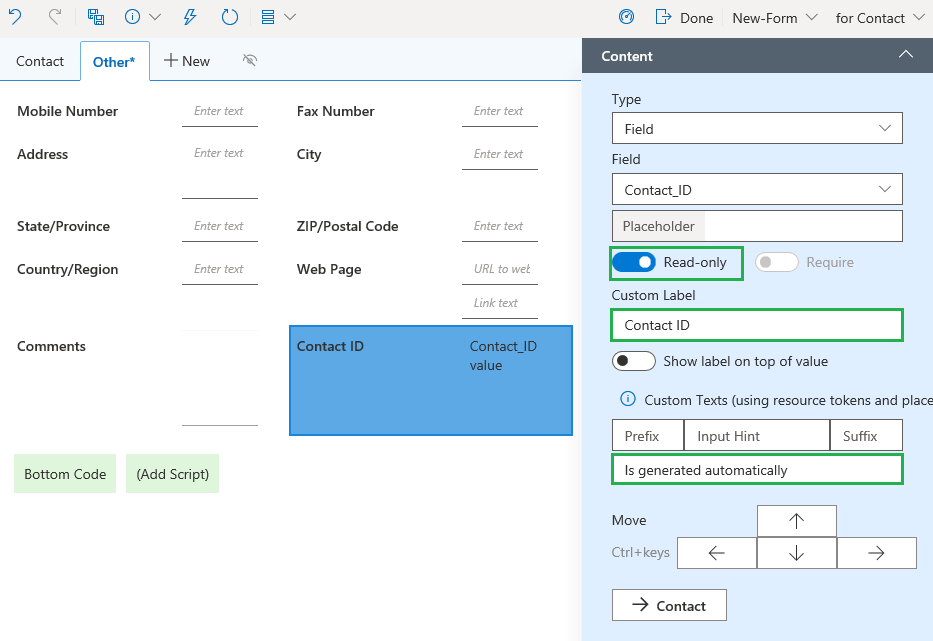
On field level you can:
- Adjust the label content and placement
- Make fields required and/or read-only
- Add a prefix/suffix to a text field value, or
- Specify a field input hint
- Move the fields to a different order or even move them to other tabs.
Shareflex uses the SharePoint branding. You use the Form Designer mainly to display information. You define the information itself (for instance dropdown field options) in SharePoint.
Nintex
With Nintex you cannot use code. The Nintex Responsive UI for SharePoint Online does not support JavaScript, CAML or any other programming language.
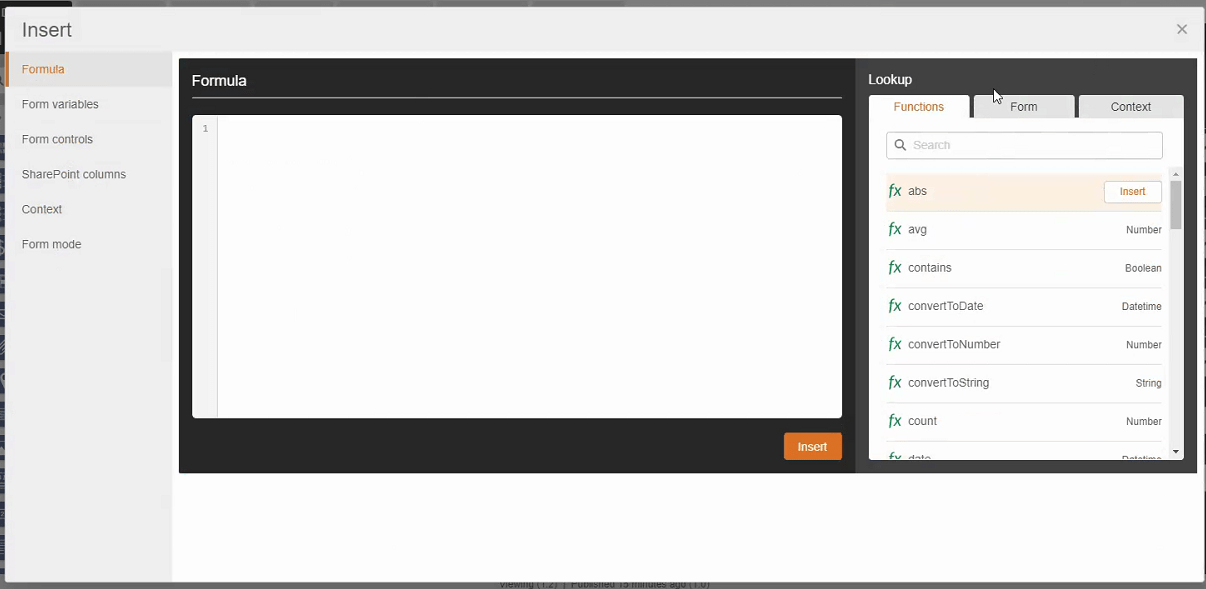
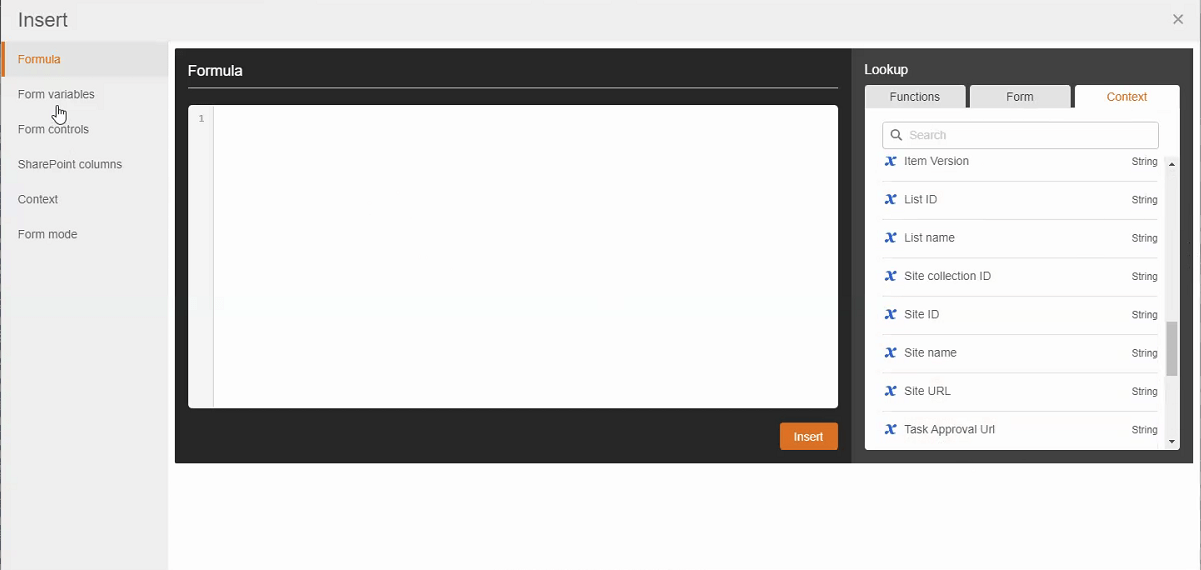
However, you can use Nintex formulas as you can see here:
Shareflex
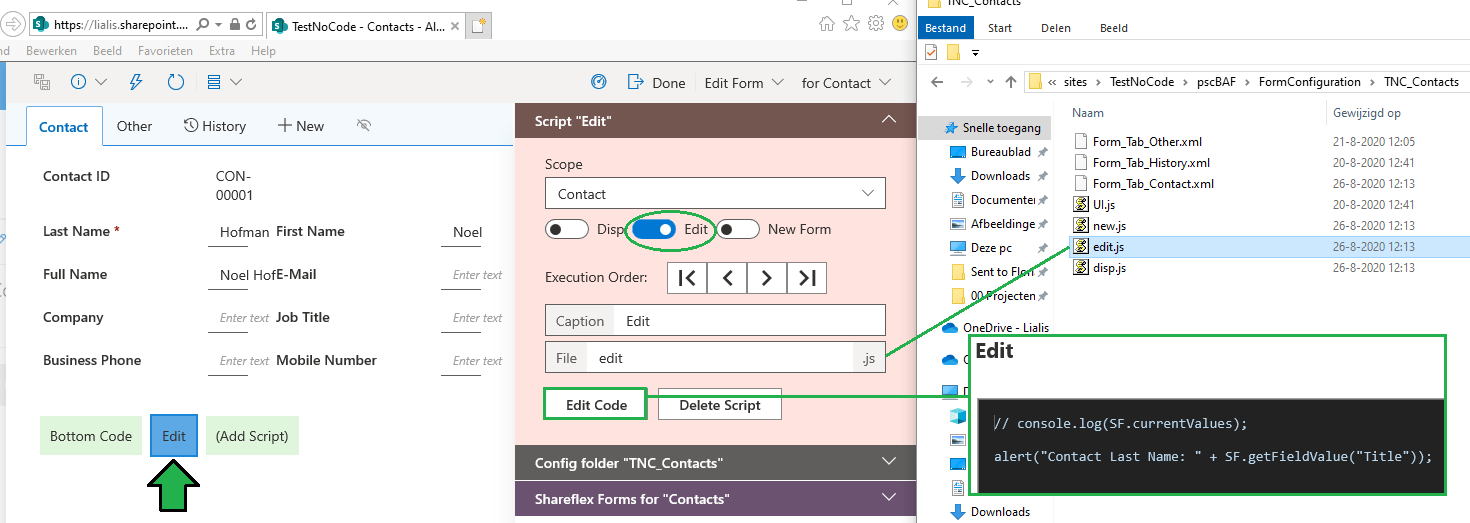
Unlike Nintex, Shareflex Form Designer allows you to use additional CSS or JavaScript to manipulate the look and behavior of the fields/form. You can even combine JavaScript with functions from the Shareflex SF-API. This API is also used by the Shareflex Forms GUI itself. As a result, existing (bottom code) and additional JavaScript can access all the same functionality. The API provides basic form and field functions (like setting values, show/hide, filter, upload, etc.) in a simple way. Additionally, can use the prepared code Snippets for standard tasks with small adjustments.
In the Shareflex Form Designer each tab shows a button where you can adjust the existing Bottom Code script or add new scripts. This brings a lot of flexibility and allows you to add anything you need.
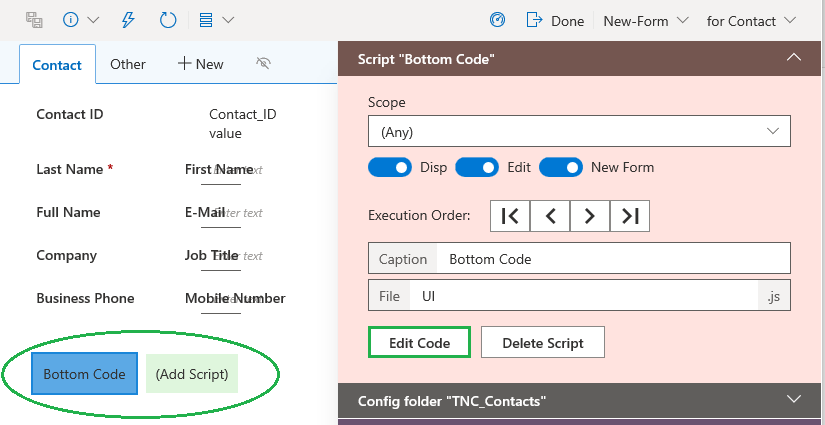
The Bottom Code script already contains Shareflex API code that was generated during the form setup. Snippets are available to help you easily insert functions.
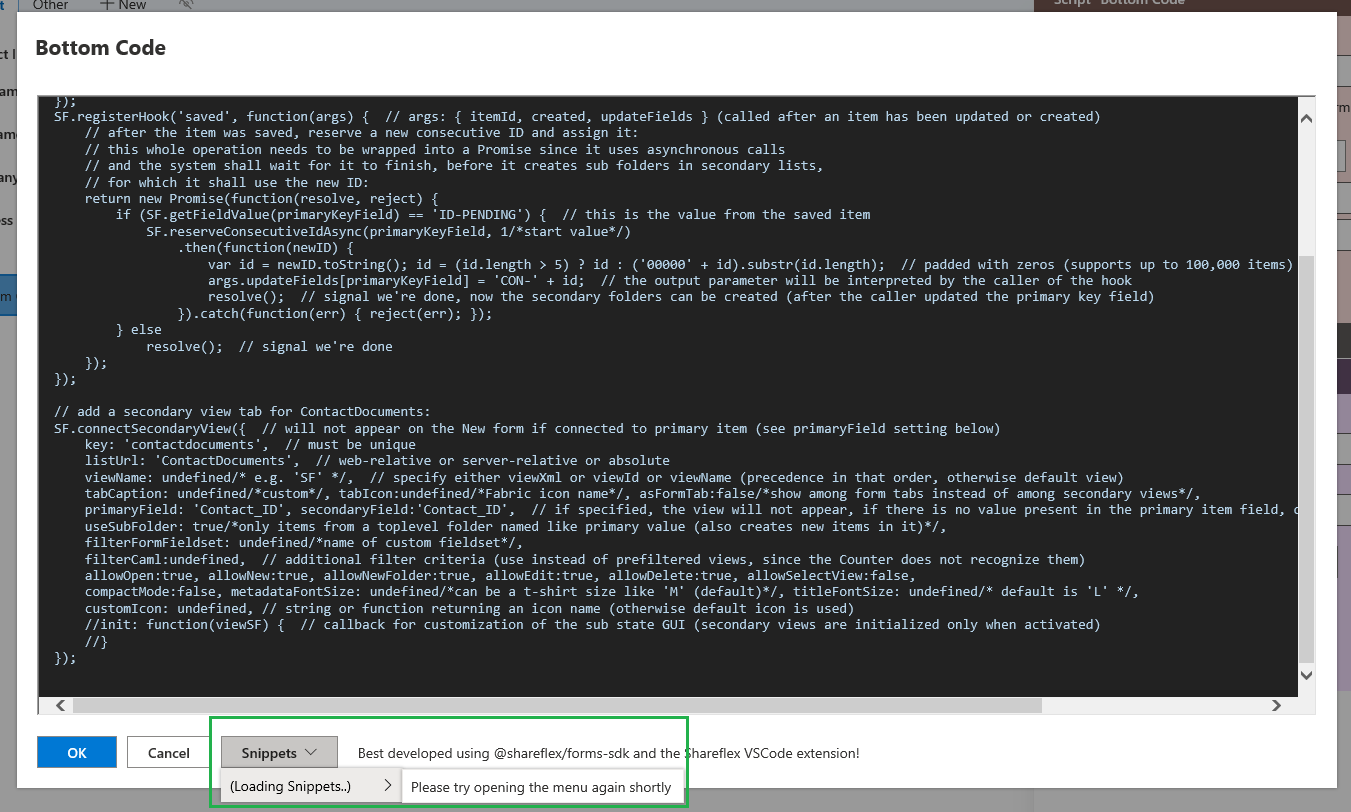
For custom form functions like button code you can add Script code directly from the same page. For instance you can use JavaScript, CAML and the SF API to modify and expand the form features.
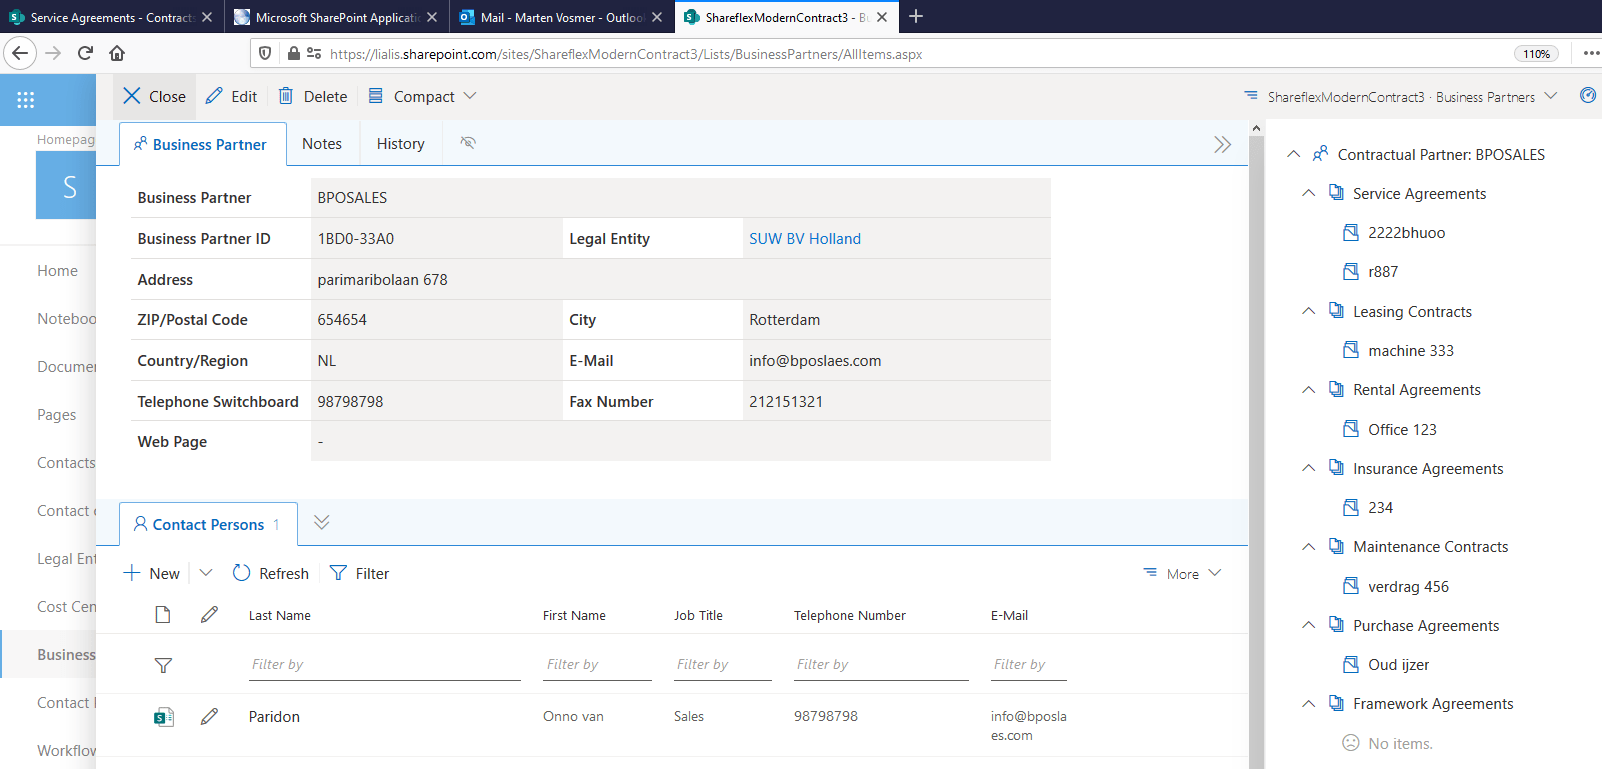
A related list is an additional list in SharePoint Online where related information is stored. Shareflex can display these related Lists on the SharePoint form. This is not possible with Nintex.
On the following screenshot a Business Partner item is displayed, including all related information from different Lists.
- On the bottom you see the Contact Persons list with all contact persons from this business partner
- On the right multiple document libraries are visible. When these Libraries contain document sets that are related to this business partner, these document sets are displayed (for instance the ‘Oud IJzer’ document set in the ‘Purchase Agreement’ library) and can be opened from here.
When you open a related item from an external Document Library it will display on the same page as an overlay to the parent item. When you close the related item you will see the parent item again.

So, on one page multiple (related) Lists and Libraries can be displayed including the (filtered) content. You can open and edit these items directly by clicking on them. There is no need to go to the Site Contents first to open a related Library or List.
Shareflex
The Shareflex administration sub site is to be used to create and administer the workflows.
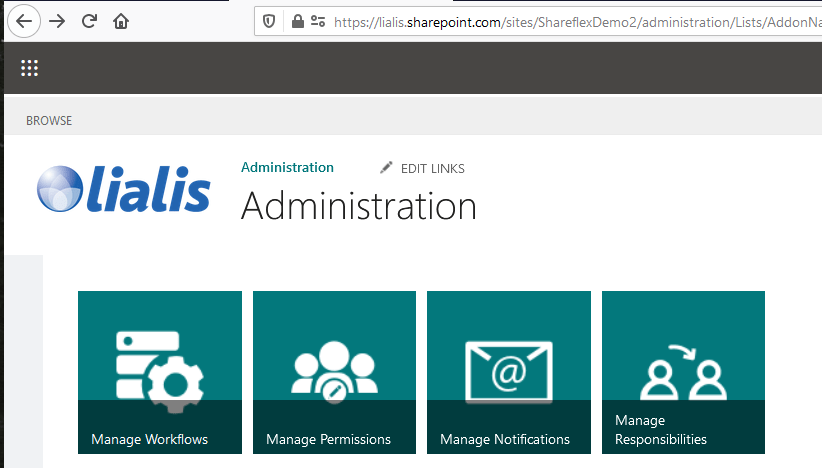
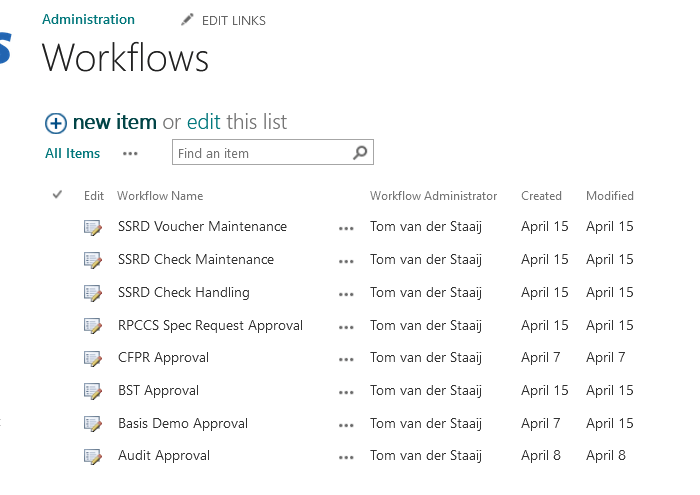
The Manage Workflows button shows all workflows used by multiple Shareflex applications this Site Collection.
Creating a Shareflex workflow can be done with the Shareflex workflow designer. Later on the power users can use this browser based tool to make modifications to the workflow.
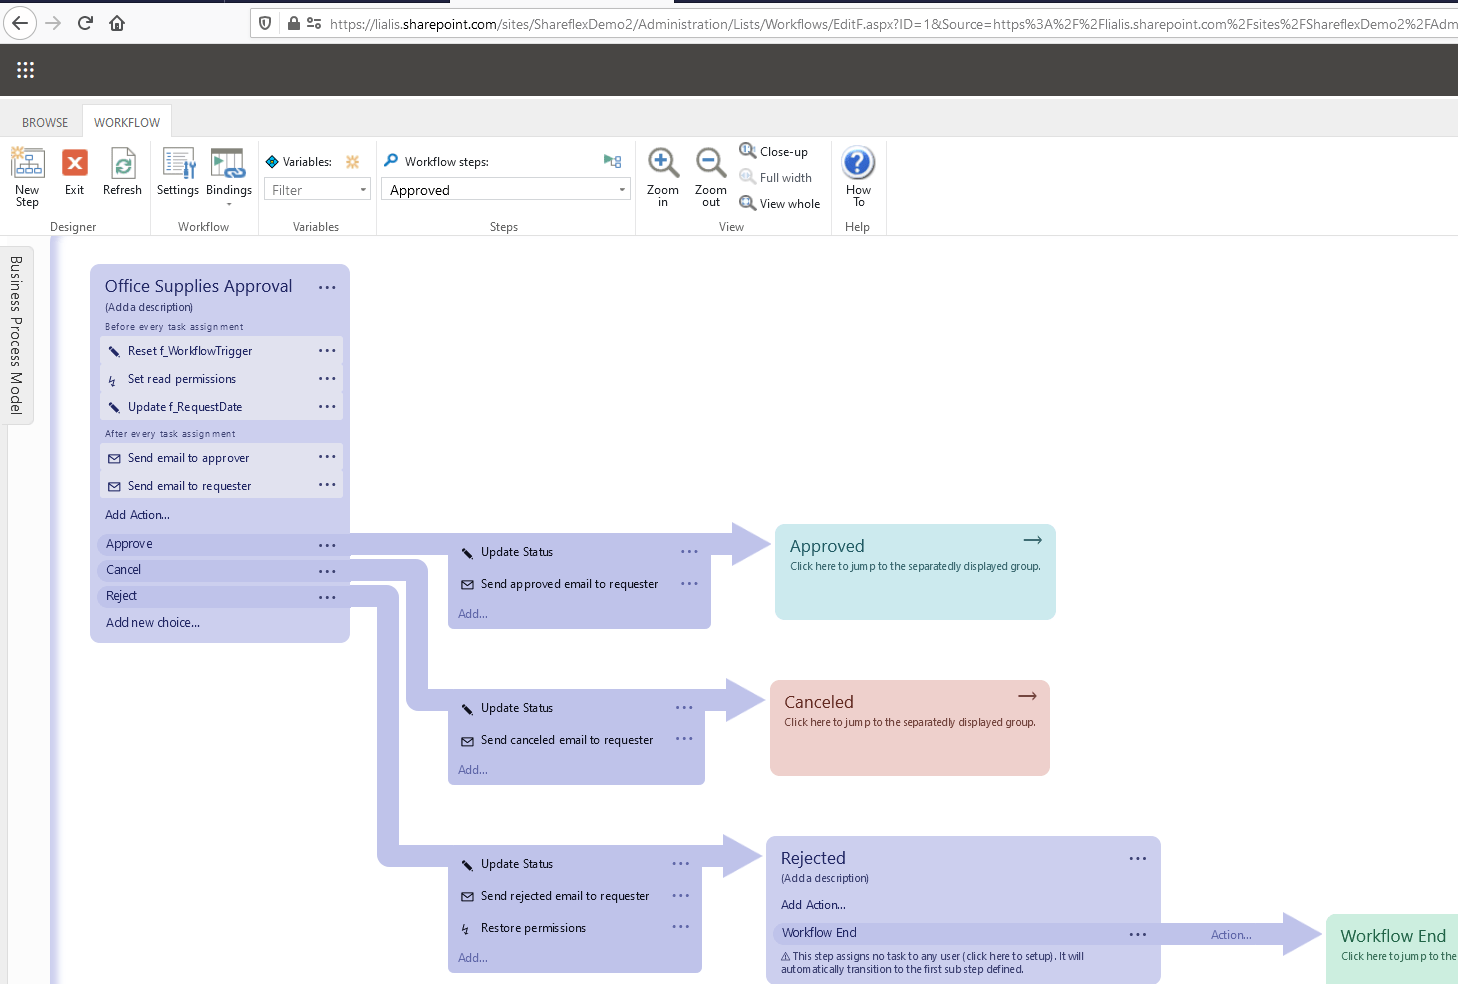
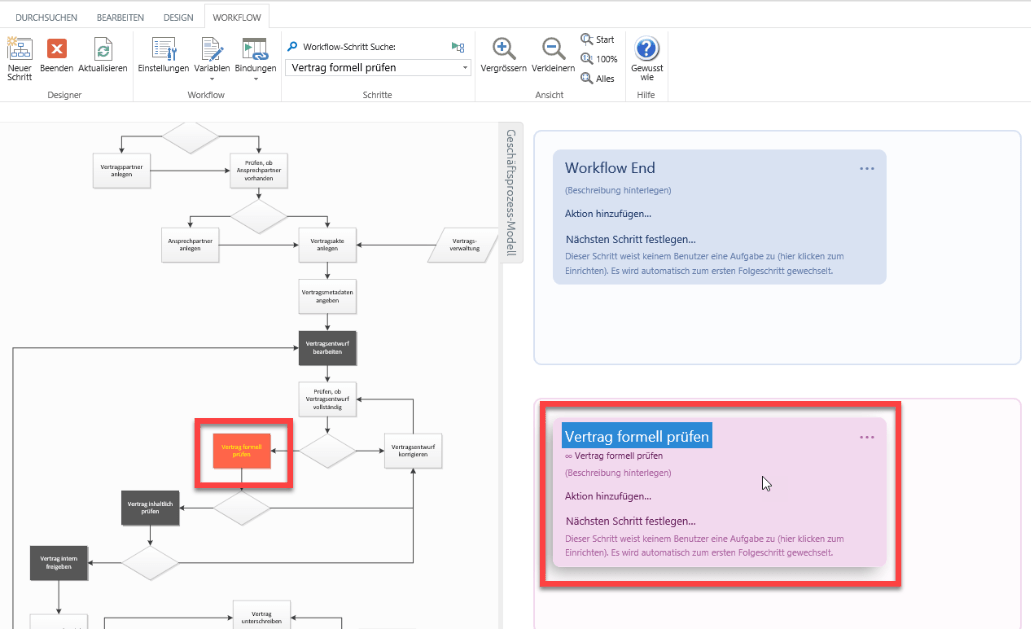
A Shareflex workflow can optionally be based on an existing workflow diagram. For instance a Microsoft Visio flowchart. Subsequently you can create workflow steps by dragging and dropping shapes from the diagram. The screenshot below shows a clear visual connection.
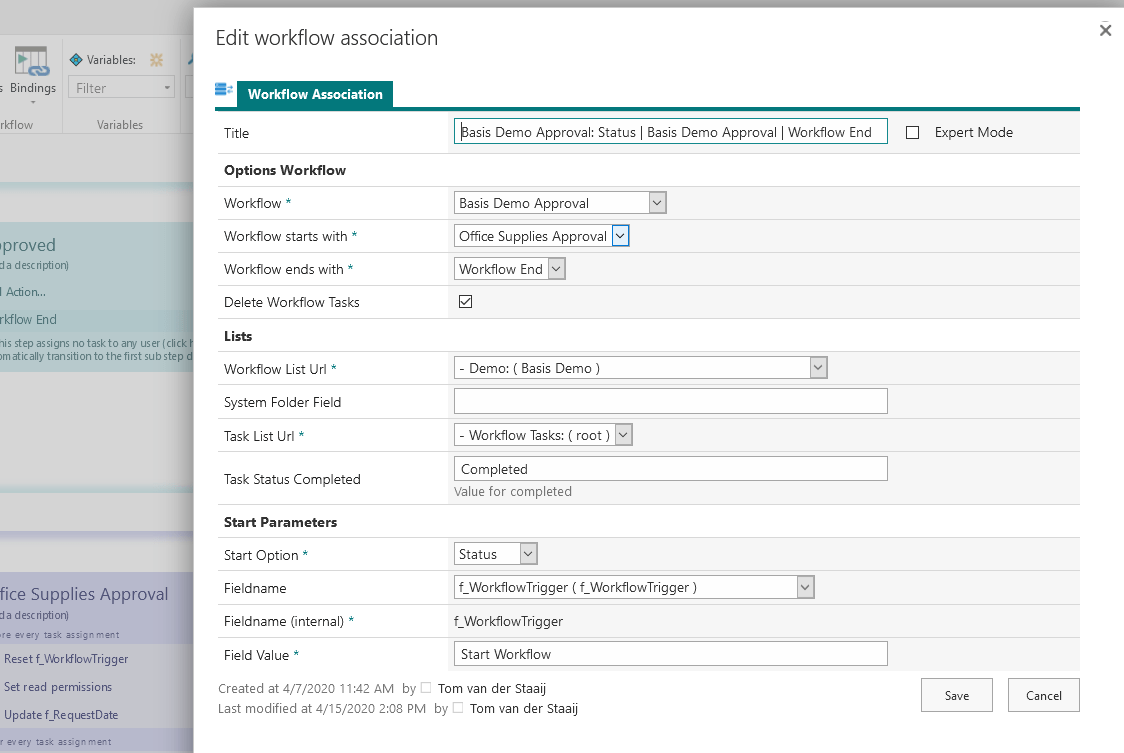
Workflow bindings (also known as workflow associations) are used to connect a workflow to a List or Library with a Shareflex form. One great feature of Shareflex is that you can create several bindings for each workflow. This has the following benefits:
- Multiple (corresponding) applications can make use of the same workflow.
- Every application can have multiple workflows (as long as they don’t interfere with each other).
- A workflow can be created even before the existence of a List.
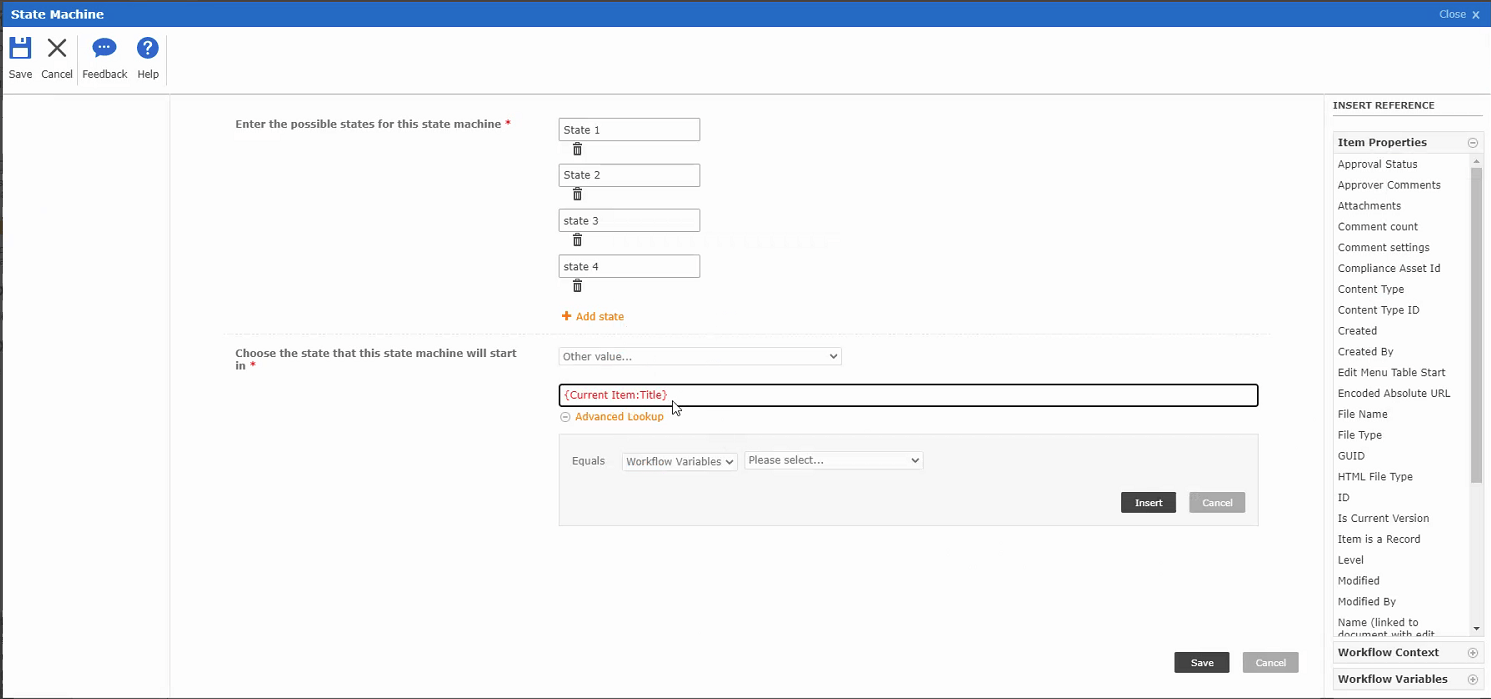
The image below demonstrates a workflow binding connected to a List with a Shareflex Form. It has a condition to automatically start the workflow once a specific field has a value of ‘Start Workflow’.
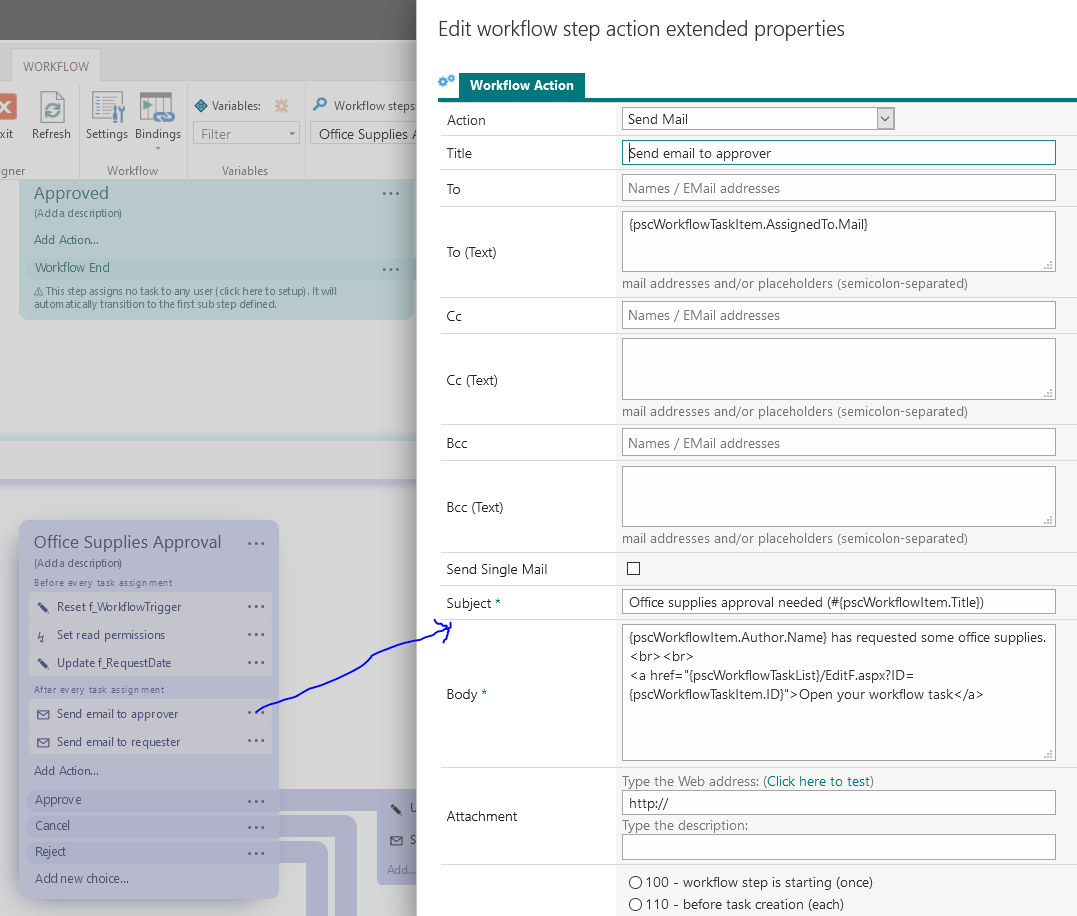
The Shareflex workflow designer includes a few commonly used actions such as updating a field value or sending an email. For custom or advanced operations you must use JavaScript or BRE (Shareflex’s proprietary XML-based domain specific language).
In the following screenshot we show an email send workflow action.
Nintex
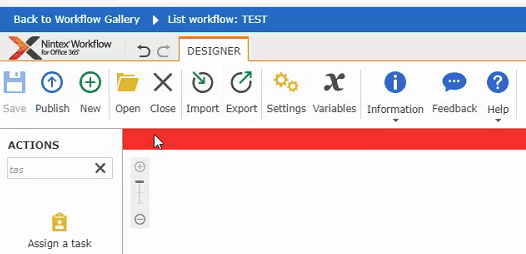
The first step is to start the creation of a workflow from the ‘Nintex Workflow’ button in a list.
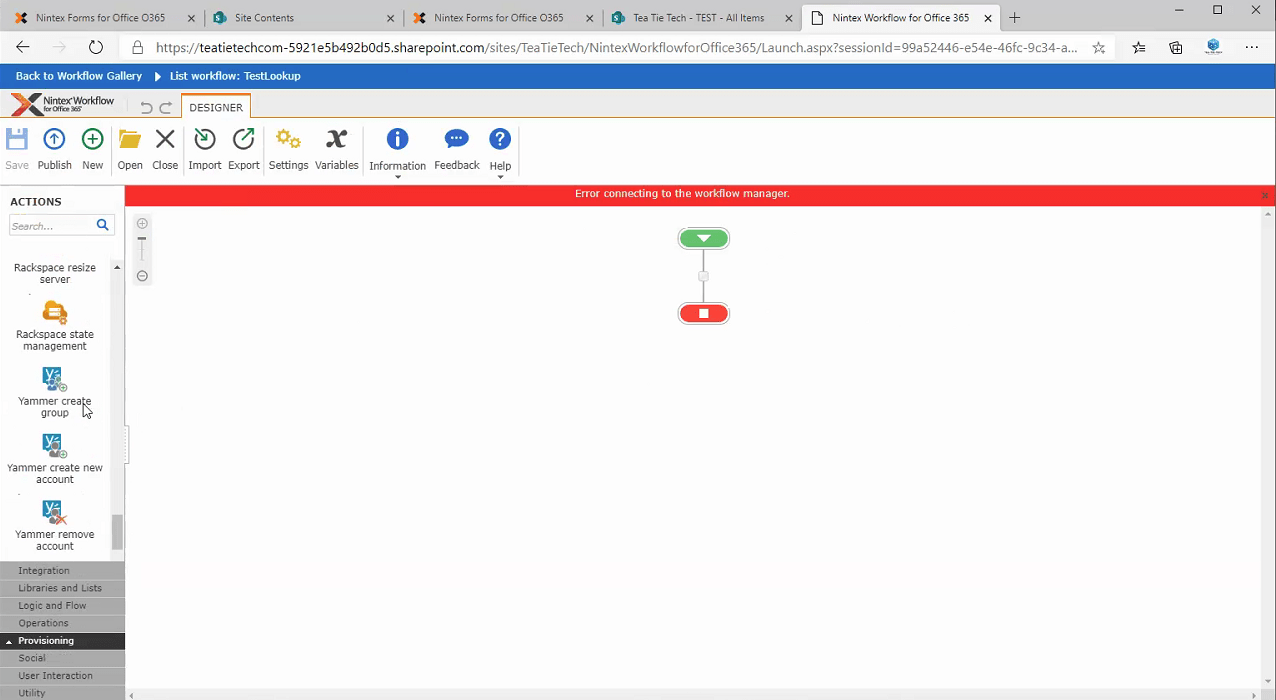
Once you start the workflow it offers a number of user friendly functions:
a. The ability to drag/drop a task on the canvas were actions are then added automatically.
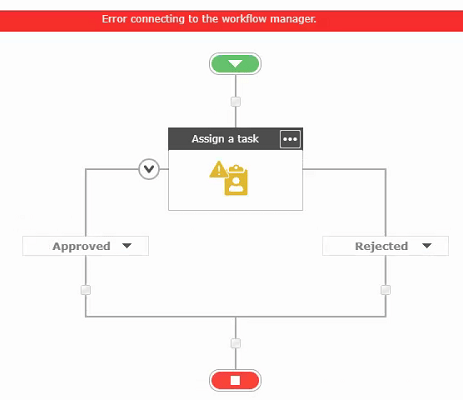
b. The facility to run serial or parallel workflow actions.
c. Support for lazy approval. This means that you can process the request via email as well
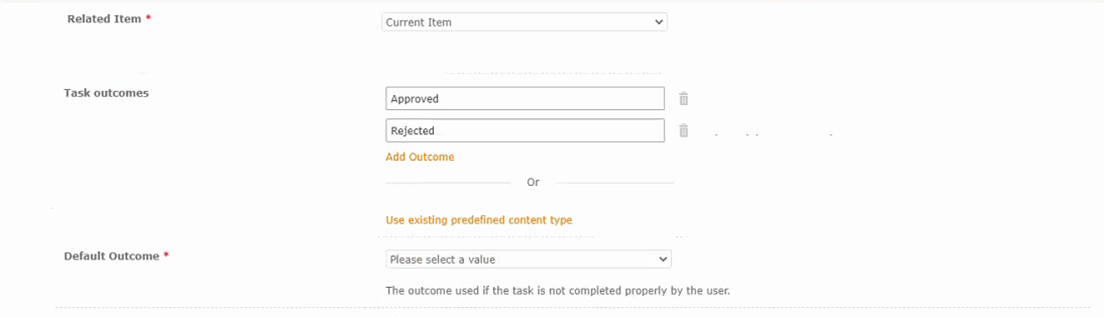
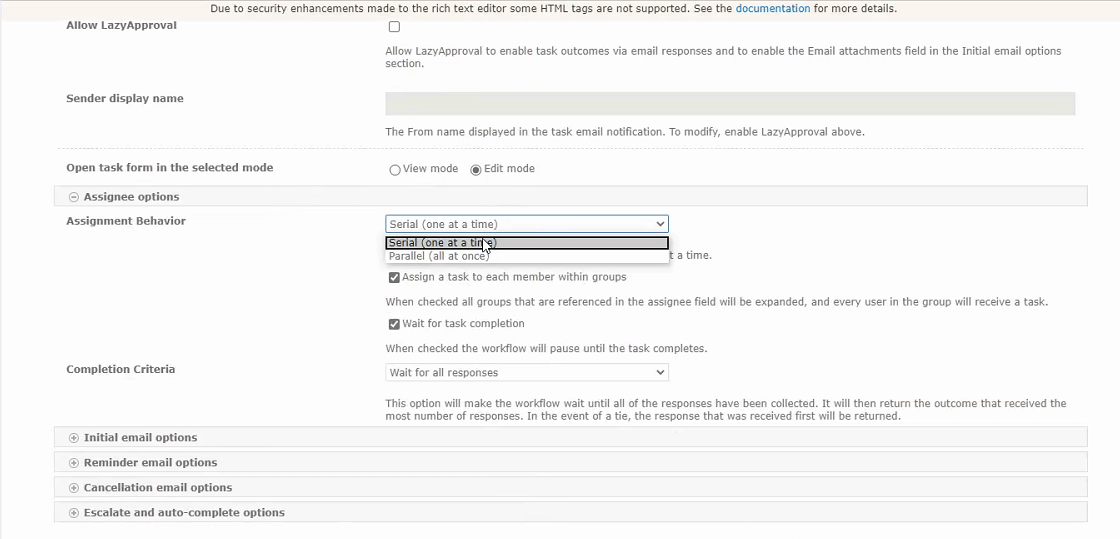
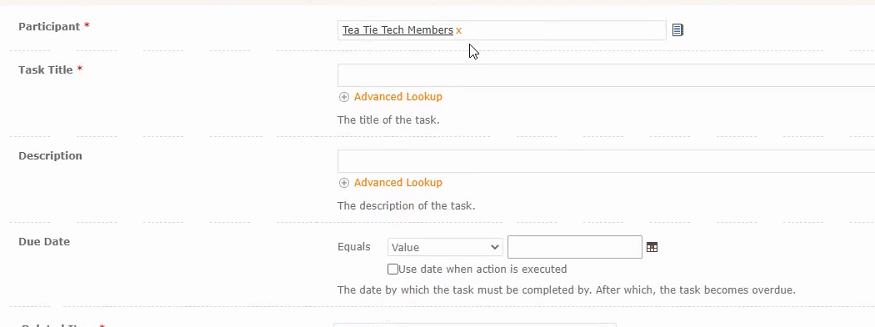
d. Assign a task to multiple users or assign a task to groups.
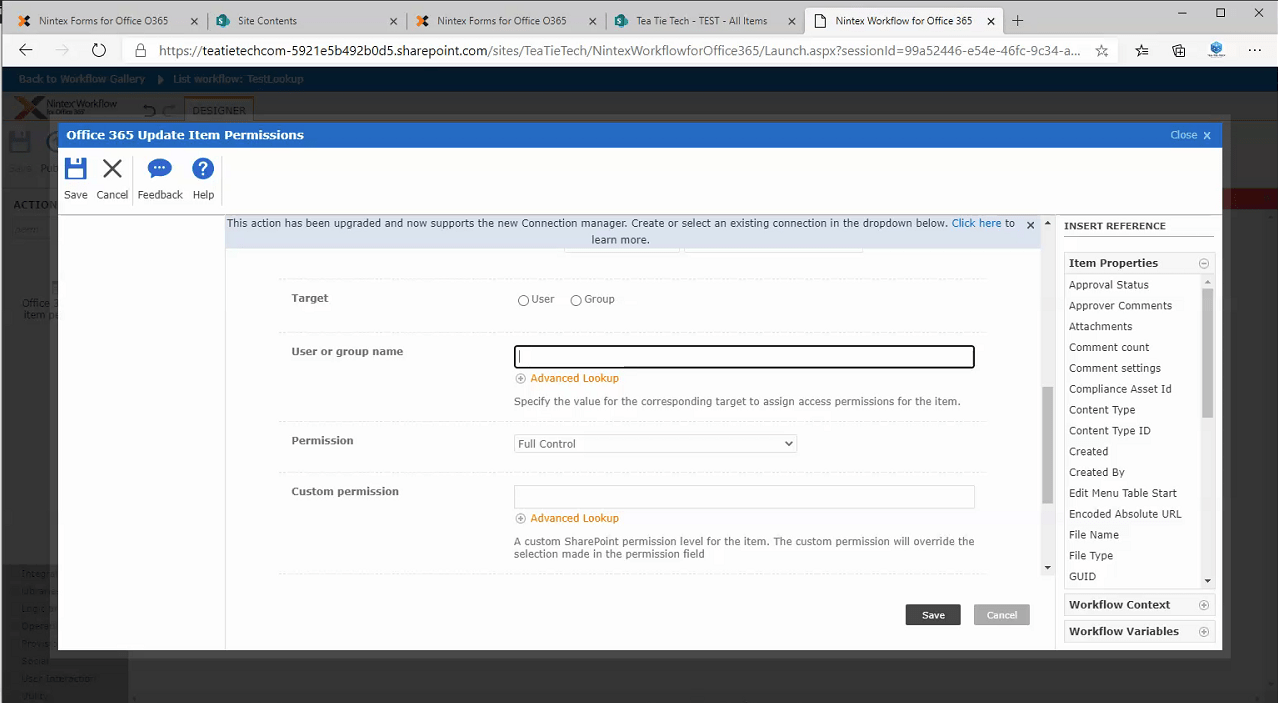
e. Set permissions for assignee’s:
f. There is a default tasks list but you can also specify a custom one
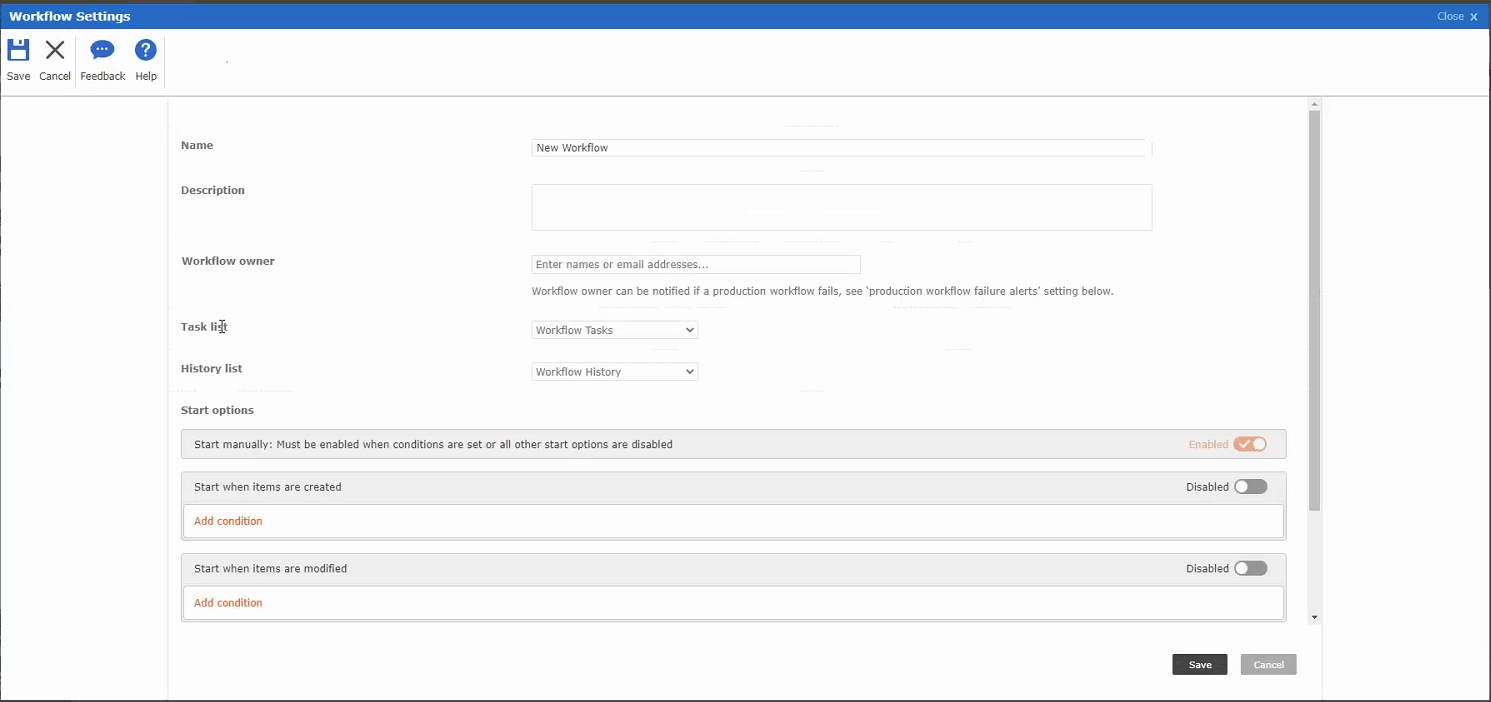
g. You can trigger a workflow on multiple conditions. For instance field 1 contains this AND/OR field 2 contains that.
h. A workflow is created on List level (normal to SharePoint). Other applications can re-use a single workflow by exporting/importing it. You can find the workflow import/export on the designer toolbar.
During the export, only the nwp format is available. For Forms, json format is available as you can see here:
i. The solution doesn’t support task delegation per single task. However, it is possible to delegate all tasks assigned to 1 approver or to another approver for a specified period.
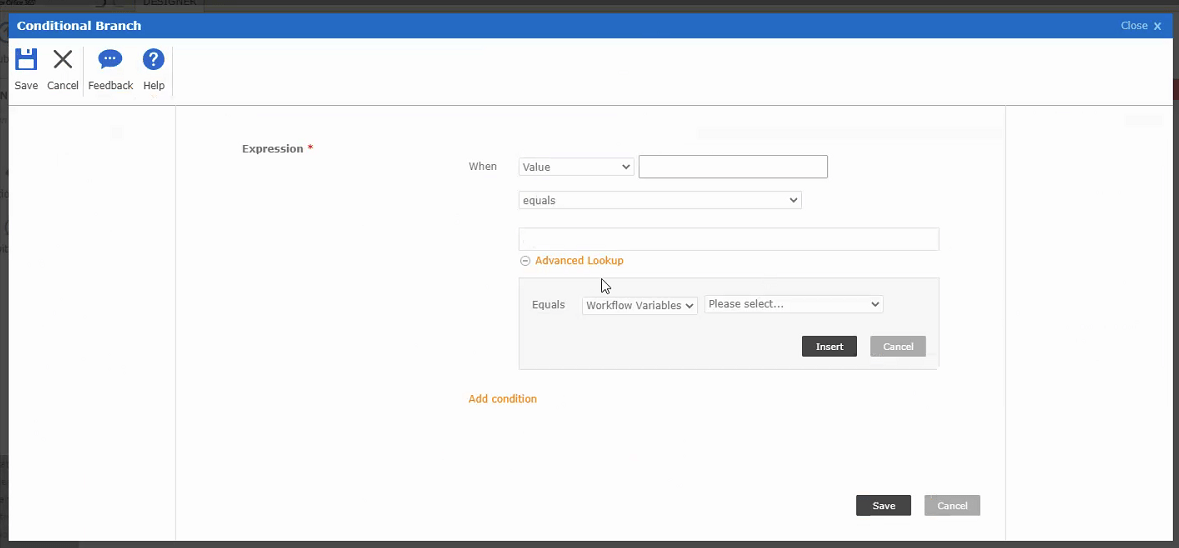
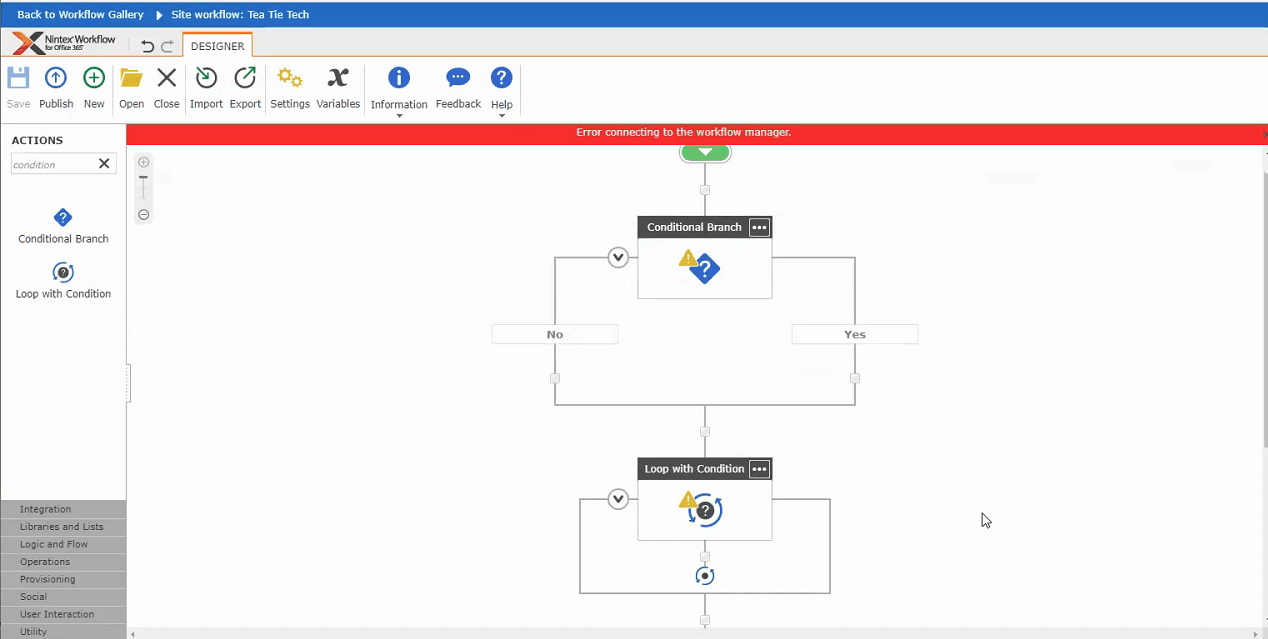
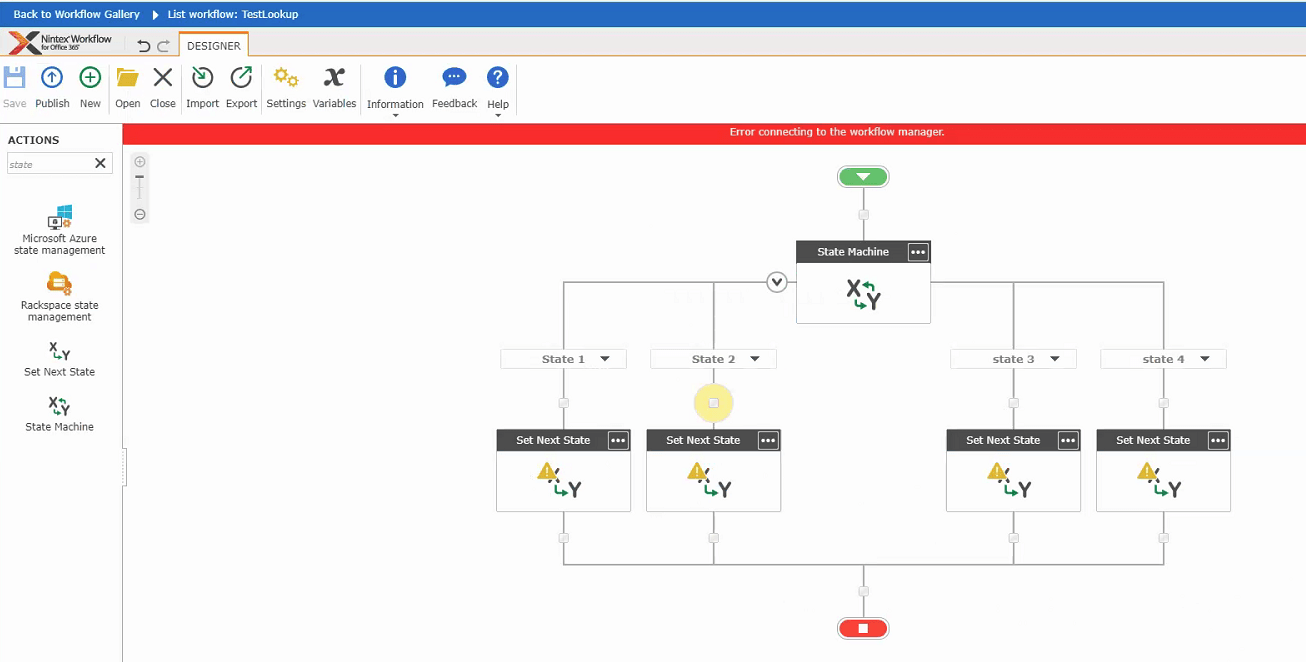
j. Dynamic conditions work nicely in Nintex: Conditional Branch
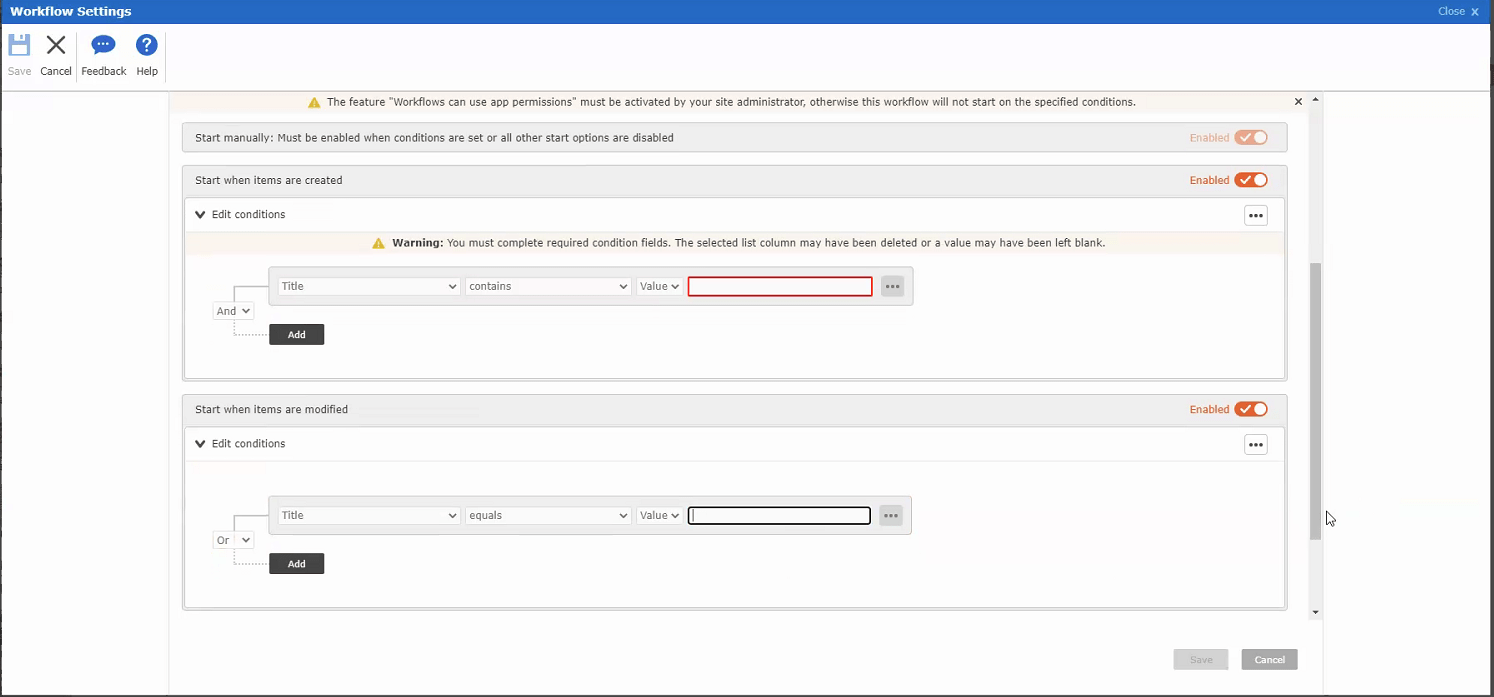
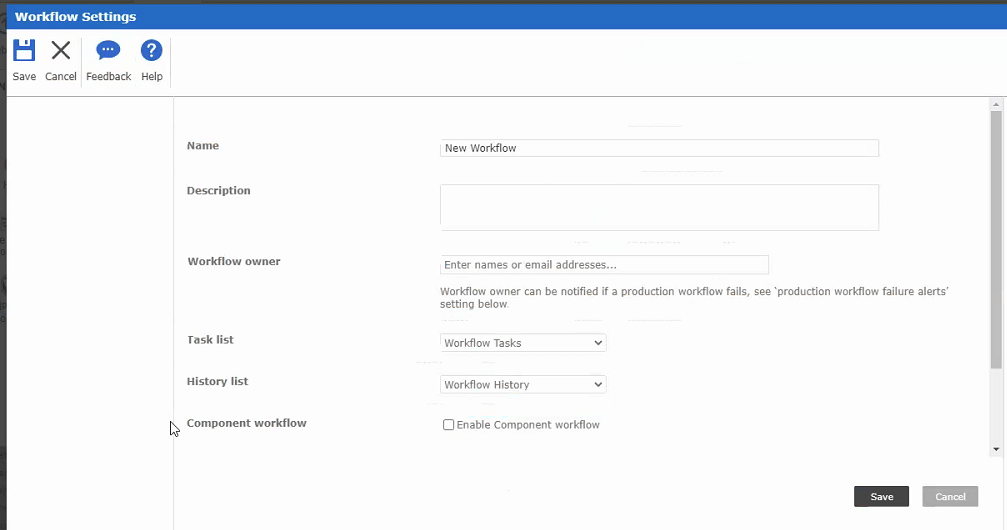
History option 1: In the Workflow settings, specify the list where you want to log the workflow history.
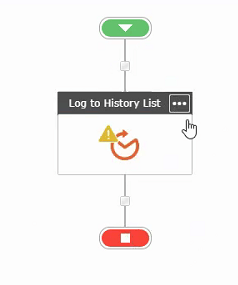
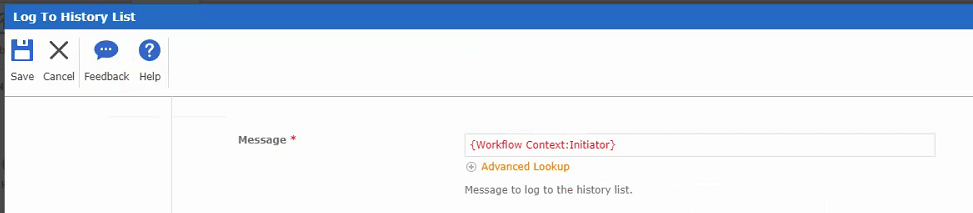
History option 2: specify the steps that you want to log in the history
3. Administration and app rollout
Installation / Set-Up Shareflex
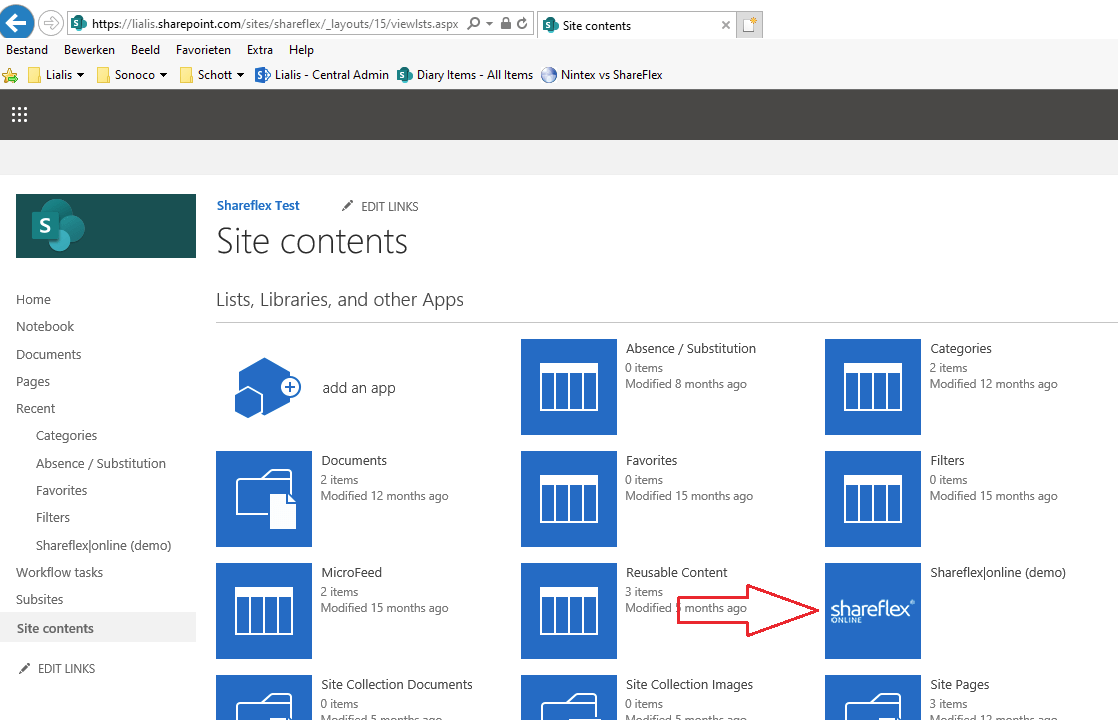
Shareflex offers a Shareflex app in the SharePoint App Catalog. The installation of this app on a new Site Collection is straightforward. After the installation of the app itself, you will have to execute a script to install several Shareflex add-ons. Unlike Nintex, Shareflex will store all core files in various lists and libraries in your own SharePoint Site Collection.
App deployment Shareflex
With Shareflex the deployment of an application is fully automatic by running a custom script from a .beeml XML file. This script mainly uses psLib functions (Shareflex specific functions based on JavaScript) for the deployment of the standard SharePoint design elements like fields, forms, lists, views, etc.. However, the script can also include JavaScript, jQuery, CAML code that is being copied into the deployed elements.
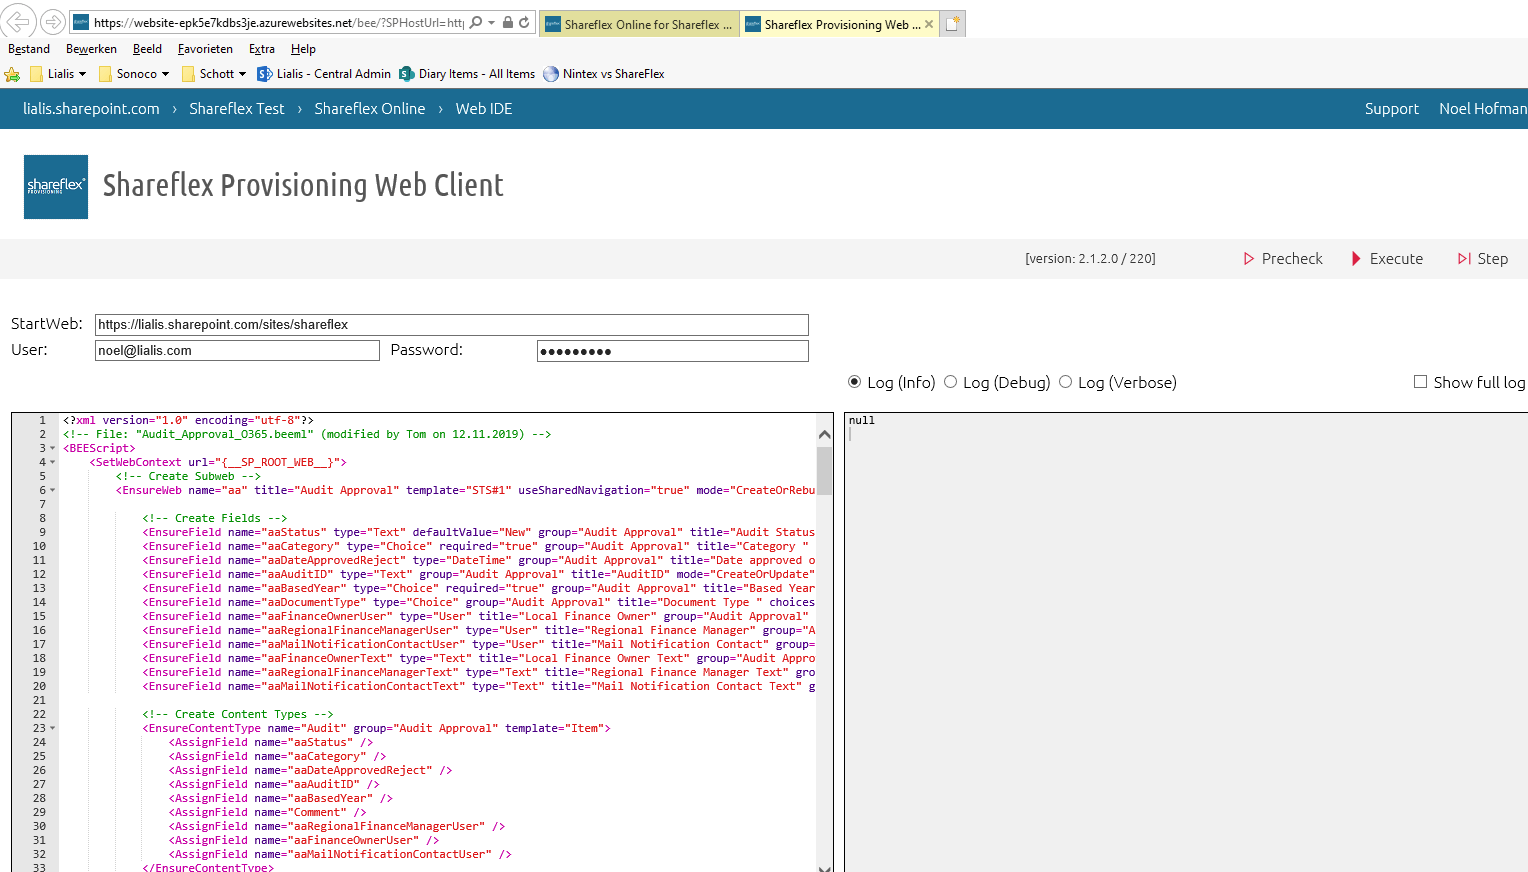
During the installation of Shareflex, a deployment app is installed on the site collection, that redirects to a web IDE on azurewebsites.net
Here you can copy and run the deployment script. Subsite, lists, libraries, fields forms, functions and everything else can be pre-configured in this script. With only one click on the ‘Execute’ button, you deploy the complete application. Fully configured and ready for use. This brings unique value to Shareflex.
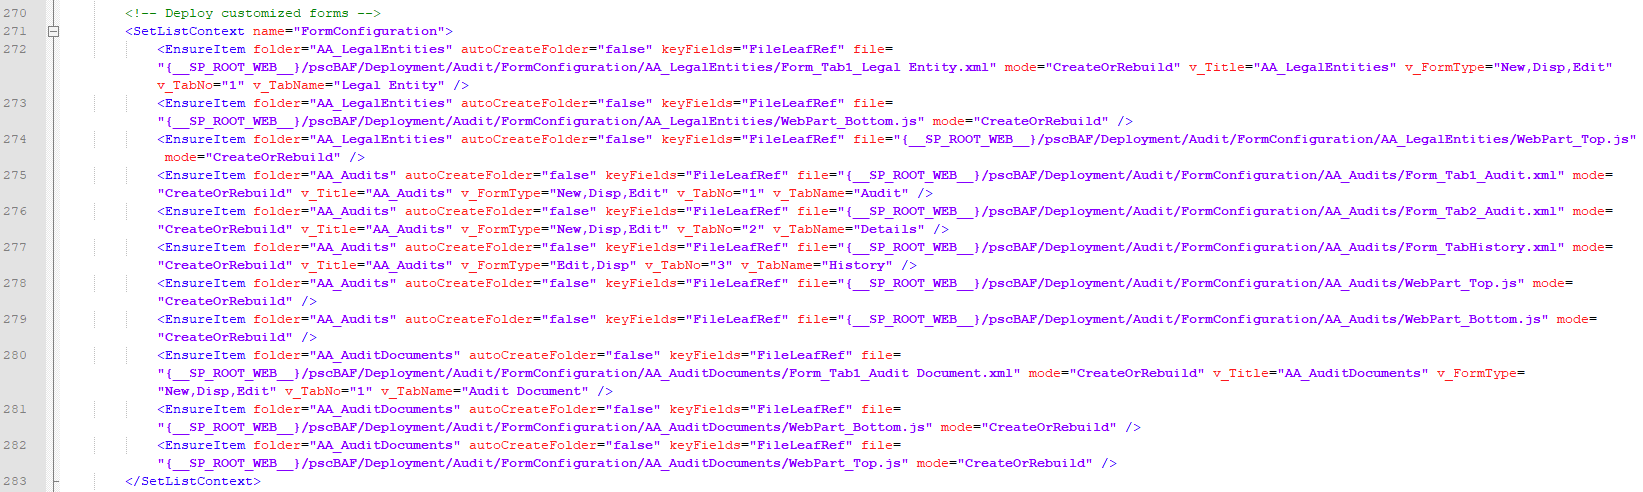
During deployment, using psLib functions in this beeml file you directly deploy the subsite, lists, fields, views and code. Some design elements (like forms and workflows) are copied from the ..\pscBAF\Deployment\[ApplicationName] directory (ApplicationName is configurable).
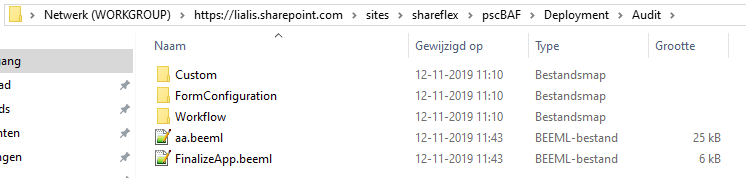
For instance below piece of code copies form-related .xml and .js files from the ..\pscBAF\Deployment\Audit\FormConfiguration\ subdirectories to the ../pscBAF/FormConfiguration/ directory:
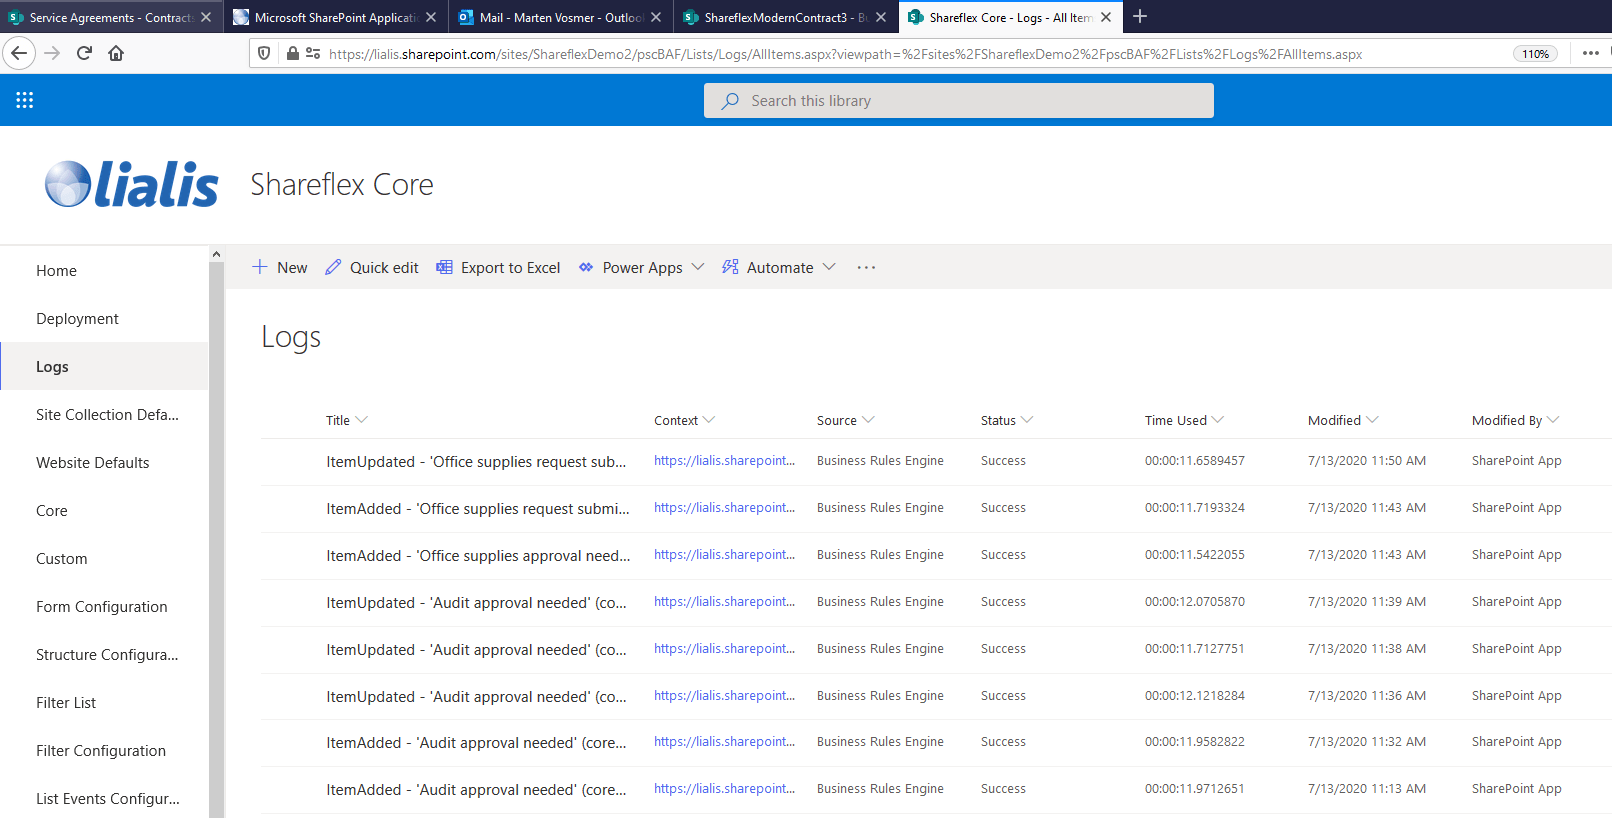
Additionally, Shareflex offers a logging view which is useful for Administrators to debug workflow operations.
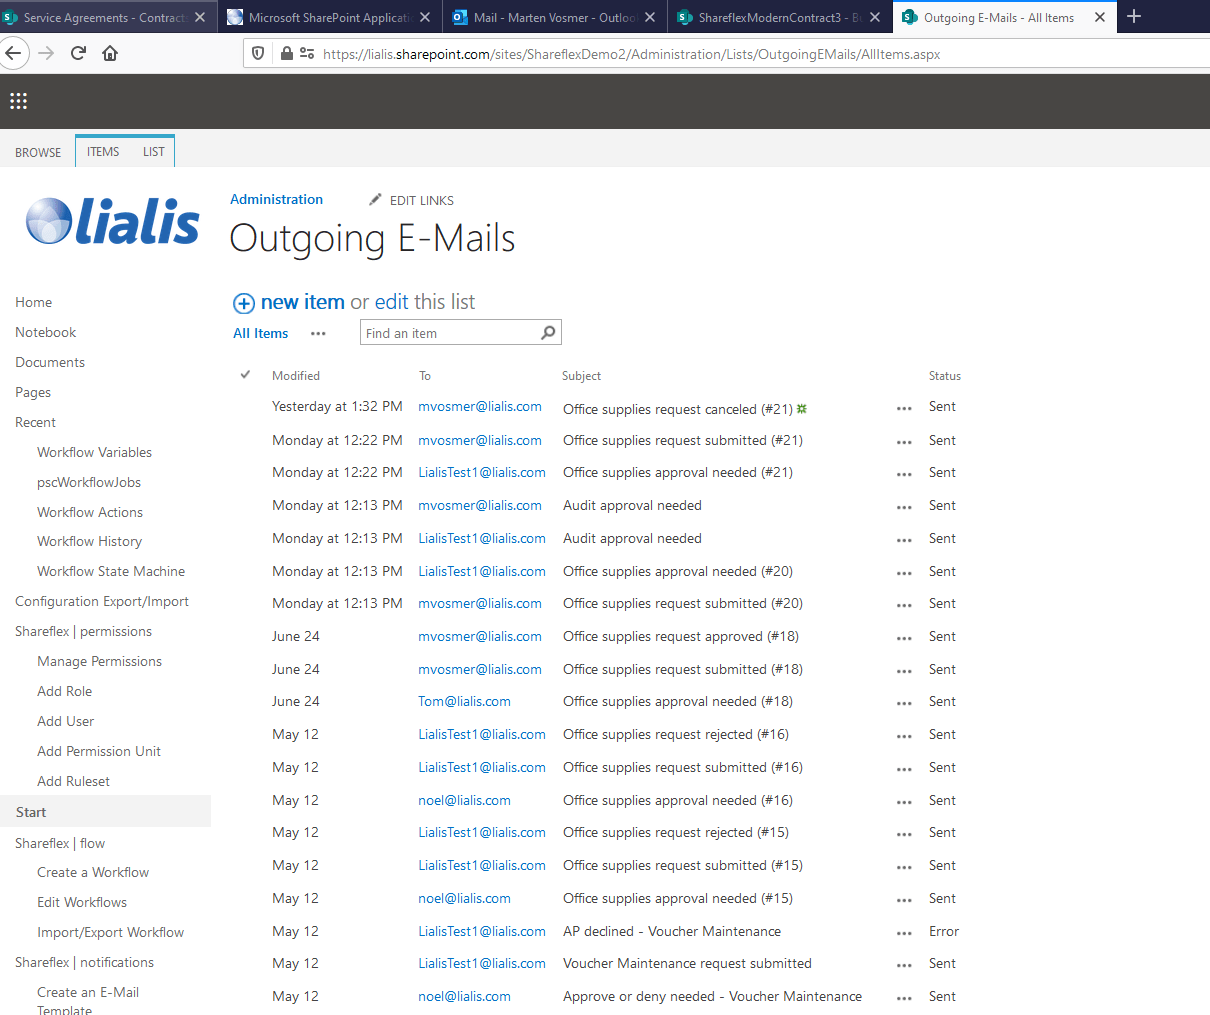
Finally, a user can view a list of all workflow e-mails. In case of an error the Administrator can resend an email.
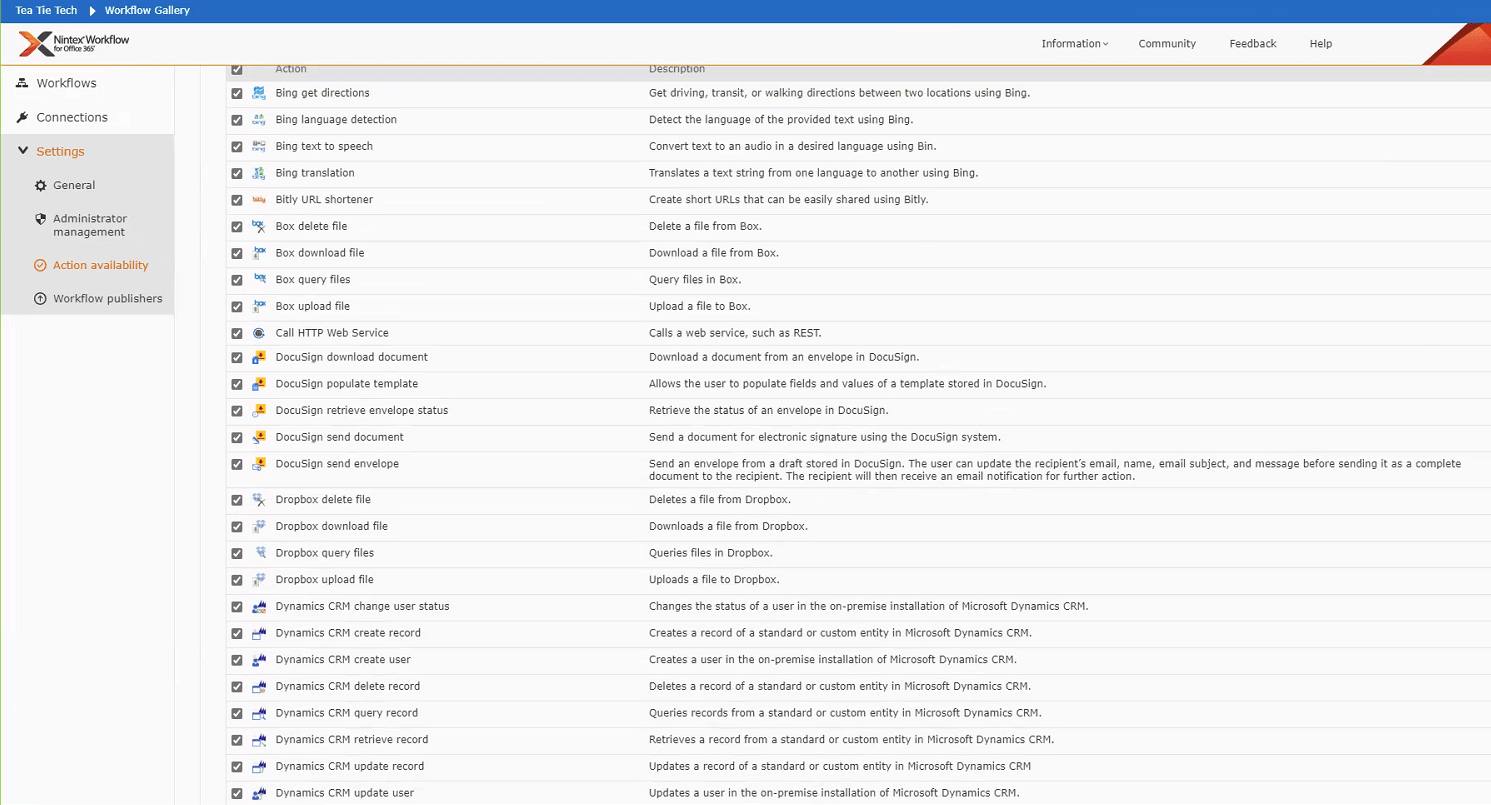
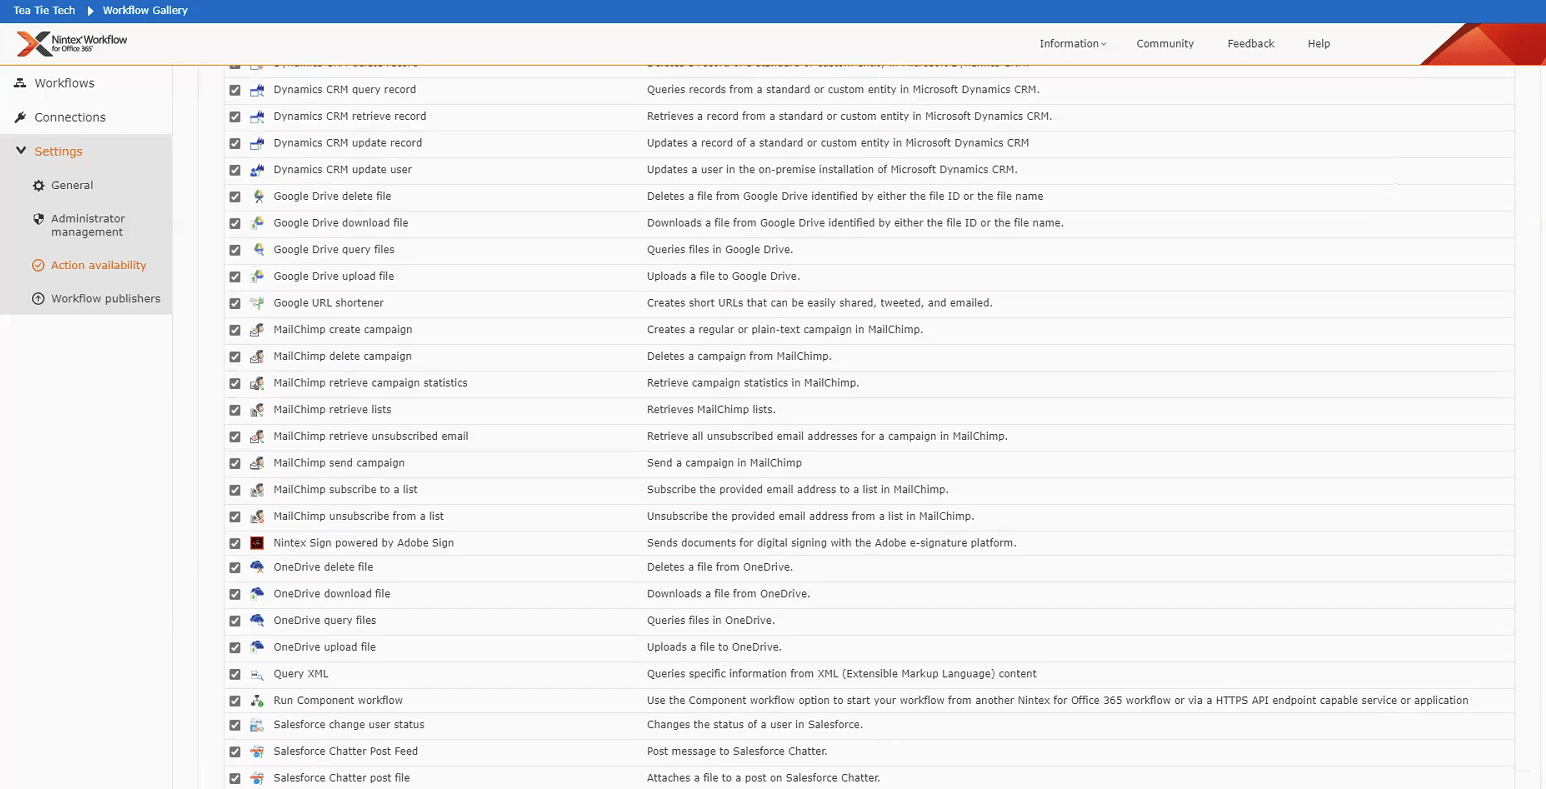
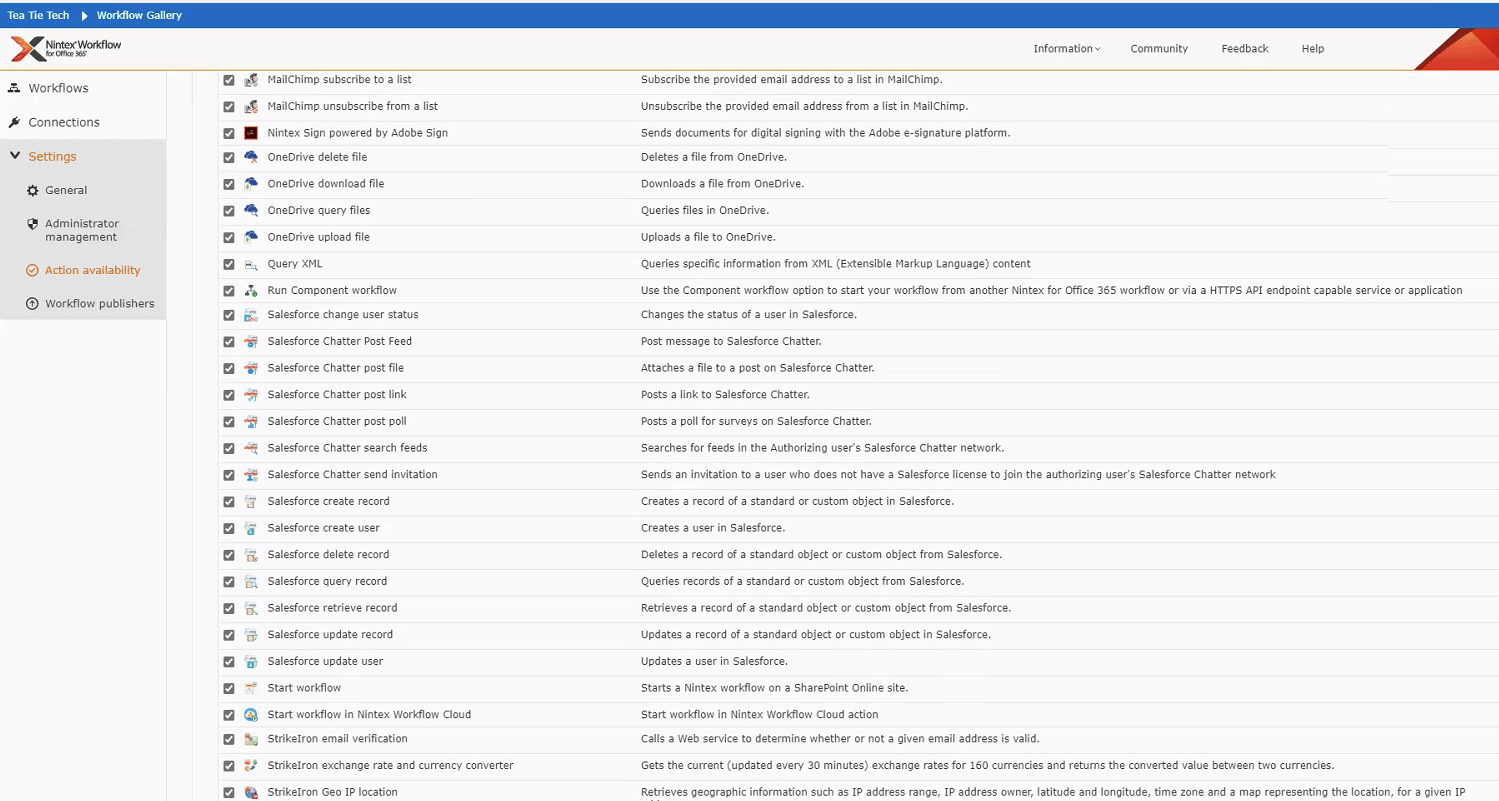
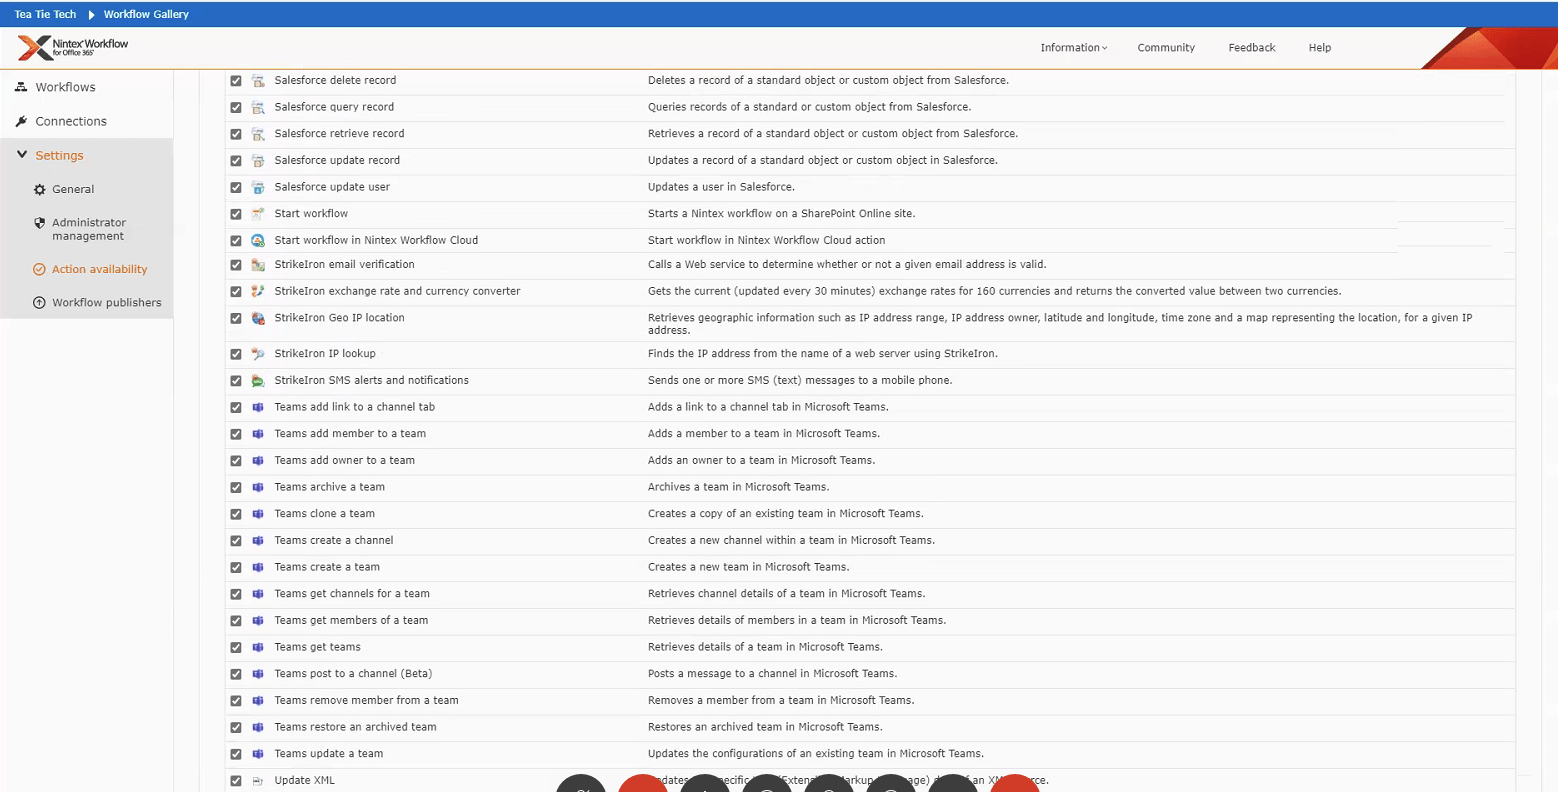
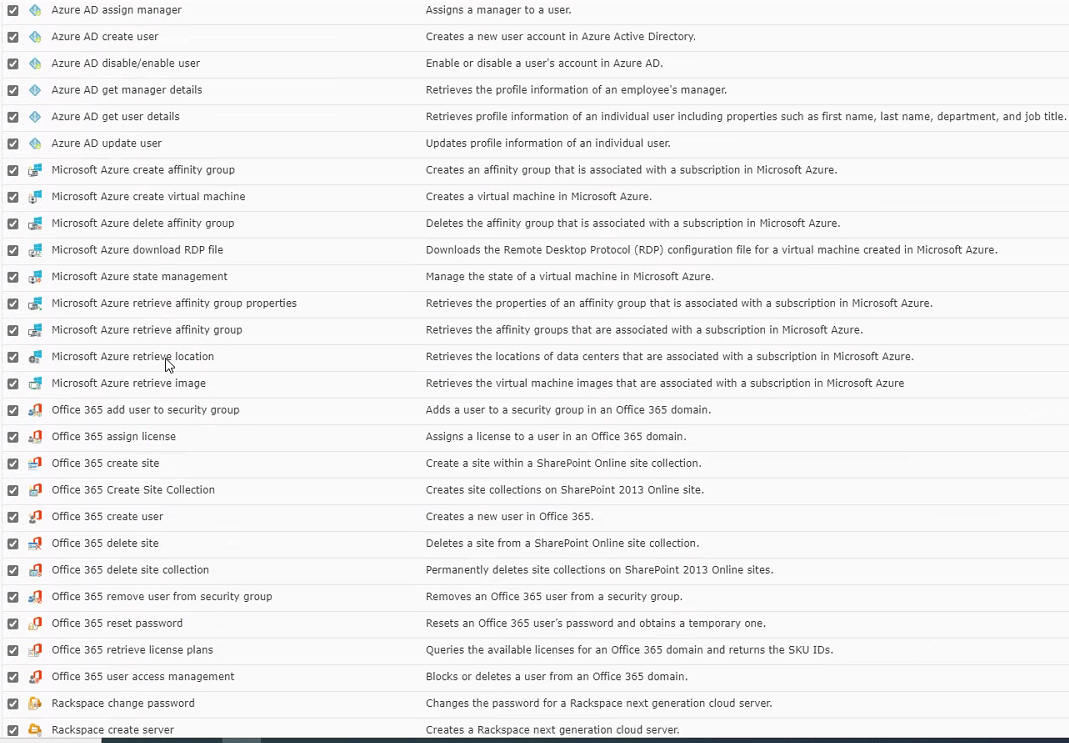
4. Integration
Nintex is a cloud based solution and multiple activities run on the Nintex cloud. That’s why it supports integration with multiple external systems as well as RESTful APIs support, examples are integrations with CRM, Sales Force, ERP, Amazon etc.
- Microsoft
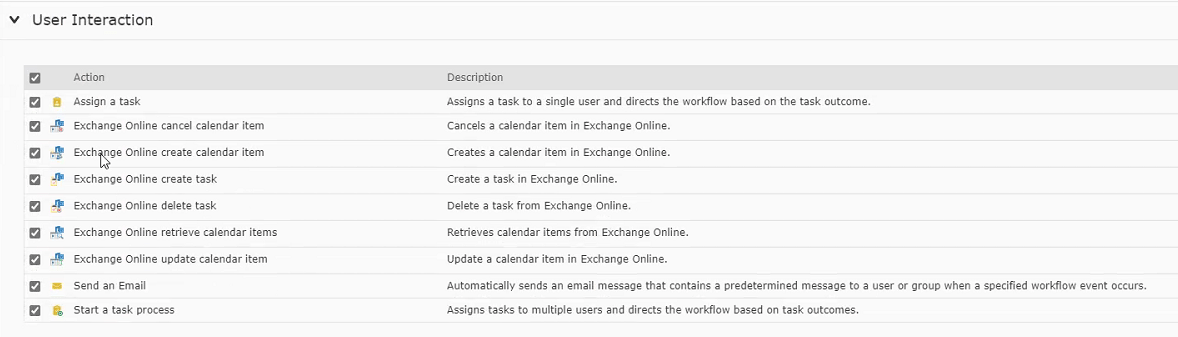
2. User Interaction
3. Social

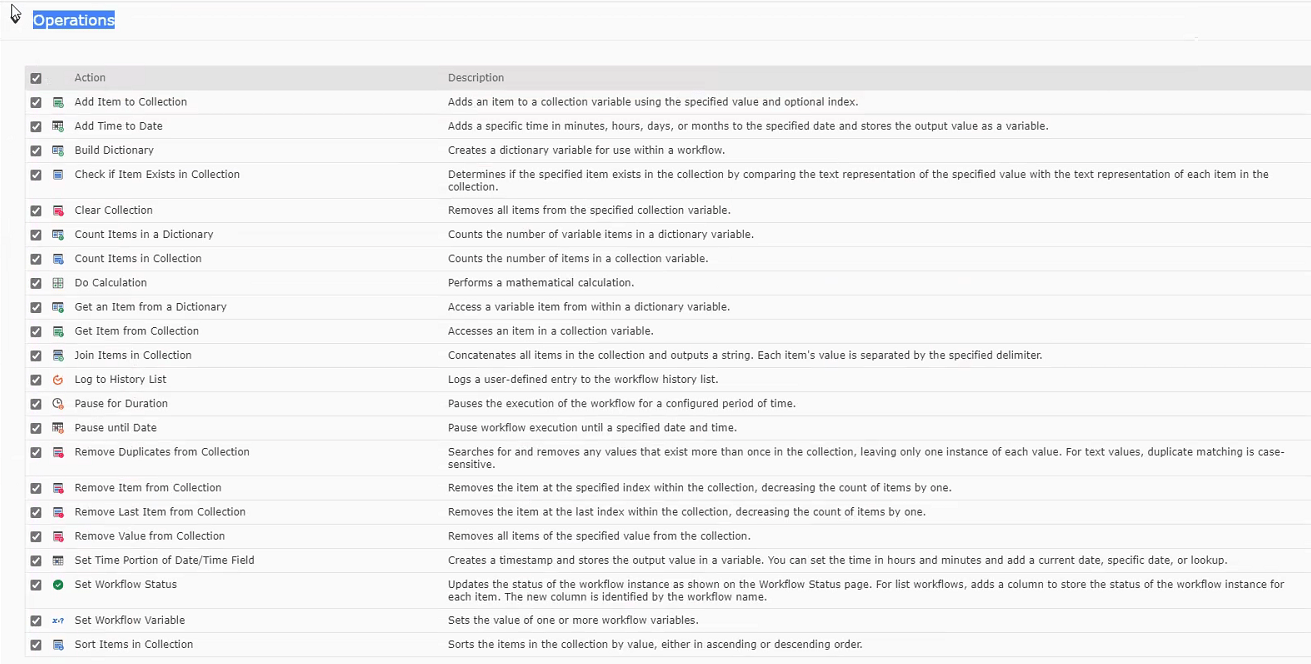
4. Operations
5. Pricing