Installing Shareflex on your SharePoint Online Tenant
Updated on Nov 4, 2025 by Marten Vosmer and Tom van der Staaij
This post will guide you through all the steps and understandings that are necessary to install Shareflex on your SharePoint tenant.
Management Summary.
The ready-made Shareflex solutions Document Control (QM), Contract Management and Document Management for SharePoint Online (SPO) have been developed with Shareflex Services. Shareflex Services and the Shareflex Solutions are created and owned by Portal Systems AG. Lialis is an implementation partner.
After purchase, the Shareflex application will be deployed at a specific customer SPO site, such as https://customername.sharepoint.com/sites/qualitydocuments.
All data and application design are stored on the customer’s M365 tenant within the SPO site.
SPO excels in MS Office integration, data storage, and providing data change logs and restore capabilities. However, a limitation of SPO is that it does not allow customers to run a centrally based program that can interact with the data in SPO. This functionality is essential for complex business workflow applications like QM.
For example, during workflow approval, it is crucial to set the record under approval to read-only for users to ensure the integrity of the approval workflow outcome.
Workflow tasks must be created, and permissions need to be changed constantly as the workflow progresses. When a new record is approved, it must replace the current record, and the previous version must be archived. SPO alone cannot manage all these tasks. For the end user, it looks like they are creating a new record in QM, but in reality, the end user signals the customers SPO environment to instruct a Shareflex Service to create the record in the customers SPO list and set the appropriate permissions. During this process, the customer’s SPO sends all records metadata (like title, category, valid until date, version number etc.) to the Shareflex Service, enabling it to create the item in the customers SPO list. The Shareflex Service ensures this work is flawlessly executed at the customers SPO site where QM resides.
To simplify, the end user can only upload / interact with documents (Word files for example) to the SPO record independently (without Shareflex involvement); everything else is managed by the Shareflex Service.
Shareflex Services handle sending emails, adding users to groups, display version logs, restore record versions and much more. Approximately 100 content management processes in the customer’s Shareflex app SPO site ensure the Shareflex application runs smoothly, fast and efficiently.
Metadata is typically not highly confidential, whereas documents are.
Documents do NOT pass through the Shareflex Services!
The bottom line is that without a central service like the one provided by Portal Systems, it is not possible to run a complex application like Document Control on SharePoint Online.
Lialis as implementation partner and Portal Systems as software vendor guarantees that the used Shareflex Services do not store any customer data, only process it.
If the customer decides not to renew the Shareflex subscription, Portal Systems will discontinue the above services. Consequently, all data remains viewable on the customer’s SPO site, and can be downloaded, exported, etc., but saving data will no longer be possible.
Why is Shareflex needed?
The Shareflex Online Solutions are ready-made or custom build applications for digital mapping, automation and optimization of business processes. The Shareflex Online Solutions are based on Microsoft 365 and the Shareflex Online Services. The Shareflex Online Solutions offer all important functions required for company-wide document and file management. Furthermore, individualizations can be made to meet the specific requirements and the continuous changes in the business environment. Shareflex Online Solutions are based on Microsoft 365, which is extended by the Shareflex Online Services. Shareflex has been created due to the limitations of SharePoint Online.
SharePoint Online consist of the following parts (high level).
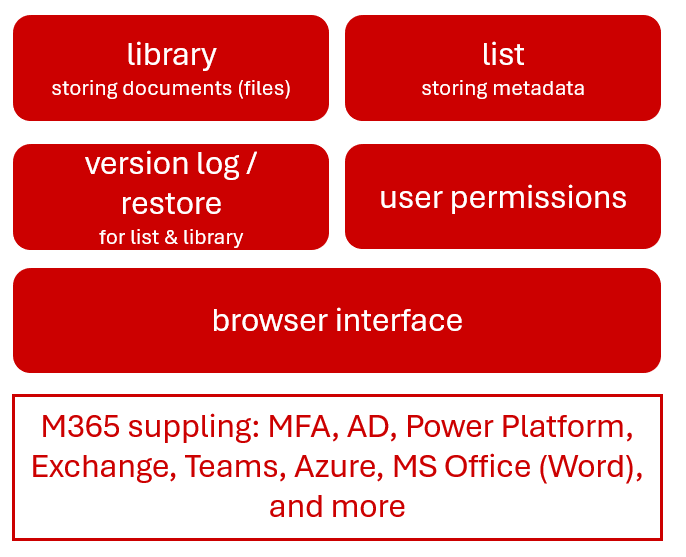
SPO does not offer the possibility to run complex background actions for end-users using full permissions.
This function is needed to dynamically set and change the permissions for list and library items during approval workflows because end-users cannot have these permissions to ensure content integrity.
For example, during a Document Control record approval workflow, the permissions of the record under approval are set to read for all users. The record under approval may not be modified while it’s under approval.
- The first person who is requested to approve the record will get edit permissions to the workflow task (list item stored in a SPO task list).
- After approval, the permissions of the workflow task are adjusted. The first person may no longer edit the workflow task; now the second person gets edit permissions to the next workflow task because he/she must do their workflow work.
- After completion of the workflow, the record gets a new status to be approved all users get read permission again
The above flow description is a simplified example.
There are more functions missing in SPO making it very hard to deliver an application like QM, but it’s not important to outline all these missing functions in SPO in this post.
There is a need for a central service to handle the above tasks and other jobs that SPO or the user cannot perform.
Entra ID Enterprise application
During the setup of the Shareflex platform on the customer’s SPO tenant, permissions are granted to a so-called Enterprise application, limited to a specific customer’s SPO site where QM (or another solution) will be installed. This Enterprise application, along with the SPO REST service, the Microsoft Graph API and the Shareflex services, will handle all operations in a Shareflex application that cannot be performed by the end users themselves.
The schema below outlines, at a high level, the parts involved when a user creates a new Shareflex Document Control record, for example.
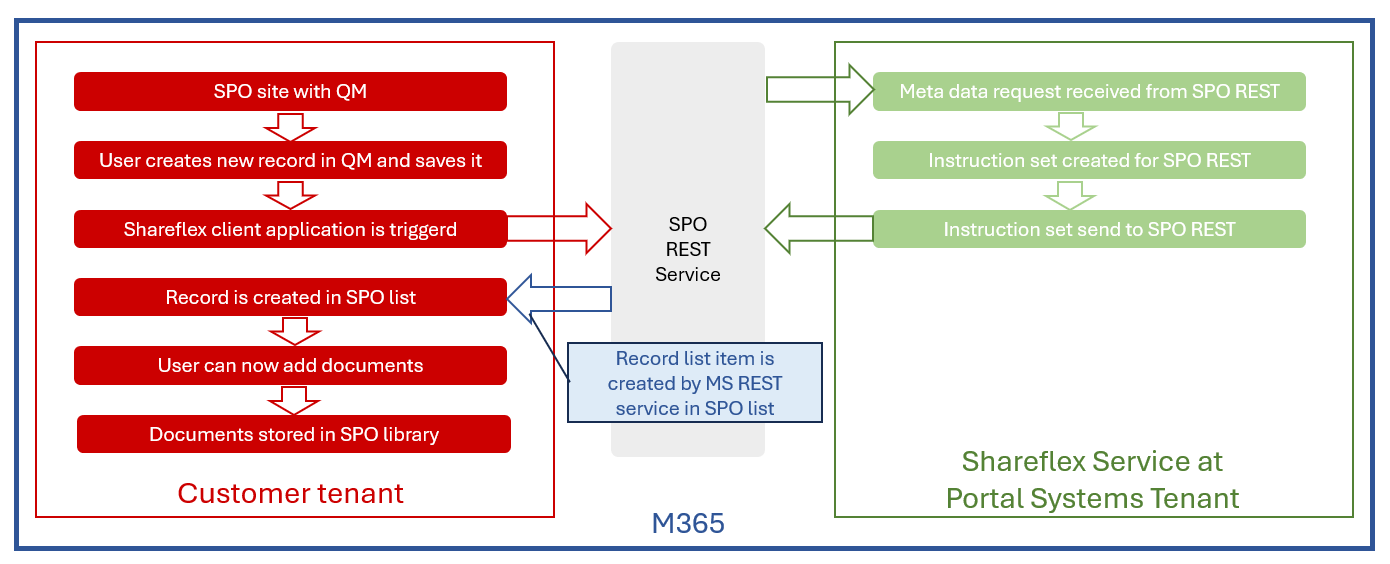
IMPORTANT documents / files are not handled by the Shareflex service system.
Workflows
Portal Systems has chosen to create their own workflow application functionality / design. The SharePoint Online workflows and Power Automate workflows are not used. The reason for this choice is that creating their own workflow user interface and mechanism allows them to deliver an exceptional workflow experience to the end users. Power Automate workflows are considered too slow and do not support complex business processes, for example. Anyway, it is the choice of Portal Systems to go in this direction.
To deliver secure and trustworthy workflow outcomes and procedure, it is crucial that the content being approved cannot be altered by the user who is approving it, nor may the content under approval be modified by other users. If users can modify the content involved in the approval workflow, the workflow output cannot be trusted and can be inconsistent. To achieve a trustworthy workflow outcome, a mechanism is needed to set permissions for the workflow tasks and the content under approval. Workflow tasks must be created in a specific list, and end users should not be allowed to create, edit, or delete these tasks by default. A document may go through several workflow phases, and in each phase, the permissions for both the workflow task and the content under approval must be set and managed carefully. This permission management cannot be done by the end user, as they do not have sufficient permissions. If they did, the workflow outcome could not be trusted.
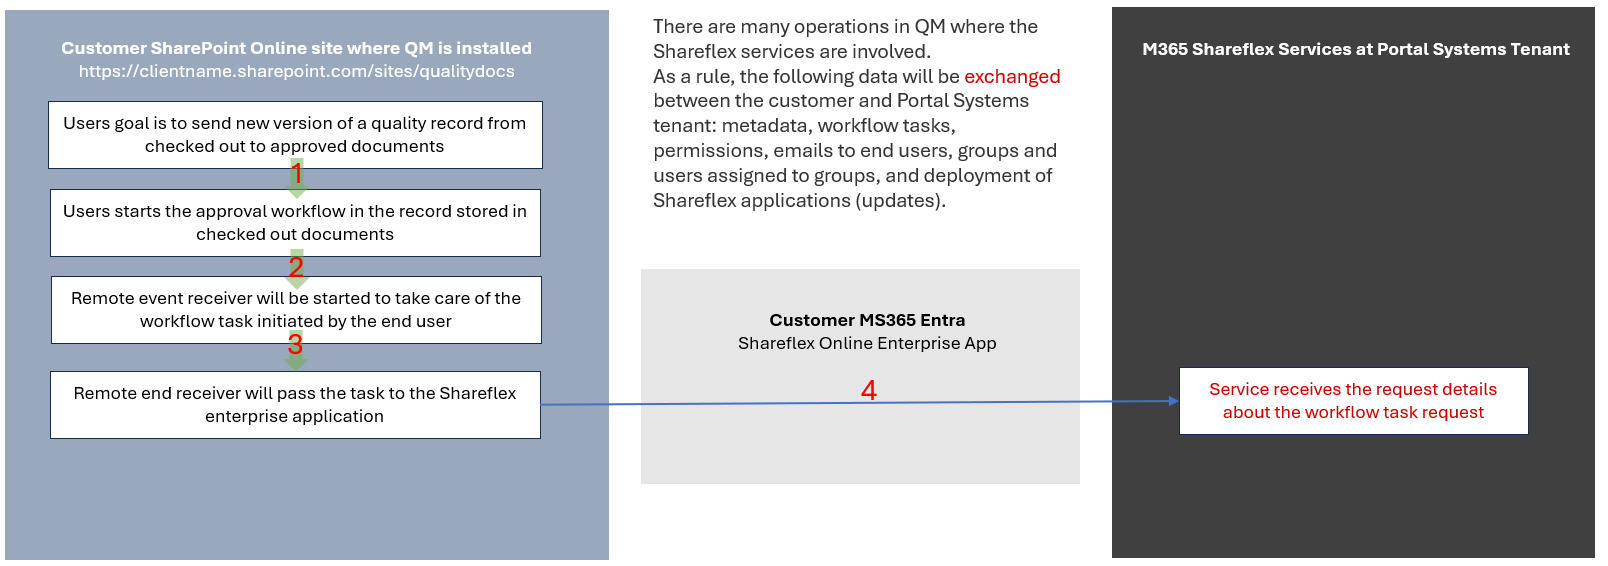
In the next two slides, the Shareflex workflow creation process is outlined in a flowchart in more detail than the previous slide. All the steps taken by the users and the interactions with the Shareflex Services and REST API of SharePoint Online are listed, showing how these interact with the customer’s SharePoint Online site. Please note the red numbers indicating the order of the steps.
During the setup of the Shareflex online platform on the customer’s SharePoint Online tenant, these permissions must be granted as a so-called enterprise application.
All Shareflex applications for all customers make use of Portal Systems-managed M365 services, which are responsible for many tasks like those described above. The processing carried out by Portal Systems in the Azure-based Shareflex Online Service depends on the solution used and the type of customization. As a general rule, the following data will be exchanged between the customer and Portal Systems: metadata, workflow tasks, permissions, emails sent, groups and users assigned to groups, and deployment of the Shareflex applications, which consist of many parts.
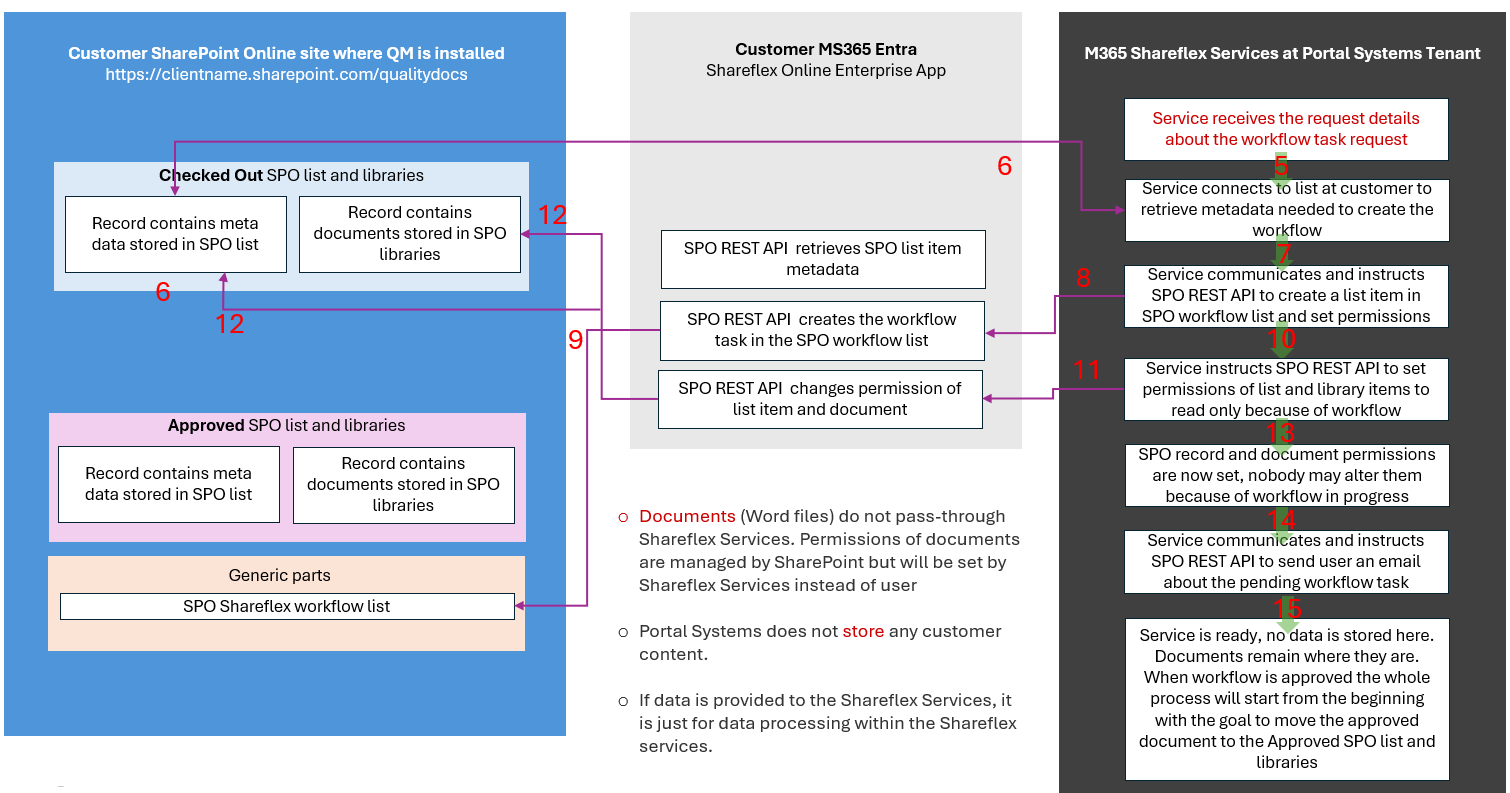
All this customer data is passed from the customer to the Portal Systems services and then passed on to the SharePoint Online REST service of the customers tenant, which carries out the work in SharePoint Online.
Documents (Word files) do not pass-through Portal Systems, and Portal Systems does not store any customer content. If data is provided to the Portal Systems services it is just for data processing within the Portal Systems services. As mentioned this is a typical scenario also suggested by Microsoft to extend SharePoint Online functionality and to access SharePoint Online REST API.
Customers can remove the permissions granted to Portal Systems at any time. As a result, all save operations will fail, though the content will remain on the customer’s SharePoint environment and will be accessible for exports/downloads. If the customer does not renew the Shareflex subscription, Portal Systems will disallow all save operations, resulting in the same scenario.
Customer-based data processing is performed by Remote Event Receivers, which act as a connection between the customer and Portal Systems tenant. All of this is done via MS Graph permissions that Portal Systems services have on the customer’s SharePoint Online environment. The permissions granted to Portal Systems services are limited to a specific SharePoint Online site collections where the Shareflex application is installed in. It’s important to note that these permissions granted by the customer do not allow access for individuals to browse the customer’s environment.
There are many remote event receivers (dozens to hundreds) executing numerous scripts. It’s impractical to track everything happening. The client could theoretically investigate it.
Remote event receivers are only executed when an item is created, updated, or deleted. Executing these rules requires metadata. Because rules are linked to event receivers, a lot of metadata is exchanged.
Microsoft 365
Shareflex Online Solutions support the modern experience of SharePoint Online. Proper functionality is ensured by exclusively using the Team Sites template with the modern user experience, without binding to Office 365 Groups. This means that all Shareflex Online Solutions are deployed within a site collection based on the “Team Site (no Microsoft 365 Group)” template. Additionally, the Shareflex Online and Shareflex Forms apps must be deployed. Therefore, a Microsoft 365 plan that includes SharePoint Online and supports the deployment of Provider Hosted SharePoint Add-Ins is required (this is the case in all M365 SPO plans).
Due to the continuous evolution of Microsoft 365 services, the Office 365 tenant must be configured for the standard release. Support can only be provided if the standard release is configured. Details can be found in the Microsoft documentation.
Permissions
For the installation of the Shareflex App, a user with tenant administrator permissions and a Windows 10 system with the “PowerShell Package MSOnline” installed are required. It is also necessary to check if Multi-Factor Authentication (MFA) is enabled in the Office 365 tenant. If so, the MFA app password is needed when running BEEML scripts.
Creating Subsites
Shareflex Online Solutions use subsites to:
– Separate application data from configuration data.
– Distribute customer data.
– Comply with the limits and restrictions of SharePoint Online.
Since the creation of subsites is disabled by default in the Microsoft 365 tenant, subsite creation must be enabled. Please refer to this section “2. Enabling the creation of subsites” of this manual for details.
Creating Properties
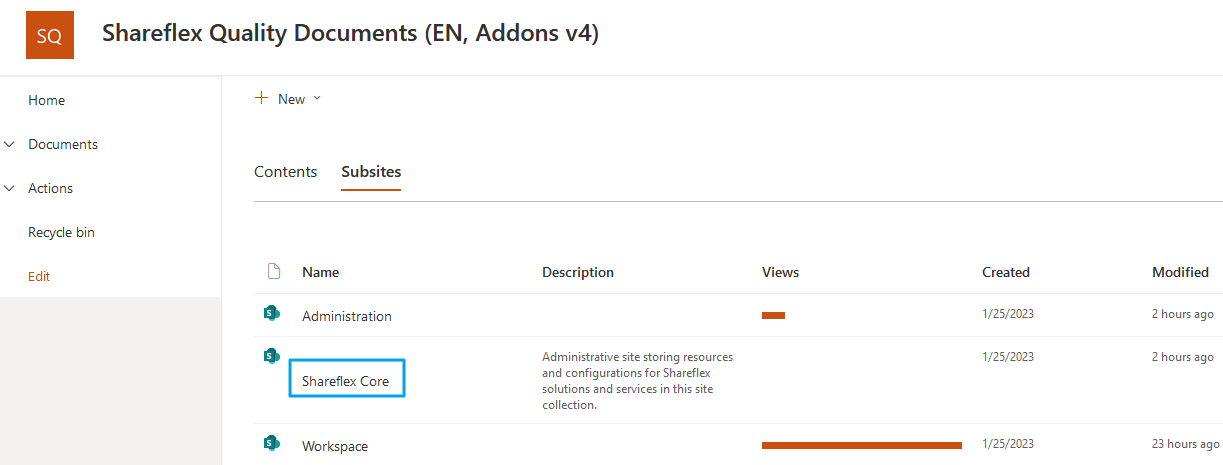
Shareflex Online Solutions store important information such as version, deployment date, etc., in the properties of the Shareflex Core configuration site and the site collection. The Shareflex configuration site “Shareflex Core” is automatically created during the deployment of “Shareflex Core Resources” and contains the resources for each Shareflex solution, as well as a list for log entries.
Therefore, the creation of these properties must be enabled for the site collection. Please refer to this section “3. Using the SharePoint Online Management Shell to update some properties” of this manual for details.
Browser Compatibility
To achieve the best experience with SharePoint Online and modern Shareflex-Forms-based forms, use the latest versions of Microsoft Edge, Mozilla Firefox, Google Chrome, or Apple Safari.
Email Sending
Shareflex Online Solutions leverage Microsoft 365 and Shareflex Online Services to send emails. Emails are always sent within the context of a Microsoft 365 account that has a Microsoft Exchange Online license. Please refer to this section “Creating a mail-enabled security group” of this manual for details.
Required Only During Deployment on the Local System of the Tenant Admin
The Microsoft Online Services PowerShell module must be installed on the Tenant Admin’s computer.
Install-Module msonline
The latest version of the SharePoint Online Management Shell is required.
Install-Module -Name Microsoft.Online.SharePoint.PowerShell
Keep in mind that while it is technically possible to install multiple Shareflex apps (as sub sites) on the same SharePoint site, certain apps (such as Shareflex Contract) will still require their own dedicated site. Additionally, you may want to have a separate test and production environment. Thus, depending on what apps you want to deploy, you may need to follow the steps in this post multiple times.
Needed role: “SharePoint Administrator”
Navigate to the Active sites page within the SharePoint admin center:
https: // <TENANT> -admin.sharepoint.com/_layouts/15/online/AdminHome.aspx#/siteManagement
Click on Create, and in the dialog that opens choose the “Browse more sites” option.

Make sure to select the “Team site” template, and choose “../sites/” as the Site address prefix. All other info (including the site name) is up to you. Click on Finish to create the site.
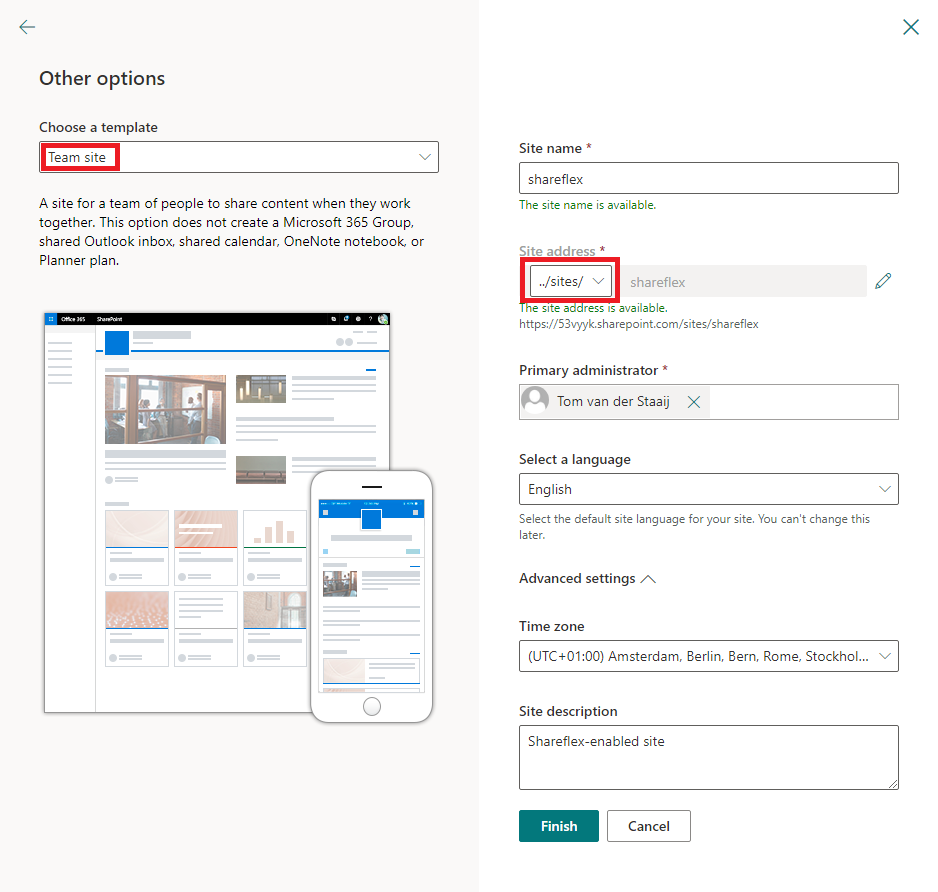
If all went well, the value in the Template column of the created site should be set to “Team site (no Microsoft 365 group)”.

Shareflex uses SharePoint subsites to store core and application-specific resources. If subsite creation has not been enabled in your SharePoint settings, you will need to do so.
Needed role: “SharePoint Administrator”
Go to the Settings page of the SharePoint admin center, then open the “classic settings page”.
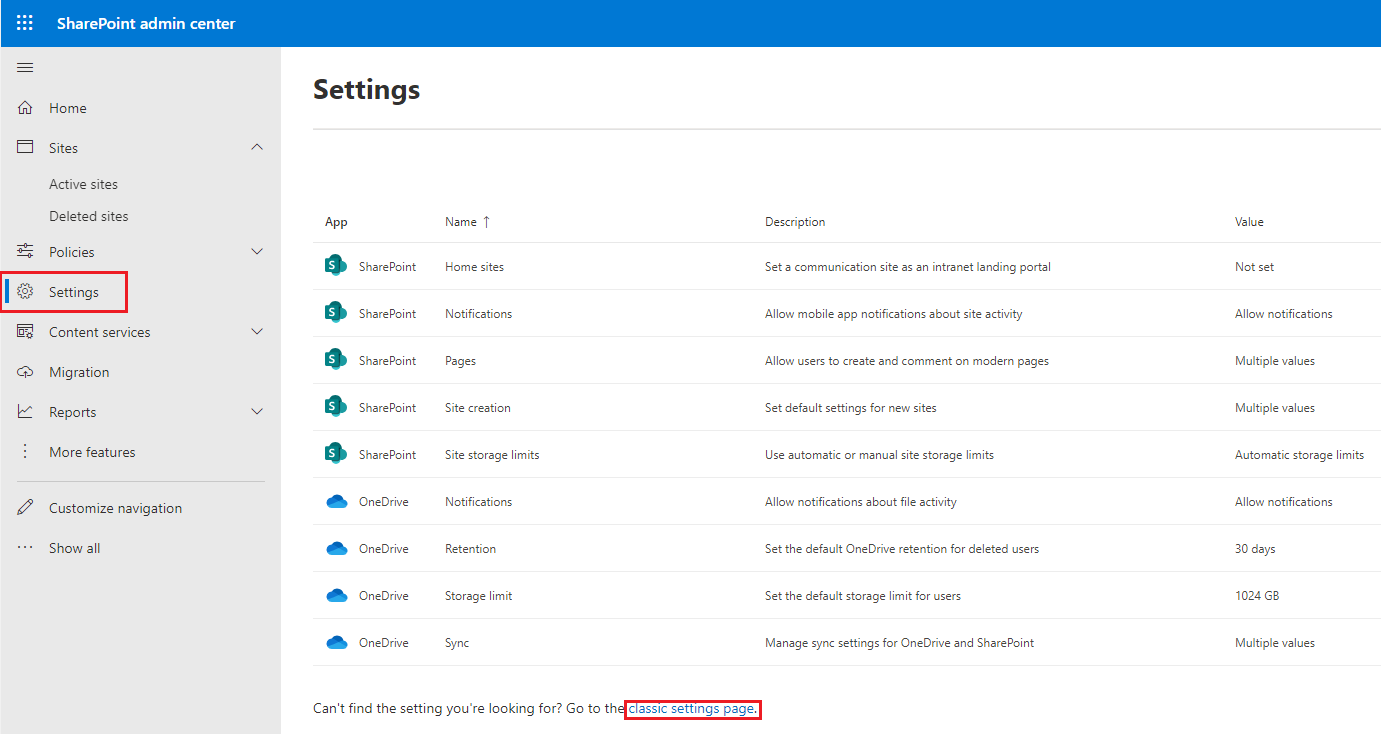
Locate the “Subsite Creation” section, select the “Enable subsite creation for all sites” option, then scroll down and click on OK to save the setting.

Needed role: “SharePoint Administrator”
Three properties will have to be updated through the SharePoint Online Management Shell:
– The DenyAddAndCustomizePages site property has to be disabled so that Shareflex can create custom properties, which is essential for it to properly function.
– The DelayDenyAddAndCustomizePagesEnforcement tenant property has to be enabled to prevent the above property from being reset every 24h.
– The SiteOwnerManageLegacyServicePrincipalEnabled tenant property has to be enabled so that the permission scope of Shareflex’s SharePoint Add-in can be restricted to your created site.
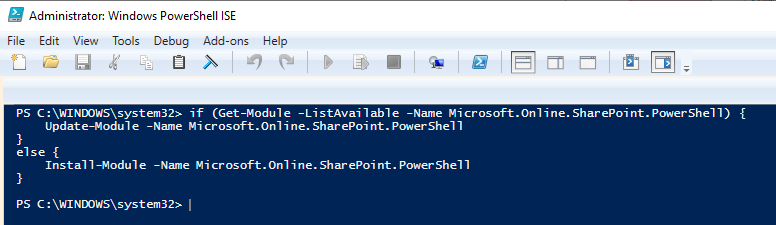
On a Windows device, launch “Windows PowerShell ISE” as Administrator. Execute the following code to install the latest version of the SharePoint Online Management Shell:
if (Get-Module -ListAvailable -Name Microsoft.Online.SharePoint.PowerShell) {
Update-Module -Name Microsoft.Online.SharePoint.PowerShell
}
else {
Install-Module -Name Microsoft.Online.SharePoint.PowerShell
}
During the installation it may prompt you to install additional dependencies, or to trust the repository. If so, click on Yes. Once the installation finishes, it will briefly display a notification message:

Once the module is installed, connect to your SharePoint tenant by executing this command:
Connect-SPOService -Url https://<TENANT>-admin.sharepoint.com
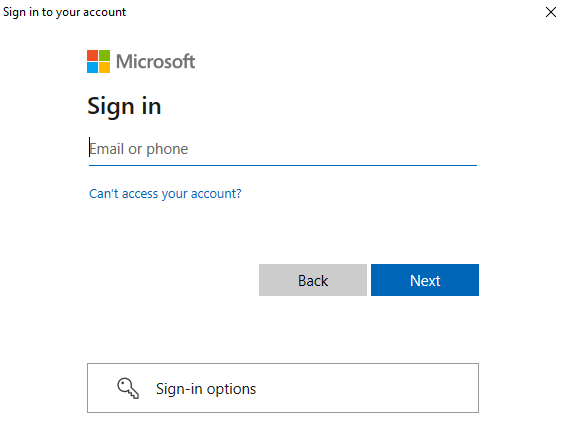
In the Sign-in window that appears, log in using your SharePoint Administrator account.
Execute the following command to disable the DenyAddAndCustomizePages property of the site that you created earlier:
Set-SPOsite https://<TENANT>.sharepoint.com/sites/<CREATED-SITE> -DenyAddAndCustomizePages 0
Then execute these two commands to enable the SiteOwnerManageLegacyServicePrincipalEnabled and DelayDenyAddAndCustomizePagesEnforcement tenant properties:
Set-SPOTenant -SiteOwnerManageLegacyServicePrincipalEnabled 1
Set-SPOTenant -DelayDenyAddAndCustomizePagesEnforcement $True
This step should be skipped if you already have another Shareflex-enabled site on your SharePoint tenant.
Needed role: “Global Administrator”, “Application Administrator” or “Cloud Application Administrator”
Navigate to the URL that was communicated by Portal Systems. The URL should look like this:
https://login.microsoftonline.com/<TENANT>.onmicrosoft.com/v2.0/adminconsent?client_id=<APP-ID>&response_type=token&scope=https%3A%2F%2F<TENANT>.sharepoint.com%2F.default&state=give-consent%20&redirect_uri=https%3A%2F%2Fwebsite-<APP-URL-PART>.azurewebsites.net
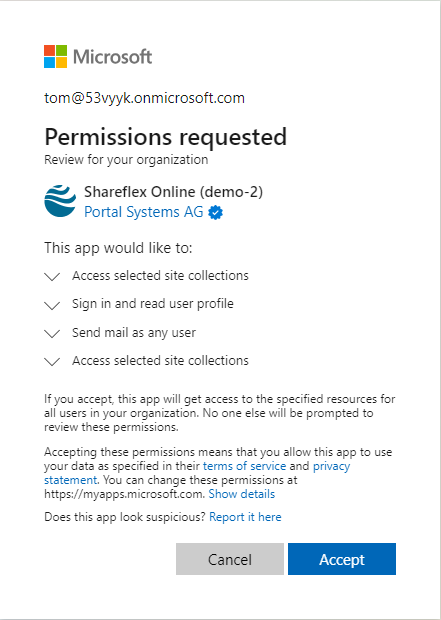
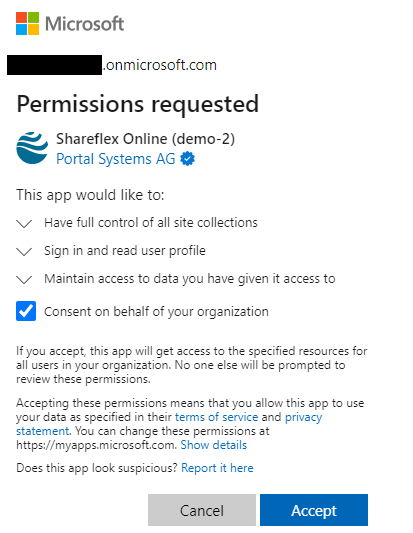
In the consent dialog that appears, accept the requested app-only permissions.
After doing so, you will be redirected to the Shareflex Online app. You can close this page.
In this step app-only access will be configured for the Shareflex Online enterprise app, so that it can access the site you created.
Needed role: “Global Administrator”, “Application Administrator” or “Cloud Application Administrator”
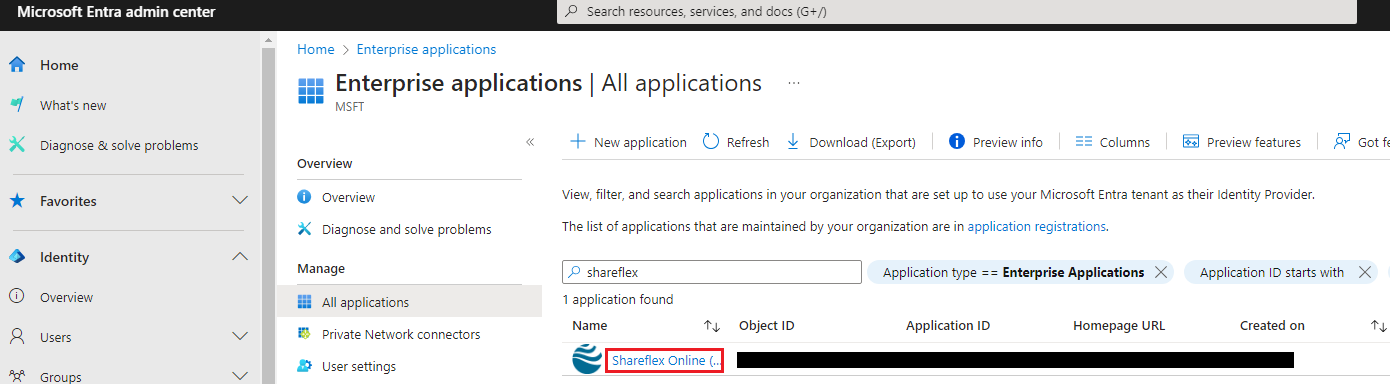
Head to the Enterprise applications page of the Entra admin center, then locate and open the Shareflex Online app.
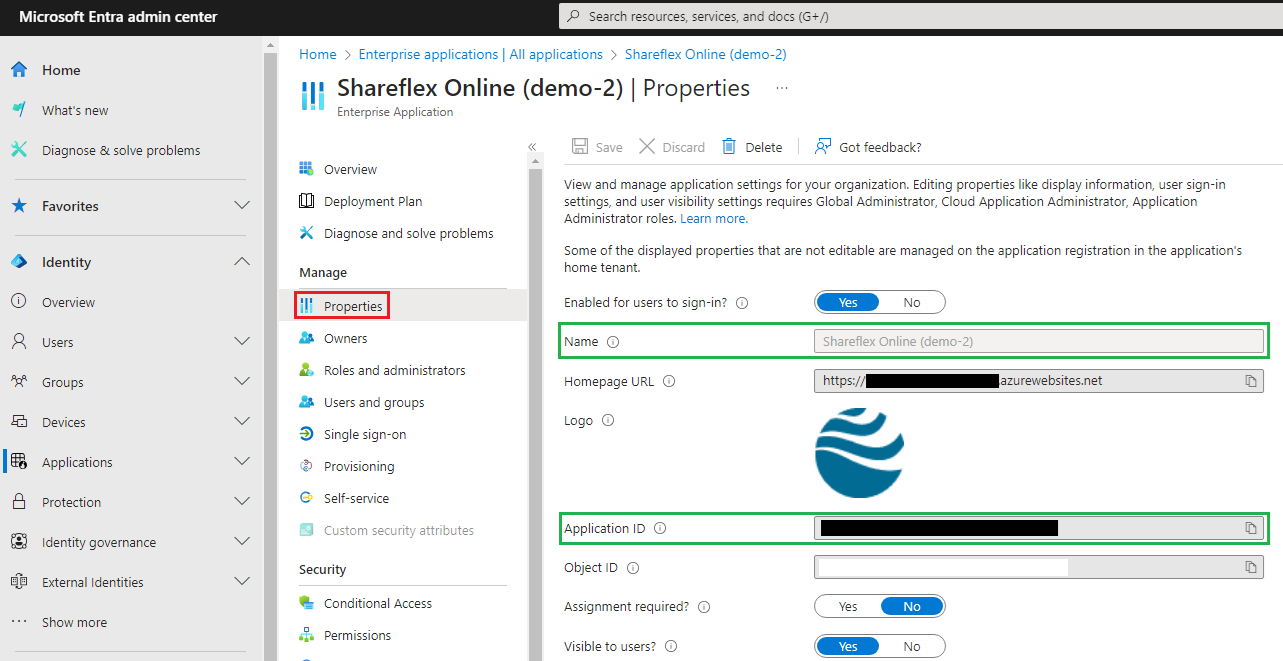
Go to the Properties section, and write down the Name and Application ID somewhere.
Navigate to the following URL to obtain the site id of the site you created:
https://<TENANT>.sharepoint.com/sites/<CREATED-SITE>/_api/site/id
Refer to the underlined value in the below screenshot to locate the site id, then write down this value.

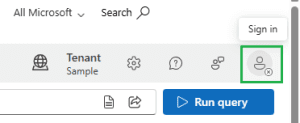
Next, navigate to Graph Explorer and sign in using your Microsoft account. Accept the Enterprise app permissions of the Graph Explorer app, if prompted to do so.
Select POST as request method and enter the following values:
Endpoint URL:
https://graph.microsoft.com/v1.0/sites/<Site-ID>/permissions
Request Body:
{
“roles”: [“FullControl”],
“grantedToIdentities”: [{
“application”: {
“id”: “<Application ID of Shareflex Online enterprise app>“,
“displayName”: “<Name of Shareflex Online enterprise app>“
}
}] }
Make sure to replace the placeholder values with the ones you wrote down earlier.
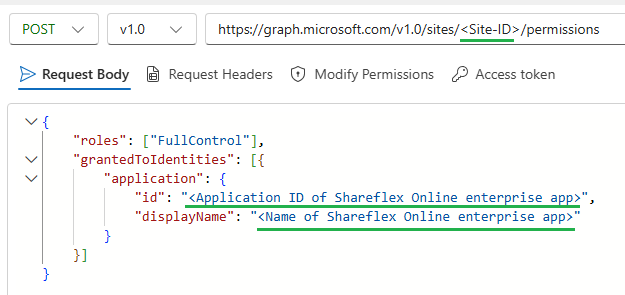
Then click on the Run query button in the top right corner.

If you see a green response status of Created, then the action was successful.

This step should be skipped if you already have another Shareflex-enabled site on your SharePoint tenant.
Needed role: “Global Administrator”, “Application Administrator” or “Cloud Application Administrator”
In addition to the app-only permissions you accepted earlier, at least 1 user account must get delegated access to the Shareflex Online app.
In a nutshell, delegated access means that certain permissions are always limited by the (SharePoint) permissions of the signed-in user.
Note that the Shareflex Online app will only be used for Shareflex provisioning activities (typically performed by Lialis), it won’t be used by end-users.
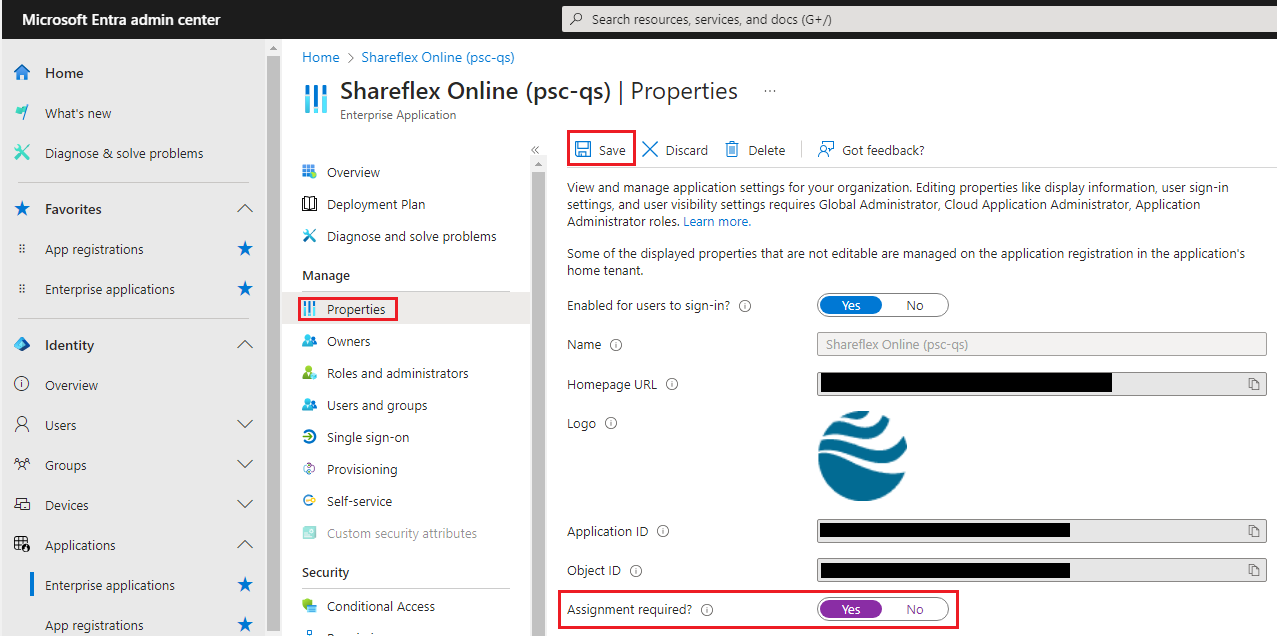
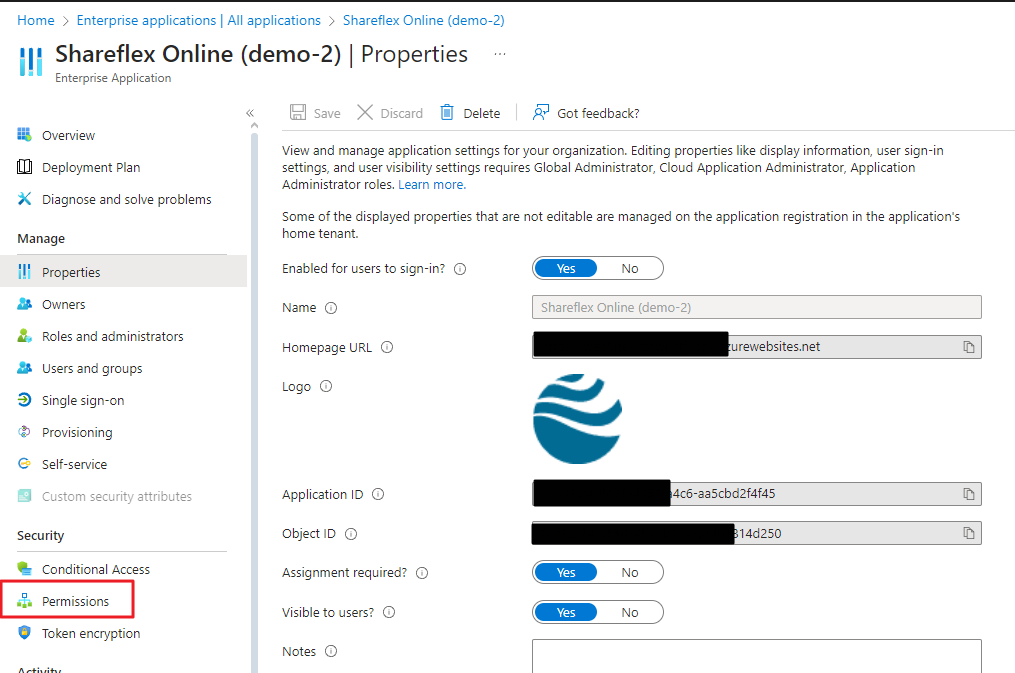
Head back to the Enterprise applications page of the Entra admin center, open the Shareflex Online app and go to the Properties section.
Set the “Assignment required” property to Yes, then click on Save. This will prevent all non-whitelisted users from being able to access the app.
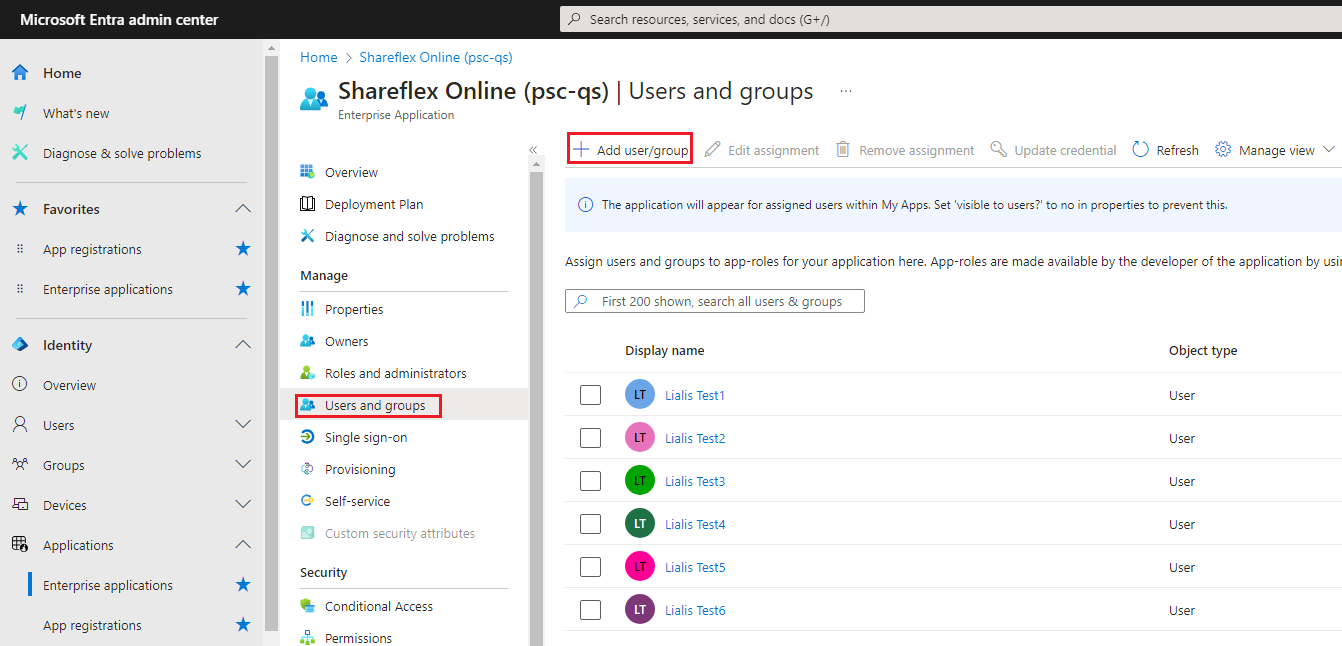
Go to the Users and groups section. On this page you can configure the users that should be able to carry out Shareflex provisioning activities.
The currently signed-in user must be added as well (at least temporarily, to be able to consent to the delegated permissions that will be requested during this step).
All provisioning accounts must be given the Site (Collection) Administrator role for Shareflex site(s) you created.
Lialis must be given access to at least one of the configured provisioning accounts.
Once the provisioning users have been configured, navigate to the URL of the Shareflex Online app that will have been provided by Portal Systems. The URL will look like either
https://<website-APP-URL-PART>.azurewebsites.net
or
https://sfs<NUMBER>.portalsystems.de
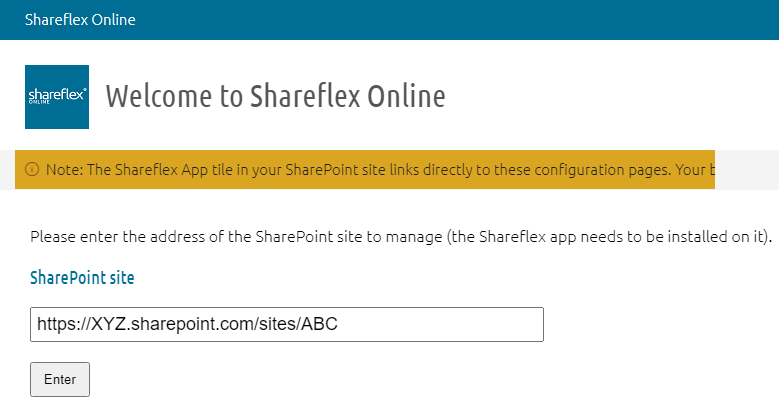
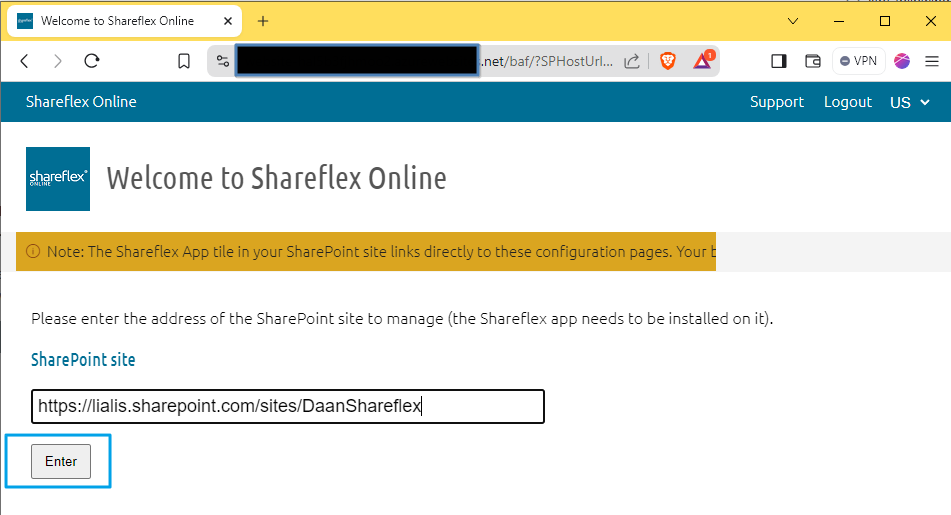
Enter the absolute URL of the site you that you created (e.g. https://contoso.sharepoint.com/sites/shareflex) into the “SharePoint site” field, then click on Enter.
A consent dialog will appear. It looks a whole lot like the app-only consent form you already accepted, but this time it requests delegated permissions.
You may wonder why the consent form requests the delegated permission “Have full control of all site collections” instead of access to selected site collections.
The answer to that is simple: unfortunately Entra ID does not offer a delegated “Access selected site collections” permission scope for SPO (unlike for Graph, or app-only SPO). However, as mentioned before, the effective permissions will be limited by the signed-in user, so do not let the delegated “Have full control of all site collections” permission scare you.
If you’re worried about potential security implications, then you can simply remove all SharePoint Online permissions that the currently signed-in user has to all non-Shareflex sites, prior to accepting the above consent form.
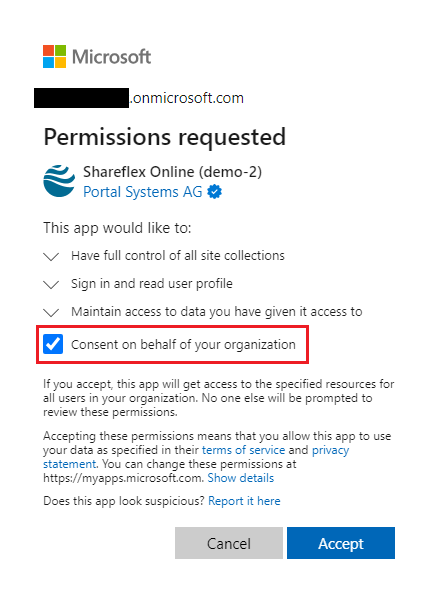
On the consent form, make sure to check the “Consent on behalf of your organization” checkbox (also known as Admin consent), then click on Accept.
You will be redirected to a page that you can close. Note that this page may mention “Access failed” if you do not have the Site (Collection) Administrator role. This is to be expected, and perfectly fine to ignore.

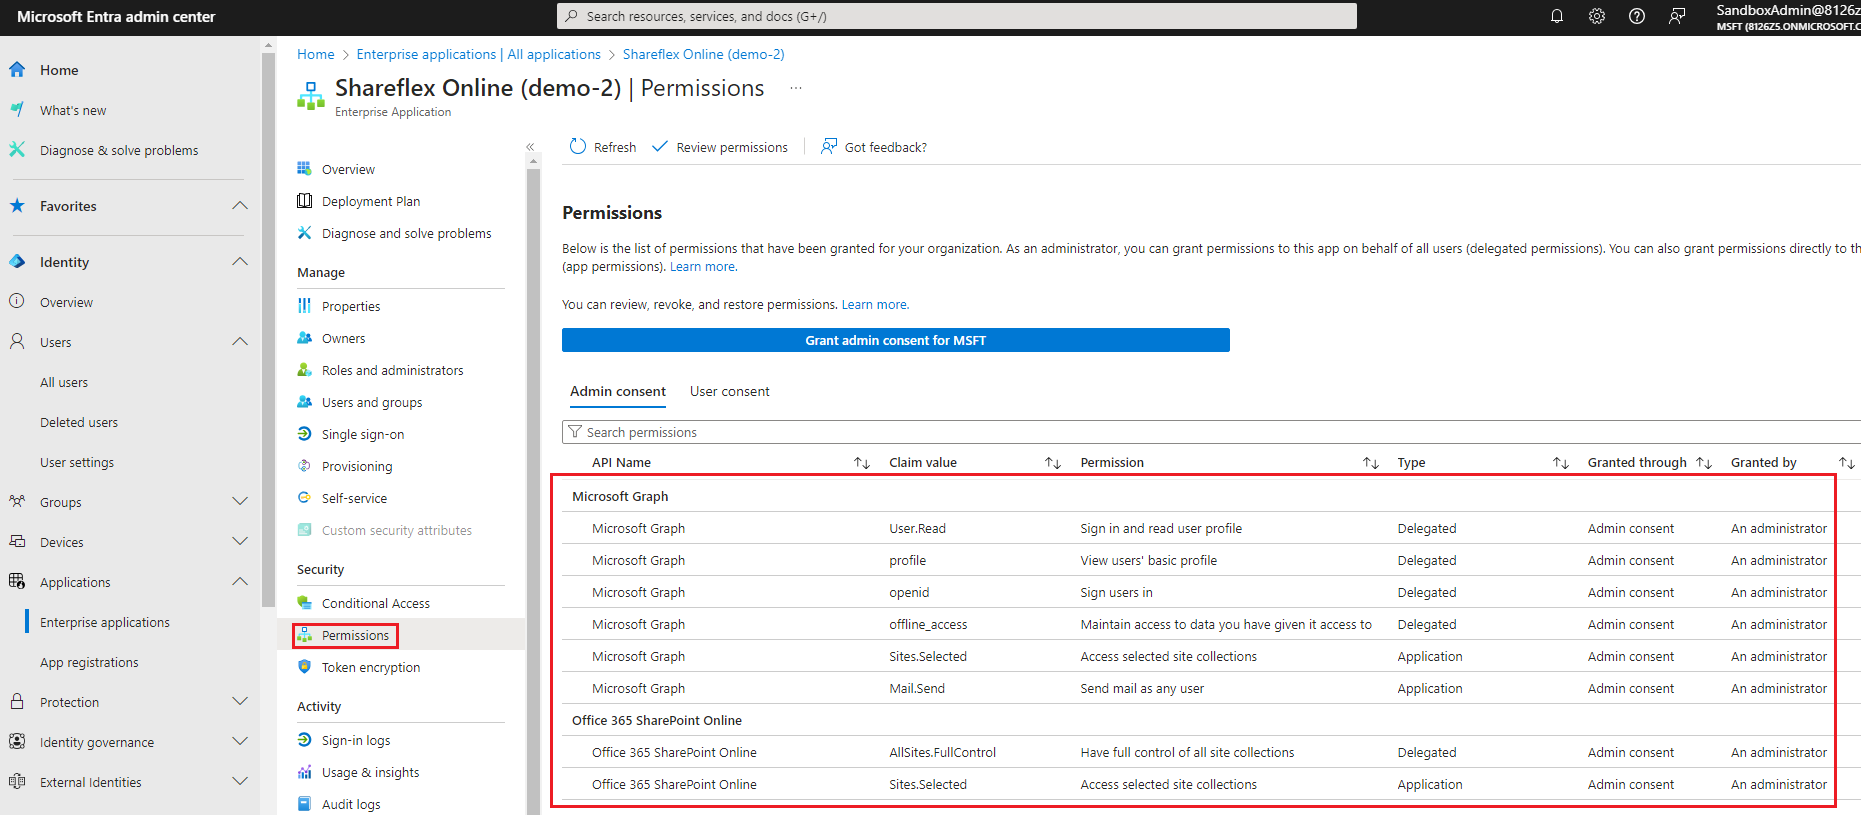
Next, head back to the Enterprise applications page of the Entra admin center, open the Shareflex Online app and go to the Permissions section.
Verify that the listed permissions match those shown in the below screenshot:
At this point, feel free to remove the currently signed-in user from the Users and groups section of the Shareflex Online enterprise app (unless you want it to be used as provisioning account, of course).
This step should be skipped if you already have another Shareflex enabled site on your SharePoint tenant.
Needed role: “SharePoint Administrator”
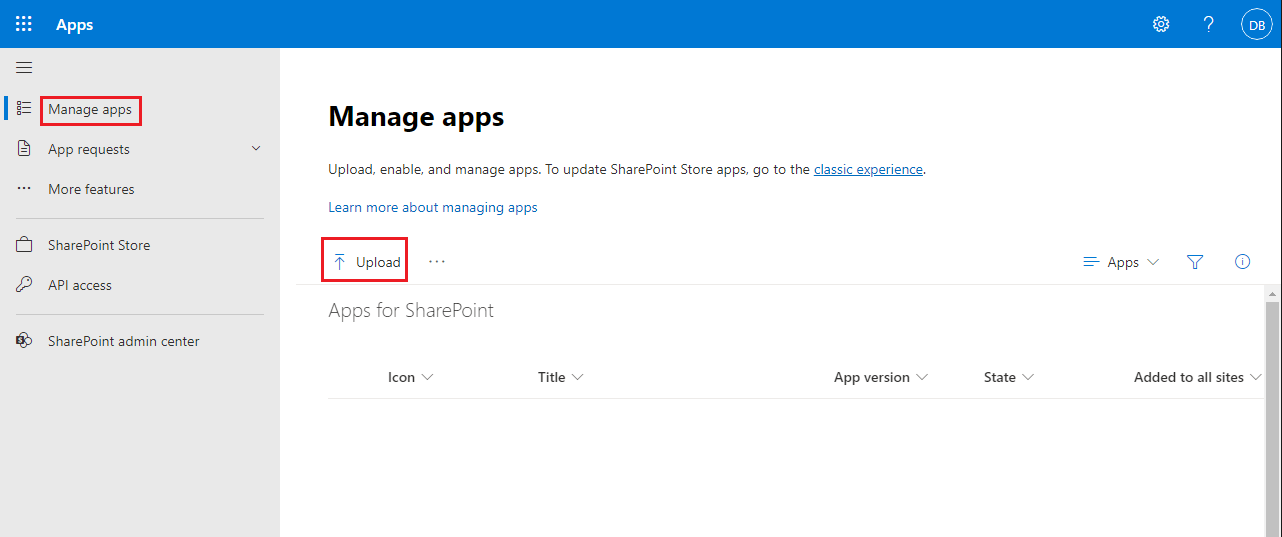
Navigate to the App Catalog page within the SharePoint admin center:
https://<TENANT>-admin.sharepoint.com/_layouts/15/tenantAppCatalog.aspx
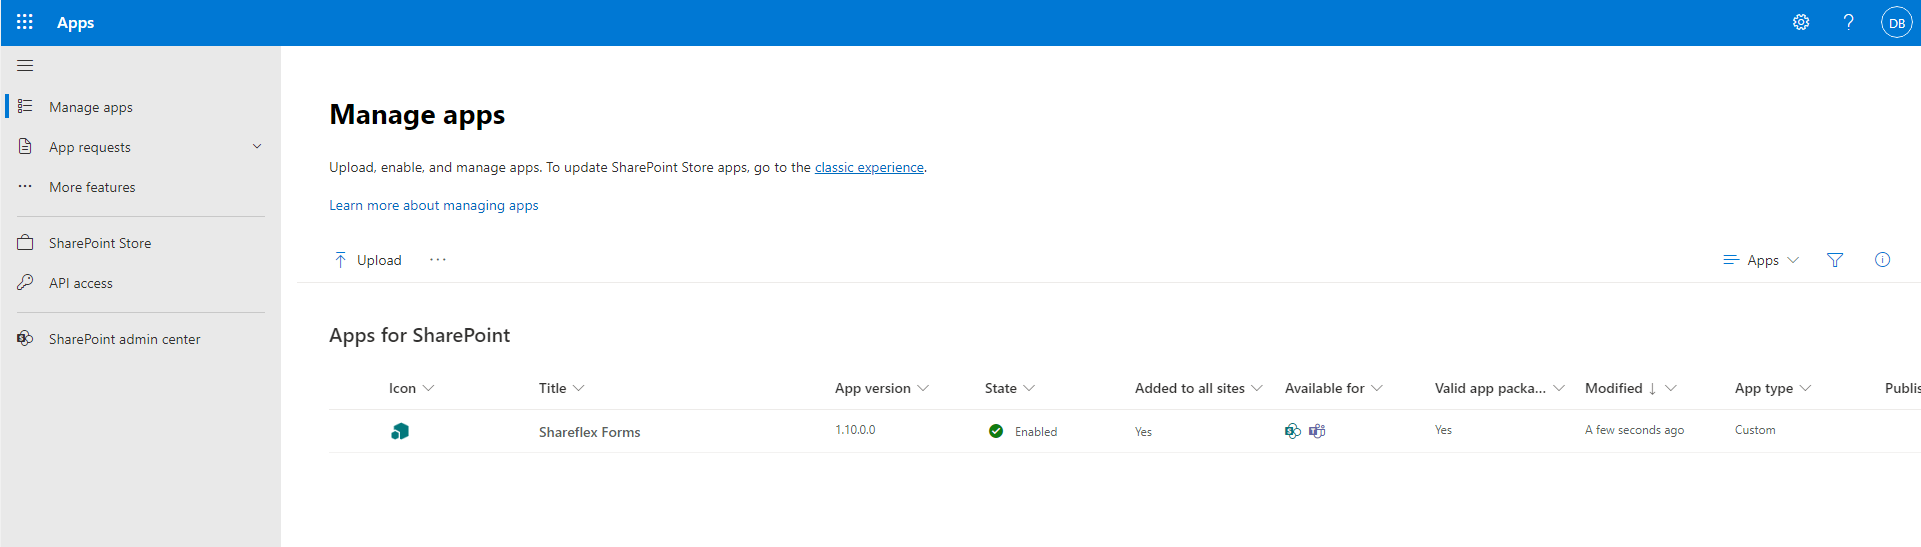
Upload the “shareflex-forms.sppkg” file that Portal Systems shared with you. This SharePoint solution package contains the client-side web parts that are necessary to view Shareflex forms.
Once the upload finishes the “Enable app” dialog should automatically appear.
Select “Enable this app and add it to all sites, uncheck “Add to Teams” and then click on the Enable app button.
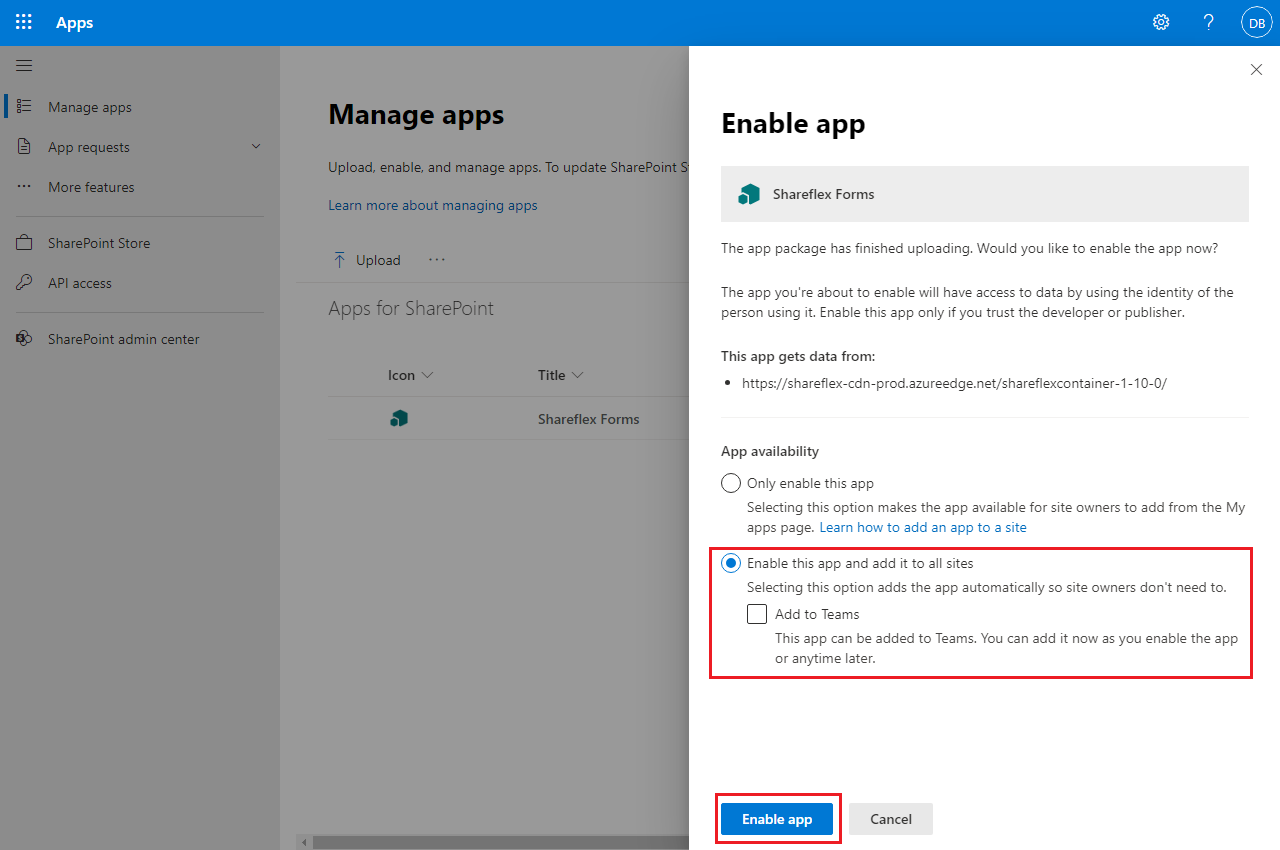
Once enabled it should look like this:
During this step you must be signed in with a provisioning account that has the Site (Collection) Administrator role.
This step is usually performed by Lialis.
Now that all permissions have been properly configured, the Shareflex Online app can be used to install its required Core resources on your SharePoint site.
Navigate to either of the following URLs (depending on what domain was provided by Portal Systems) :
https://<website-APP-URL-PART>.azurewebsites.net/baf/?SPHostUrl=https://<TENANT>.sharepoint.com/sites/<CREATED-SITE>
or
https://sfs<NUMBER>.portalsystems.de/baf/?SPHostUrl=https://<TENANT>.sharepoint.com/sites/<CREATED-SITE>
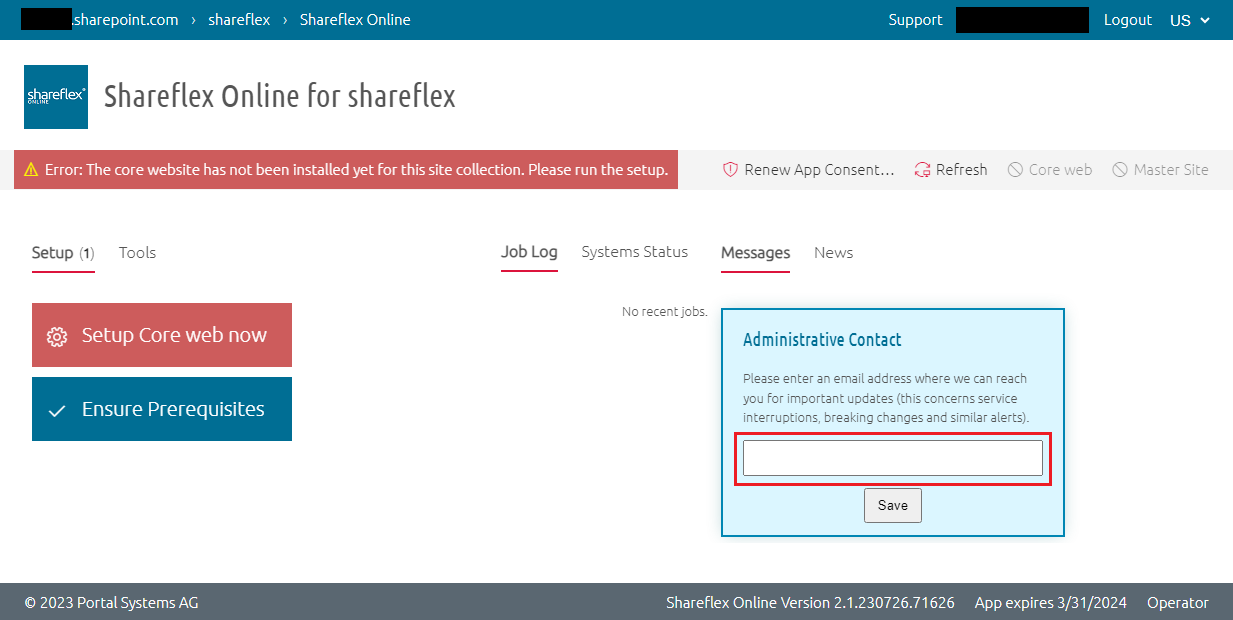
Enter an email address into the “Administrative Contact” field and click on Save.
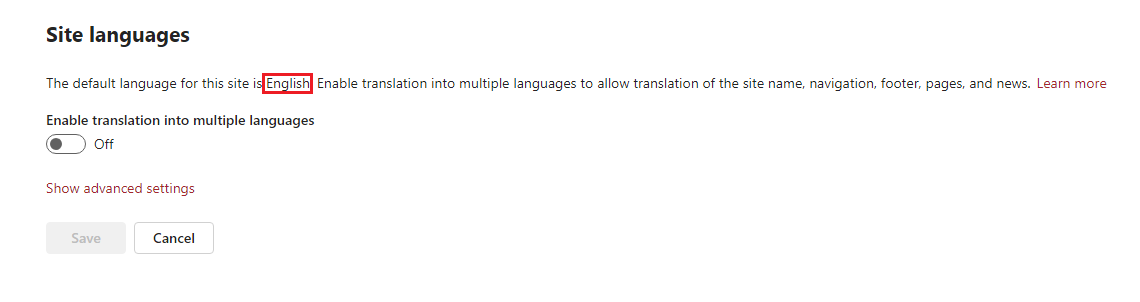
Before moving on, make very sure that the display language of your Microsoft account matches the default language of your created site. This is a technical limitation that (only) applies during the execution of any Shareflex script (including the Core resources).
To check the default language of your created site, navigate to:
https://<TENANT>.sharepoint.com/sites/<CREATED-SITE>/_layouts/15/muisetng.aspx
To check the display language of your Microsoft account, navigate to:
https://myaccount.microsoft.com/settingsandprivacy/language
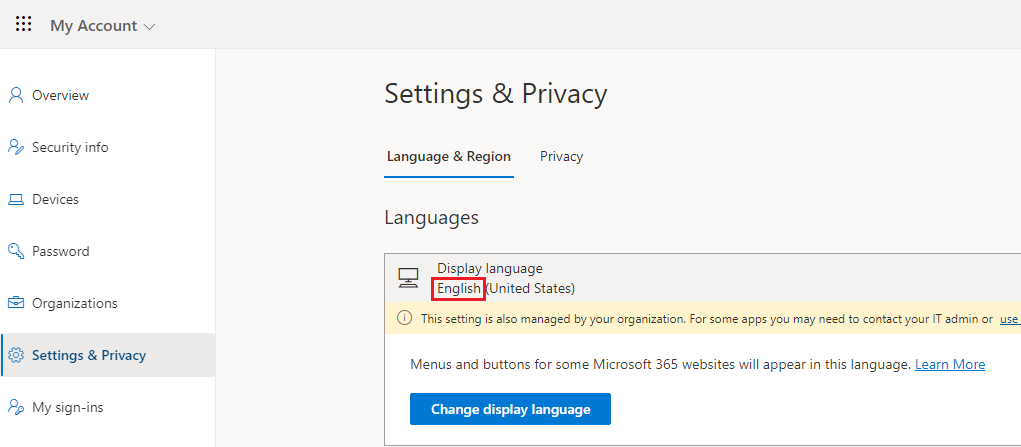
If they are different, (temporarily) change your account’s display language.
You can now start the installation of the Core resources by clicking on “Setup Core web now”, then on OK to confirm.
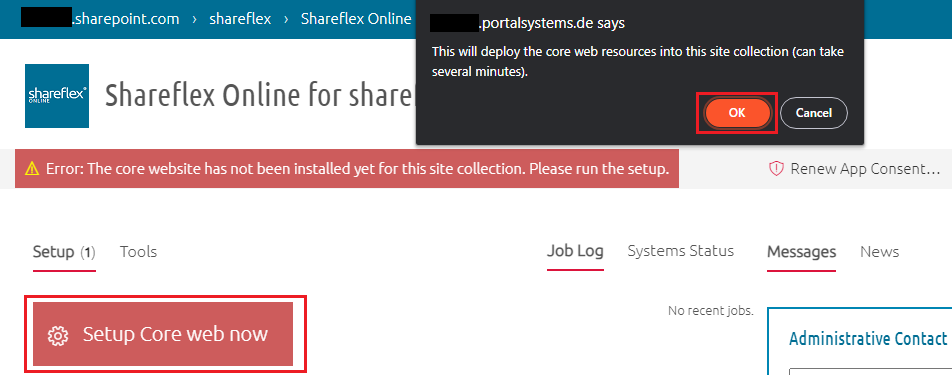
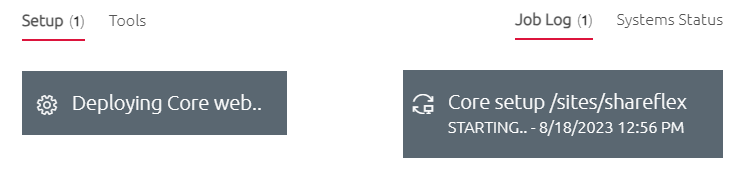
The installation will take a couple of minutes. The page will auto-refresh until the installation completes.
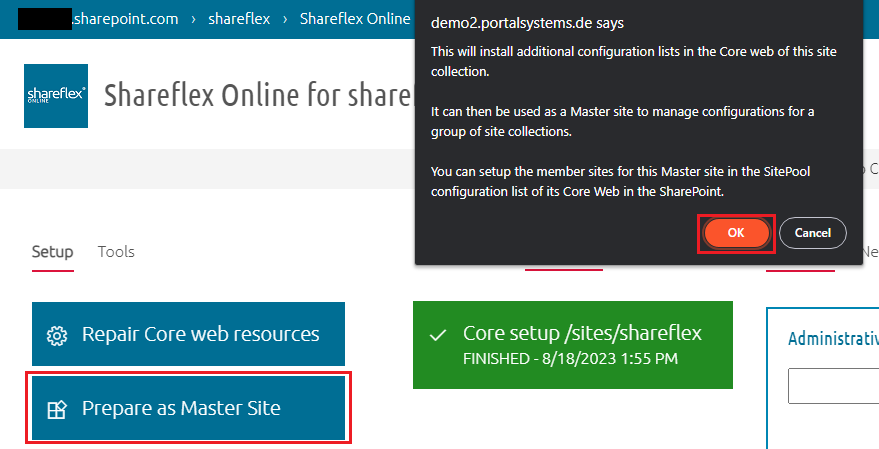
Once the installation has finished (the Job Log status should be green), click on the “Prepare as Master Site” button, then on OK to confirm.
After a few minutes the second Job Log should be green as well.
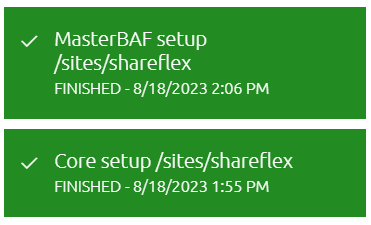
Most of the Shareflex resources will have been deployed to the Shareflex Core subsite located at https://<TENANT>.sharepoint.com/sites/<CREATED-SITE>/pscBAF. Feel free to look around.
You can also get to the Shareflex Core subsite by clicking on the “Core web” button on the Shareflex Online app page.
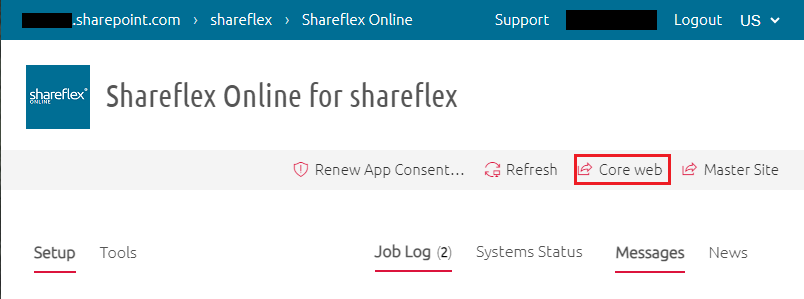
In the Settings menu of your SharePoint site (including its subsites such as Shareflex Core), you can now also find a menu entry to quickly navigate to the Shareflex Online app.
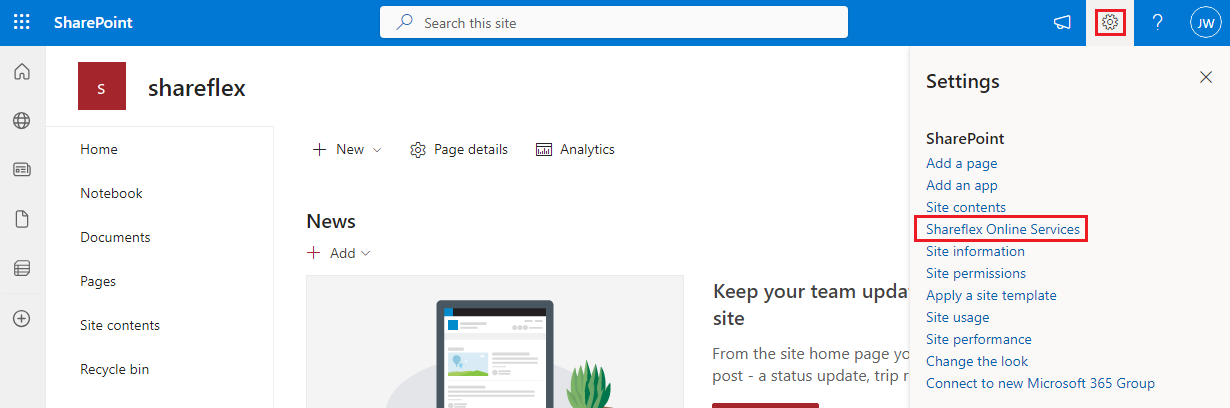
Keep in mind that this link is site-specific, so whenever you use the Shareflex Online app (including the Provisioning client), always double check if its context is set to the correct site:
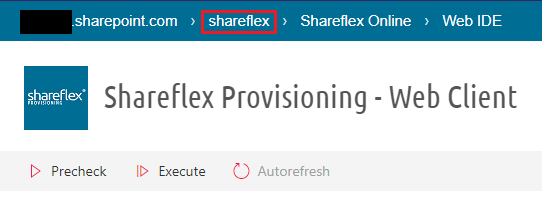
The goal of this section is to explain the permissions Portal Systems has on the customer’s SPO environment.
During the Shareflex Online services setup, permissions are requested twice. Both request prompts are displayed in the images below.
Section 4. Adding the Shareflex Online enterprise …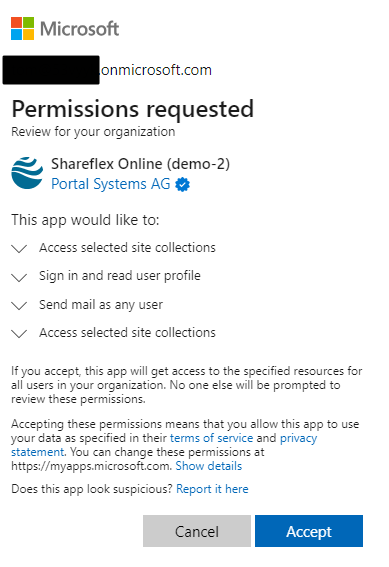 |
Section 6. Setting up delegated access for provisioning …
|
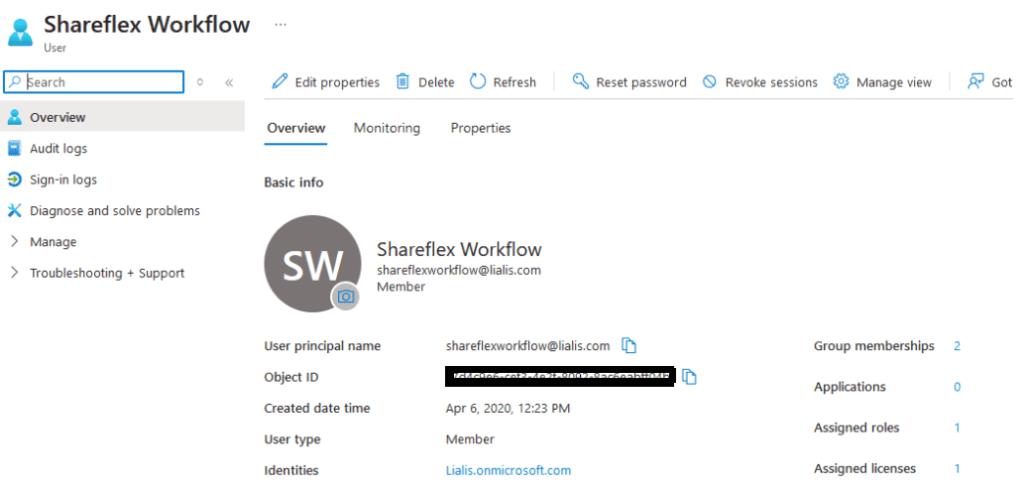
The result of above 2 permissions request is one Shareflex Online Enterprise Application in Entra, displayed in the image below.
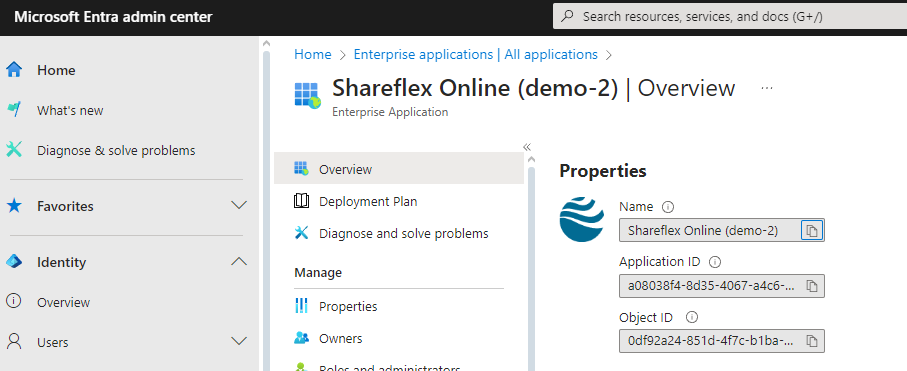
App properties:
The Shareflex Online Enterprise Application permissions created by the two permissions requests is shown in the image below.
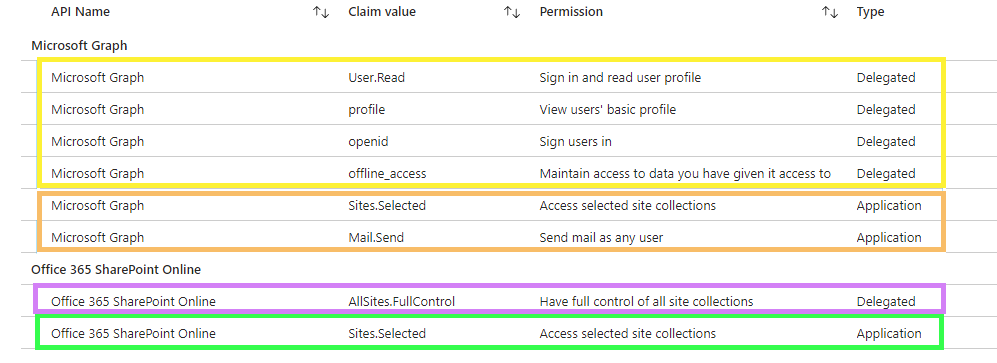
There are no higher permissions set elsewhere that grant Portal Systems access to the customer’s SPO environment. We explicitly mention “higher permissions” because the permissions in the image below are downgraded by other permissions explained in this section.
Please note the Enterprise Application permissions type in the above image, Delegated and Application permissions.
All Delegated permissions (marked in yellow and purple in the image above) are set by the following consent form.
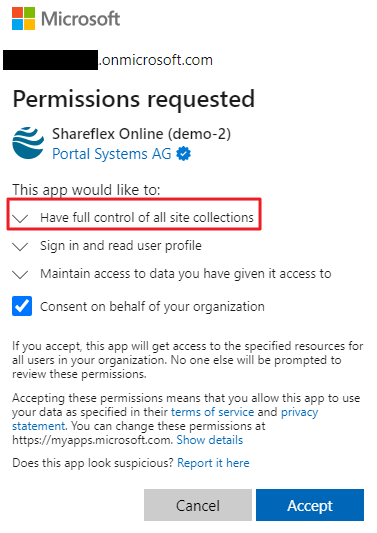
The permission request above mentions, “Have full control of all site collections”. This permission request is marked purple in the above image, and its scope is all SPO site collections, which is actually not the case because the permissions are delegated.
The image below displays the permission details of the purple-marked AllSites.FullControl permissions. It clearly states that the app has full control of all sites on behalf of the signed-in user.
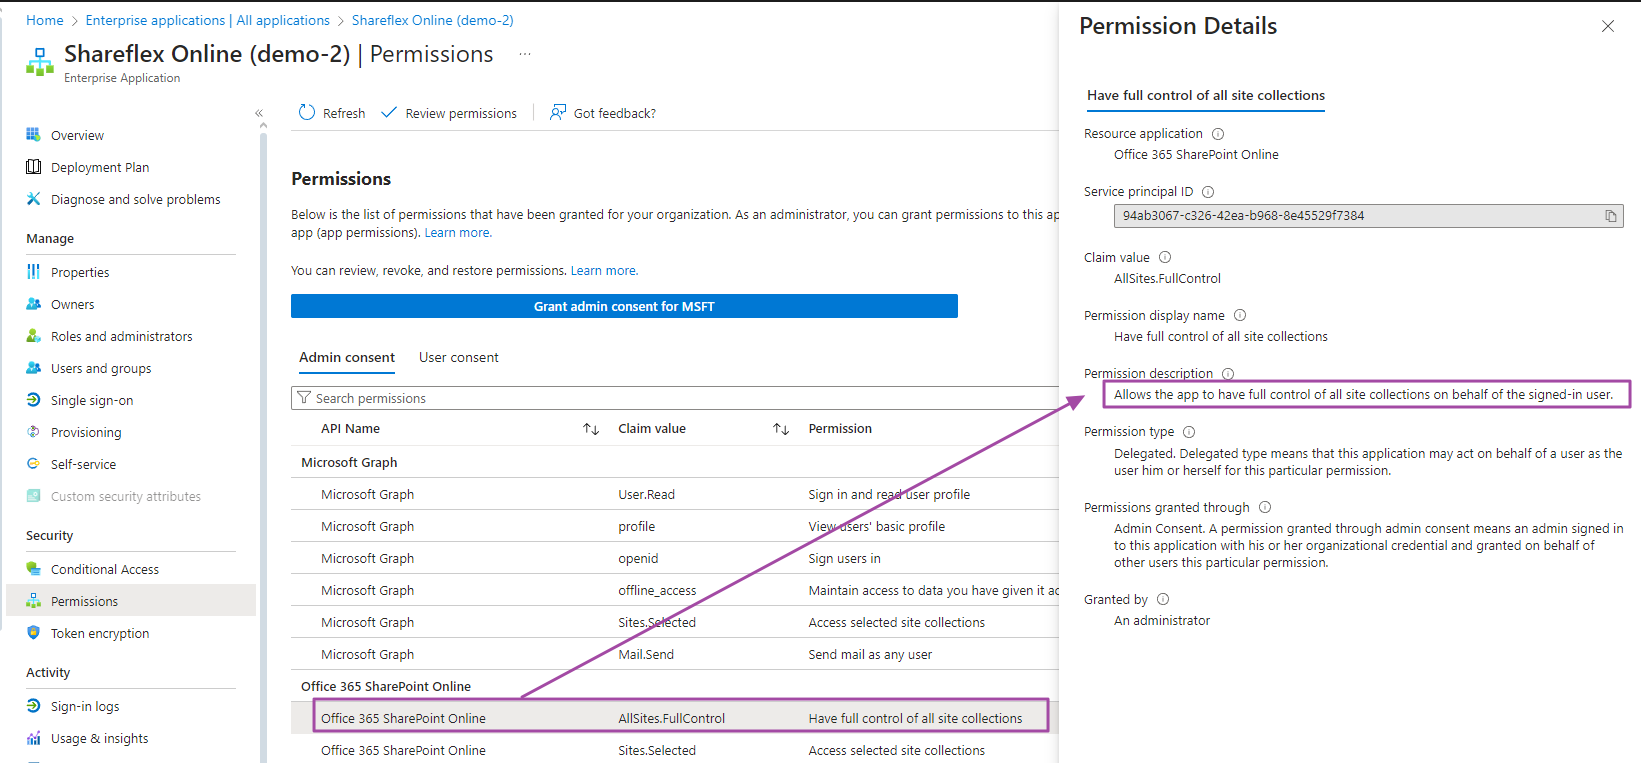
So the limitations of these permissions are the signed in user.
The delegated permissions of the Shareflex Online Enterprise App can be configured by the customer. In the example below Customer Administrator accounts have been given permissions to use this app.
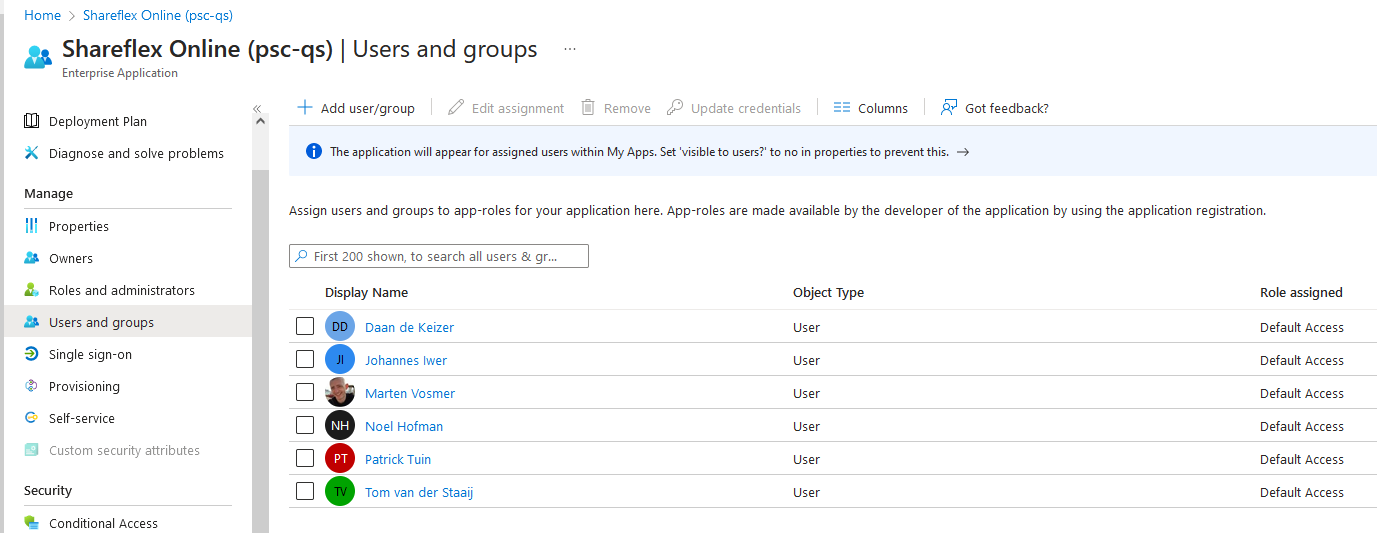
Only customer Administrator user accounts should be allowed to use the Shareflex Online App because it requires SPO Site permissions to perform the operations like deploying code to the SPO site. Users who don’t have SPO Site Admin permissions are not allowed to run code that performs certain operations on SPO sites.
All of the Application permissions (marked orange and green in the image above) are restricted to selected SPO sites. Portal Systems has permissions to selected SPO sites only. Granting these permissions is described in section “4. Adding the Shareflex Online enterprise app to Entra ID” via the consent form displayed in the image below.
Testing the delegated permissions of the Shareflex Online Enterprise App.
The user LialisTest1@lialis.com does not have delegated permissions to the Shareflex Online Services app
The user clicks on the Shareflex Online Services app link.
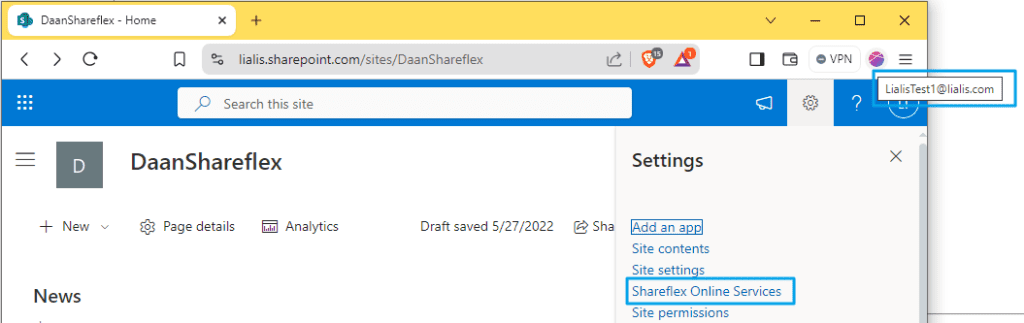
An error appears.

A smart user could figure out the URL of the Shareflex Services App and this user will be able to access the frontend of this site.
Next step is to enter the customers Shareflex site, for example:
Same error.
During this step you must be signed in with a provisioning account that has the Site (Collection) Administrator role.
Once you are logged in to the Partner Portal, click on the Deployments button.

Then open the “Shareflex Add-ons” folder and locate the latest version of the ShareflexAddons archive for SharePoint Online (O365).
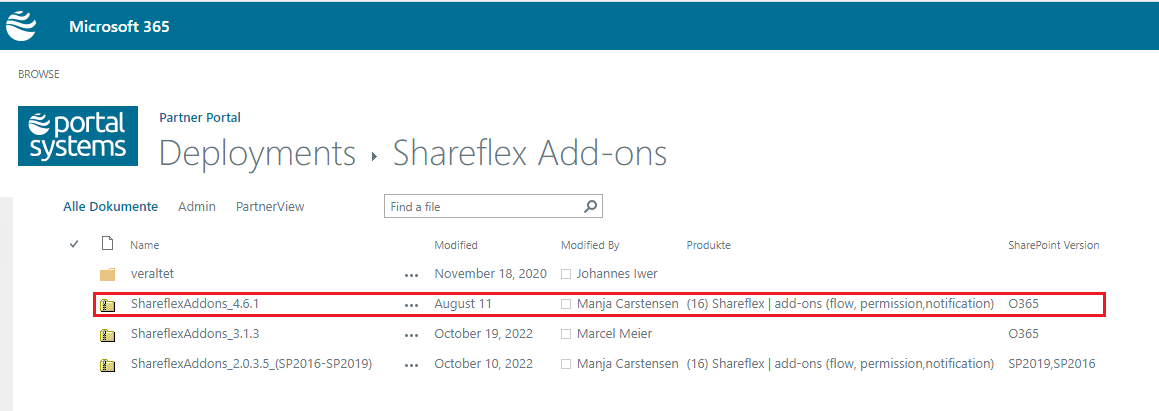
Download the archive file and unzip it somewhere.
Needed role: Site (Collection) Administrator
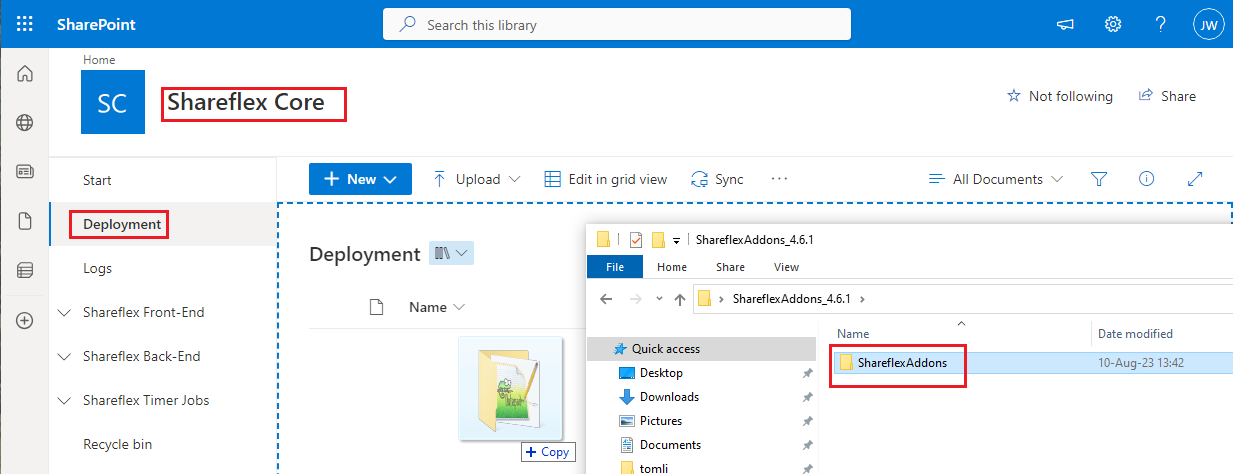
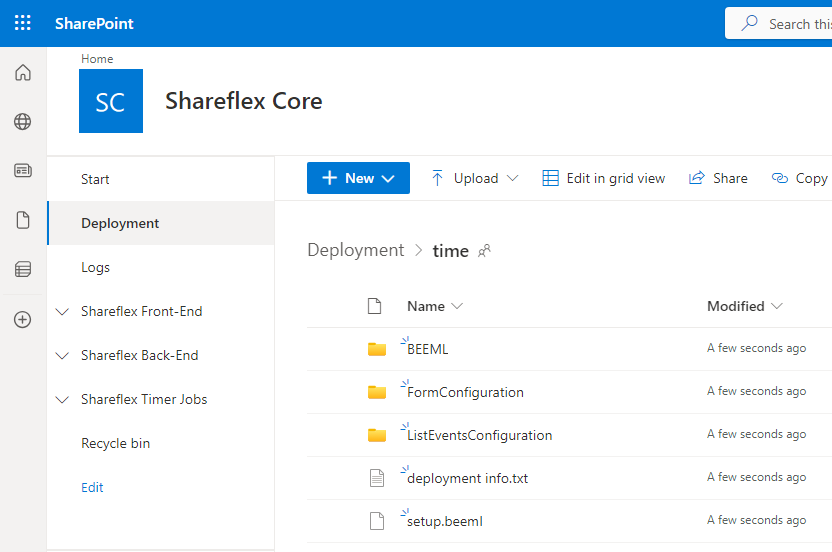
In your own SharePoint tenant, head to the Deployment library inside of the Shareflex Core subsite:
https://<TENANT>.sharepoint.com/sites/<CREATED-SITE>/pscBAF/Deployment
Then upload (e.g. by dragging and dropping) the entire “ShareflexAddons” folder to the Deployment library.
Shareflex offers a complex proprietary XML-based scripting language that can be used to automate certain SharePoint & Shareflex actions.
Files making use of this language will have the “.beeml” file extension.
Inside the ShareflexAddons folder there should be a file called “ShareflexAddons.beeml”. Open this file with any text editor, and copy its contents.
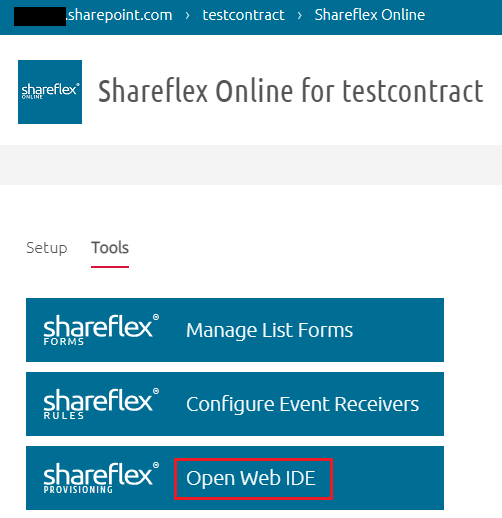
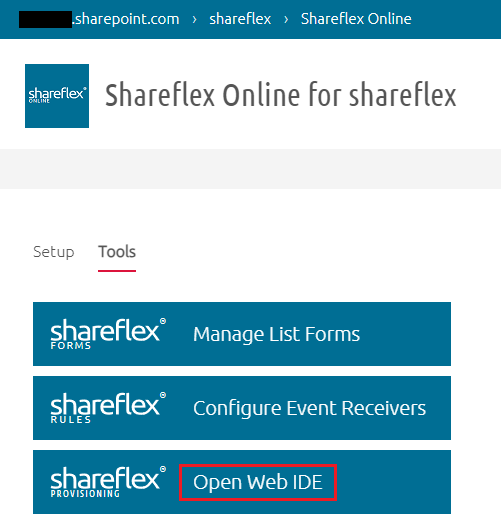
Head back to the Shareflex Online app page (through the link in the Settings menu), select the Tools tab, and click on Open Web IDE.
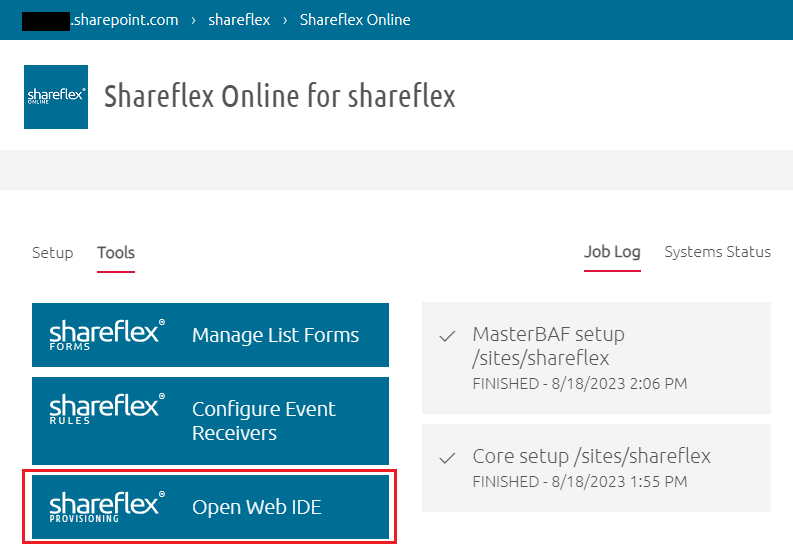
This Web IDE (also called Provisioning client) allows you to execute *.beeml scripts.
Before executing anything, make sure that the “Start Web” field contains the URL to your created site (https://<TENANT>.sharepoint.com/sites/<CREATED-SITE>).
The “User” and “Password” fields should be ignored.
The “File Name” field is useful for providing a short script description that can later be used to the execution jobs/logs. This is optional, but recommended.
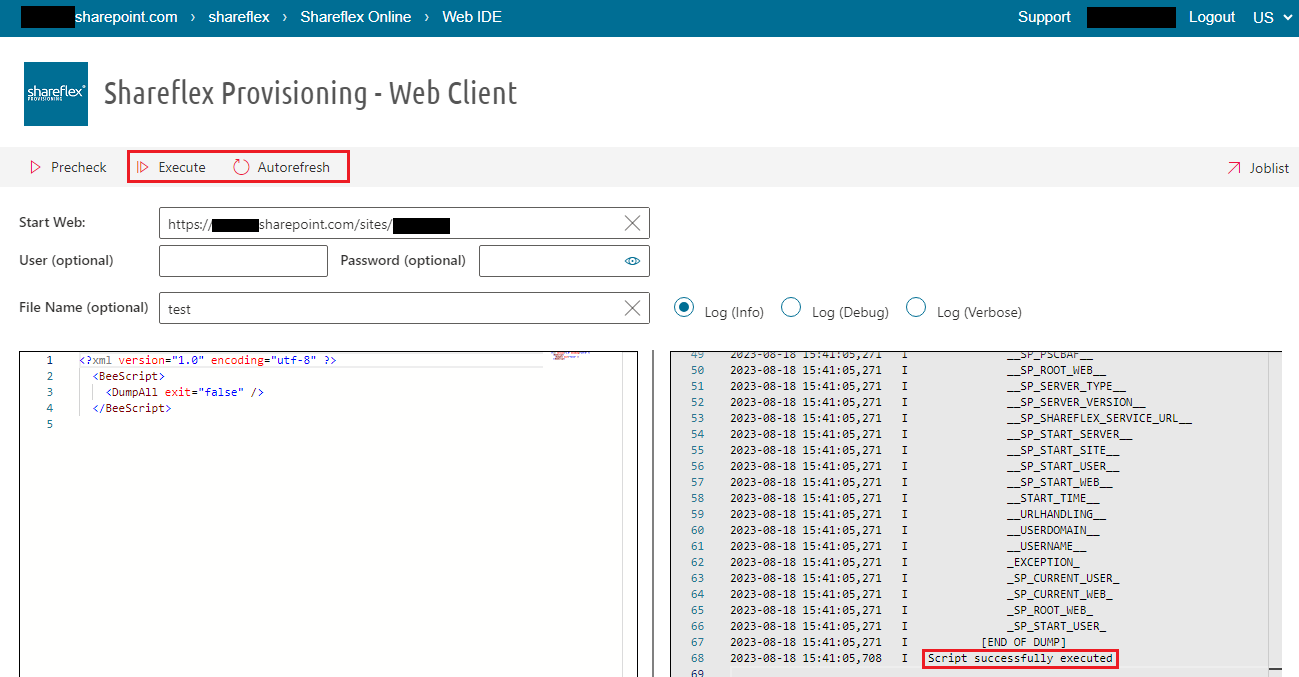
Feel free to execute the default script as a test, by clicking on Execute. Then click on Autorefresh to view the execution progress in real-time.
If the script ran successfully, the progress log will end with “Script successfully executed”. Note that any warnings (unlike errors) are generally safe to ignore.
Now delete the default script, and replace it with the contents from the “ShareflexAddons.beeml” file.
Before executing the script, perform a Precheck. This will quickly analyze the script to look for potential issues.
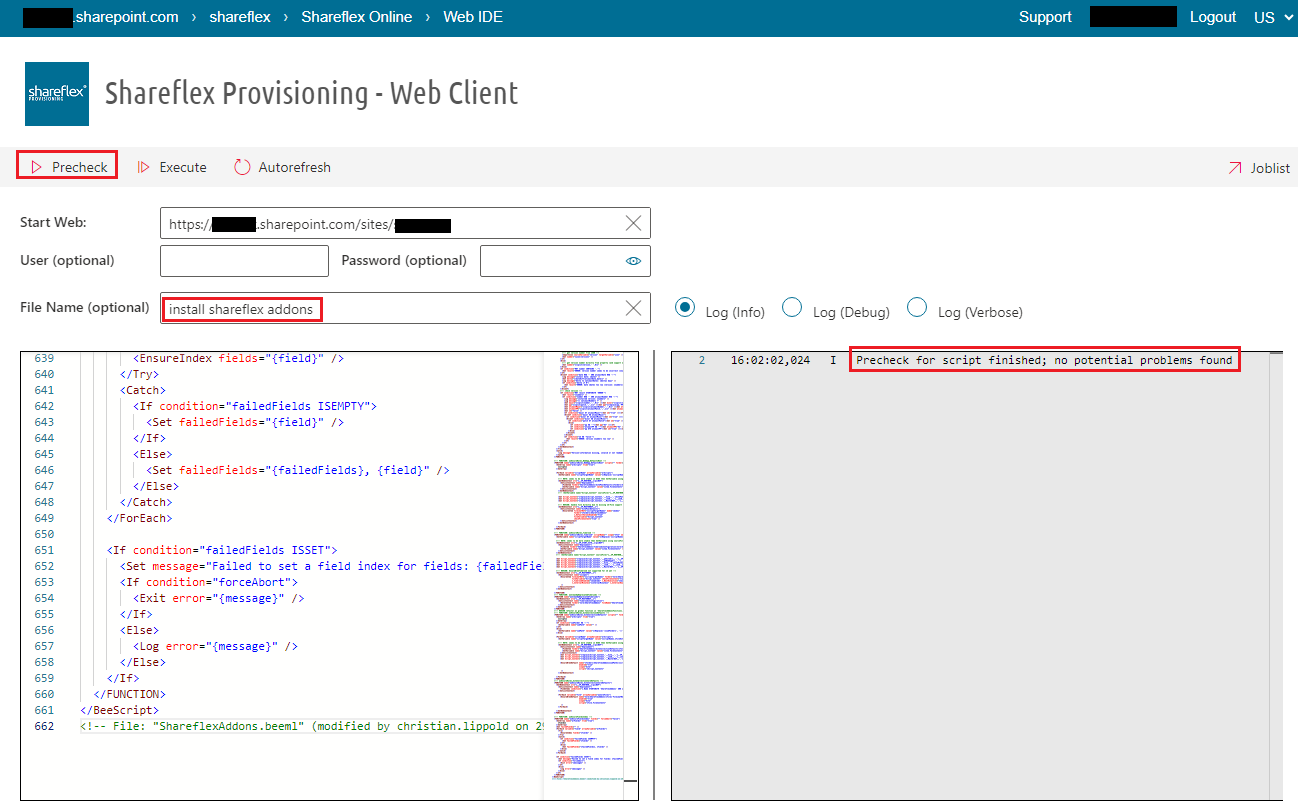
After the precheck finishes, click on Execute. The Shareflex Addons installation will take about two hours.

Note that the Provisioning client runs all scripts as background jobs, so it is fine to close your browser.
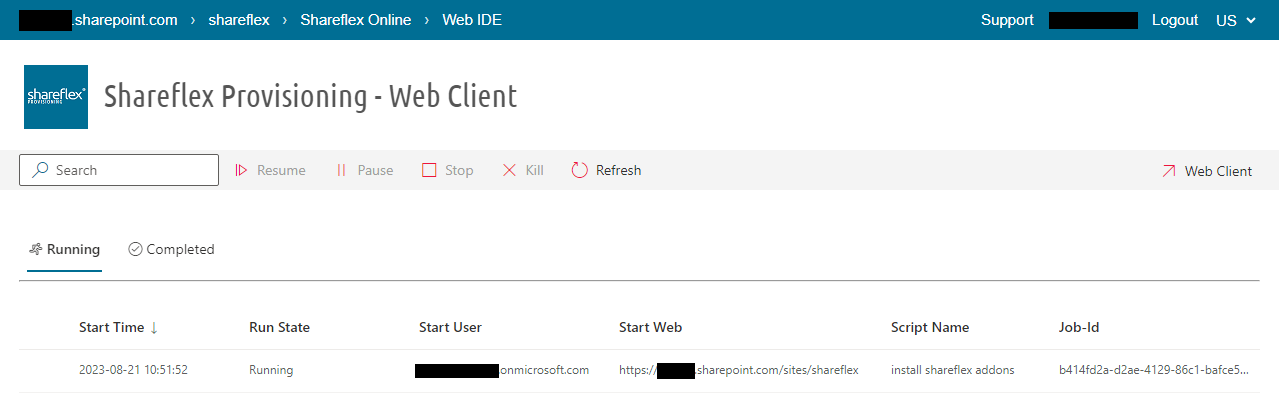
At any point in time you can view the status/progress/history of a background job by clicking on the Joblist button within the Provisioning client.

Which brings you to this background job overview:
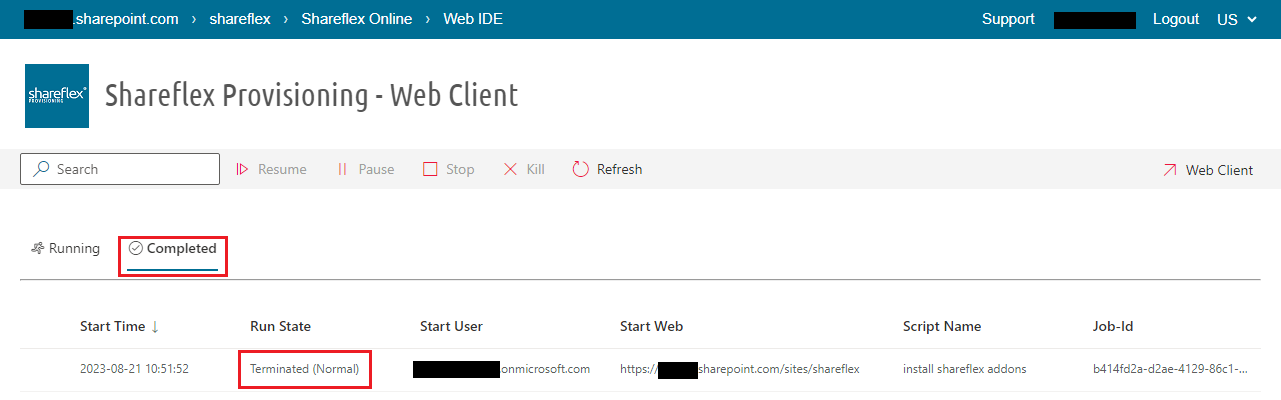
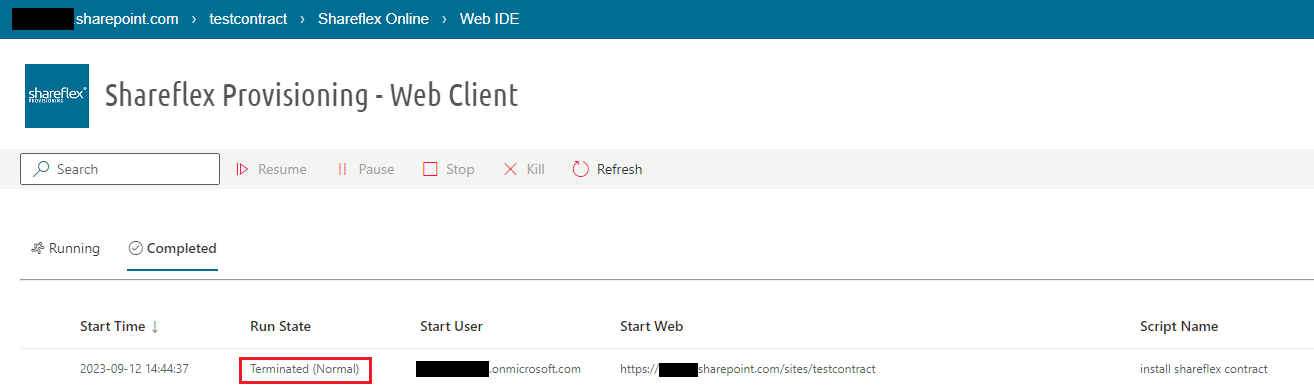
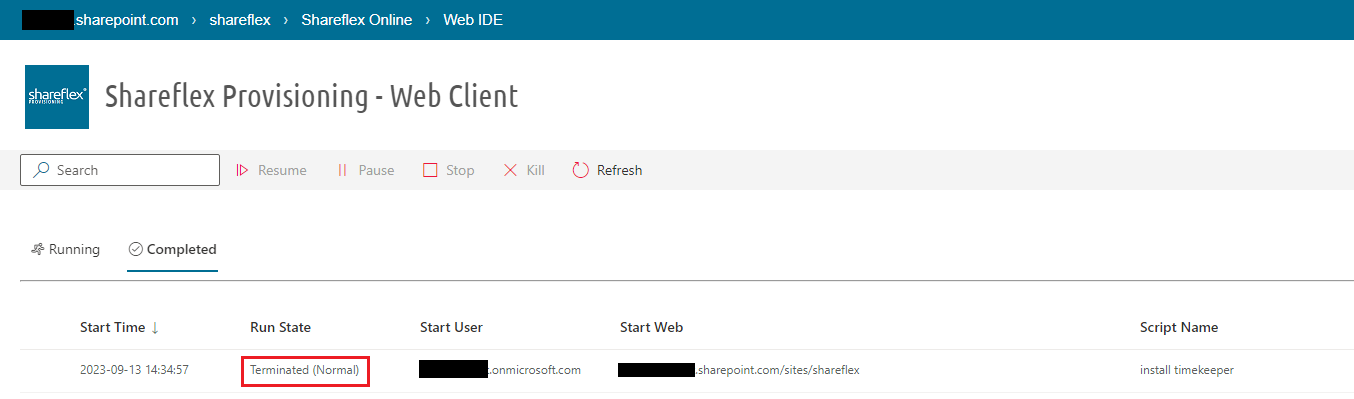
Once the installation job finishes it will move to the Completed tab, and its Run State will update to “Terminated (Normal)”, assuming that no problems arose.
Note that the Shareflex Contract app requires its own dedicated (Shareflex-enabled) site. If you don’t already have one, follow all of the above steps first.
Head to the Deployments library of the Partner Portal, open the Shareflex Contract folder, then locate the latest version of the ShareflexContract archive for SharePoint Online (O365).
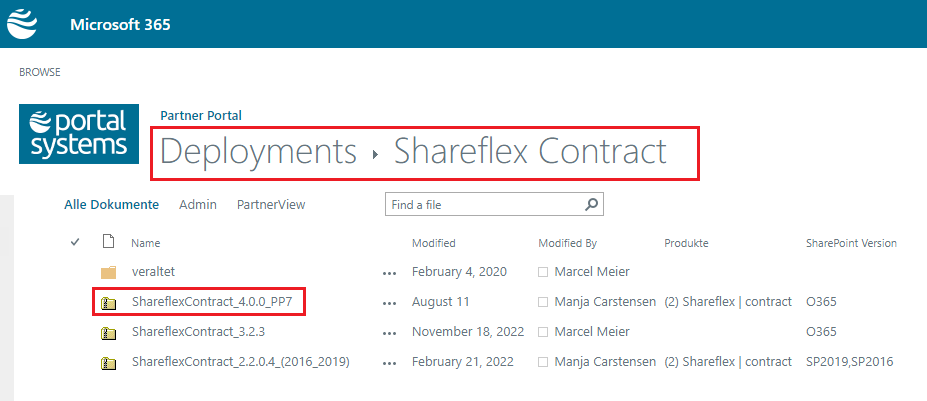
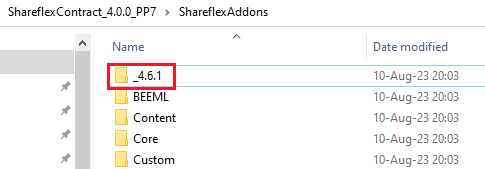
Download the archive file and unzip it somewhere. It should contain two folders: “ShareflexContract” and “ShareflexAddons”. Open the latter and identify its version number by locating the subfolder that starts with an underscore.
In your own SharePoint tenant, head to the Deployment library inside of the Shareflex Core subsite:
https://<TENANT>.sharepoint.com/sites/<CREATED-SITE>/pscBAF/Deployment
If the library contains a ShareflexAddons folder, identify its version number in the same manner.
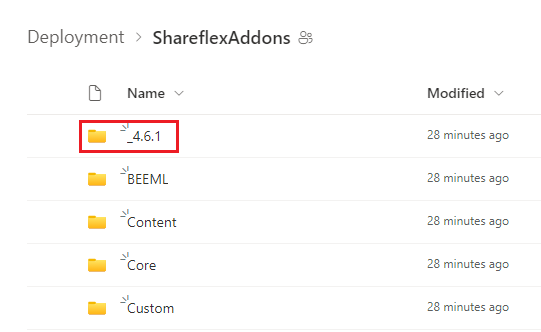
If the version number of the ShareflexAddons inside the Deployment folder is lower than the one included in the ShareflexContract archive, delete the entire ShareflexAddons folder from the Deployment library.
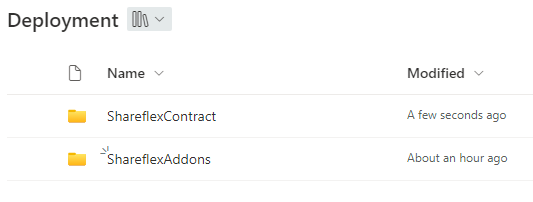
If the Deployment library does not contain a ShareflexAddons folder (anymore), upload the ShareflexAddons version included in the archive.
Finally, upload the “ShareflexContract” folder from the archive as well.
Open the Provisioning client by navigating to the Shareflex Online app (remember the link in the settings menu?) and clicking on “Open Web IDE” under “Tools”.
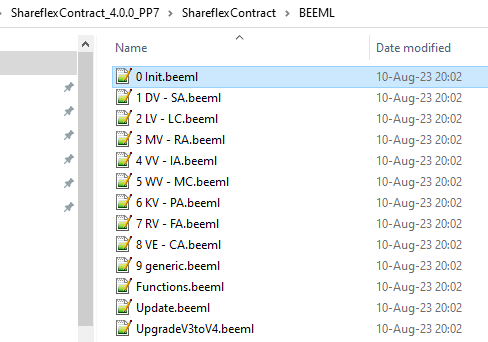
Open the ShareflexContract > BEEML folder within the downloaded archive, then copy the contents inside file “0 Init.beeml”.
Head back to the Provisioning client and replace the default script with the script you just copied. Perform a Precheck, then Execute it if no problems were found.

Open the Joblist and wait until the background job finishes. If no problems occur, the job’s Run State will be “Terminated (Normal)”.
Now, depending on what contract types you want to support, also execute scripts 1 to 8. Wait until each script finishes before starting the next one.
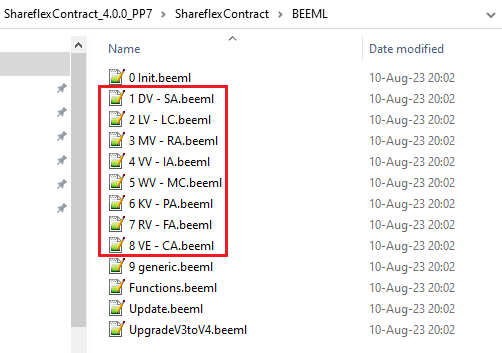
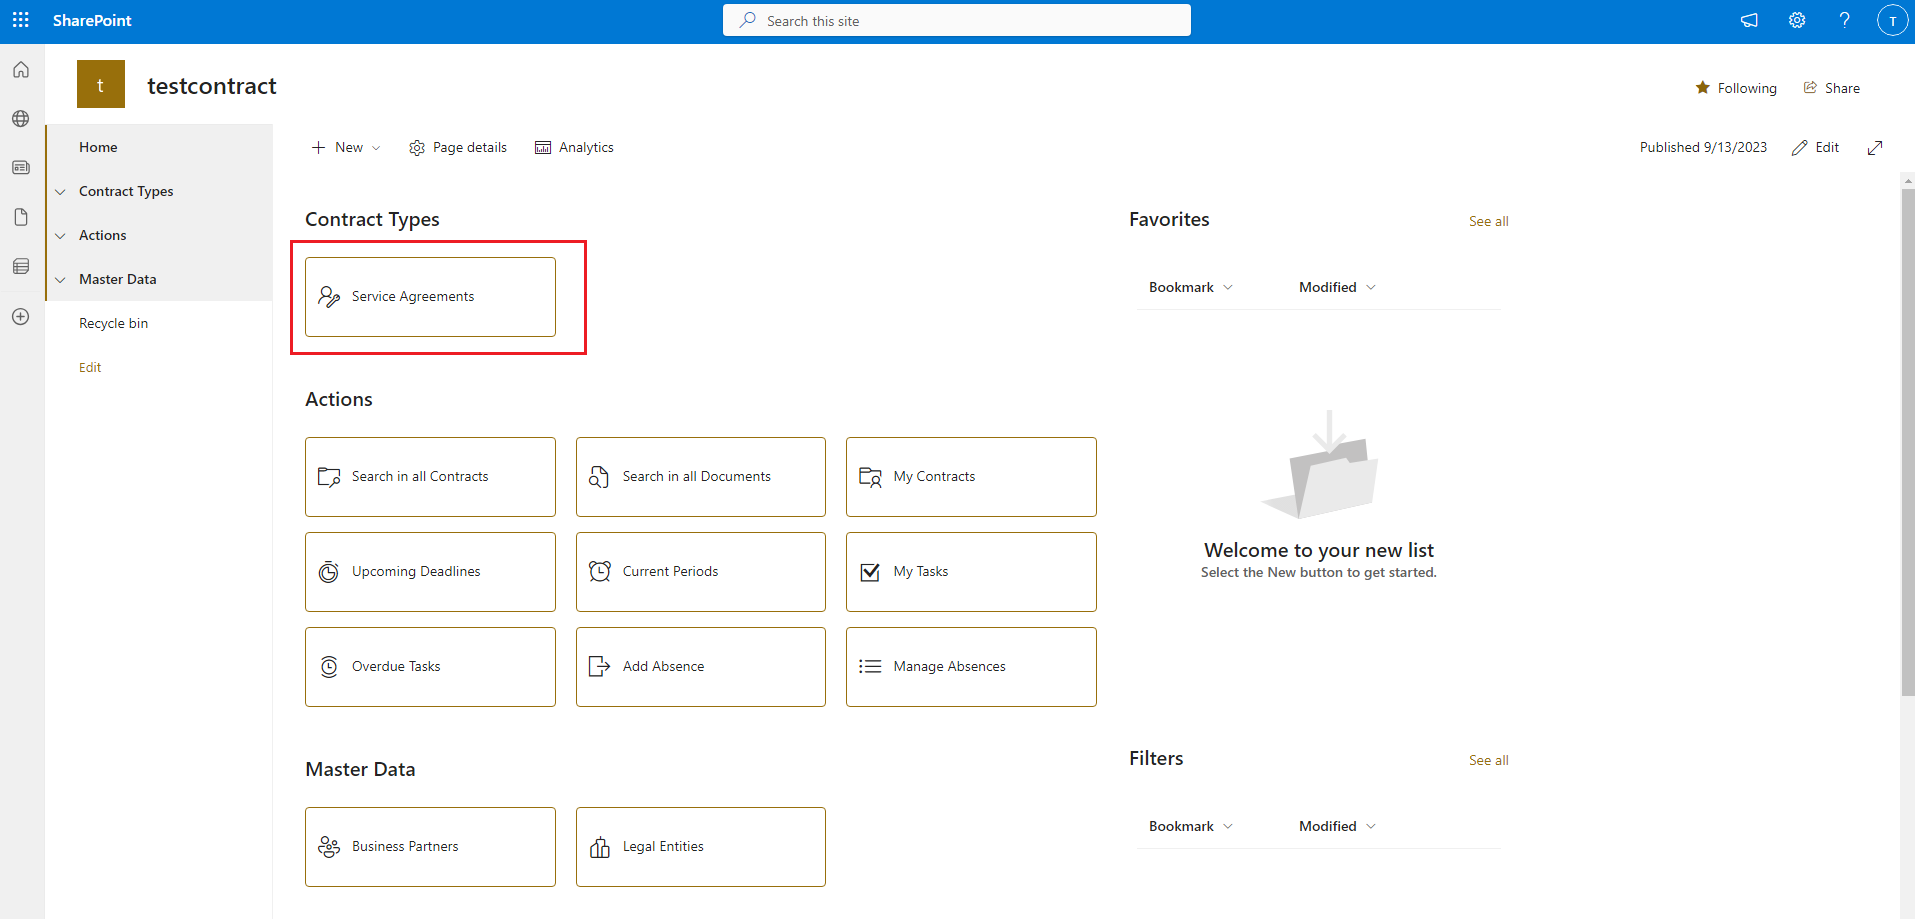
This is what your site’s homepage will look like after installing the Service Agreements contract type (script “1 DV – SA.beeml”):
During this step you must be signed in with a provisioning account that has the Site (Collection) Administrator role.
The TimeKeeper app can be deployed as subsite on any of your existing (Shareflex-enabled) sites. It does not need its own dedicated site.
Unzip & upload the provided TimeKeeper deployment package to the Deployment library of the Shareflex Core subsite:
https://<TENANT>.sharepoint.com/sites/<CREATED-SITE>/pscBAF/Deployment
Head to the Provisioning client by navigating to the Shareflex Online app (remember the link in the settings menu?) and clicking on “Open Web IDE” under “Tools”.
Locate the file “setup.beeml” within the TimeKeeper deployment package, open it with the text editor of your choice, then copy its contents.
Head back to the Provisioning client and replace the default script with the script you just copied. Perform a Precheck, then Execute it if no problems were found.

Open the Joblist and wait until the background job finishes. If no problems occur, the job’s Run State will be “Terminated (Normal)”.
Introduction
The authorization concept of Entra ID (formerly Azure Active Directory) only provides the permission scope to send emails on behalf of all email users. To restrict this to selected mailboxes, it is advisable to work with Application permissions in Exchange Online. The goal here is to ensure that the Shareflex email account cannot be used to impersonate any user when sending emails in your environment.
Prerequisites
A user account for sending emails can be configured in each Shareflex Site Collection. This user must already be created in advance. A separate user can be used for each Site Collection, or all Shareflex Site Collections can use the same user.
Important: The user that will be used for sending email requires a license of at least level E1, and should be a pure Azure Active Directory user. Access to this user’s mailbox is possible via Outlook Online in your browser. Shared mailboxes are not supported.
The user account used in this post is listed below:
Install Exchange Online modules
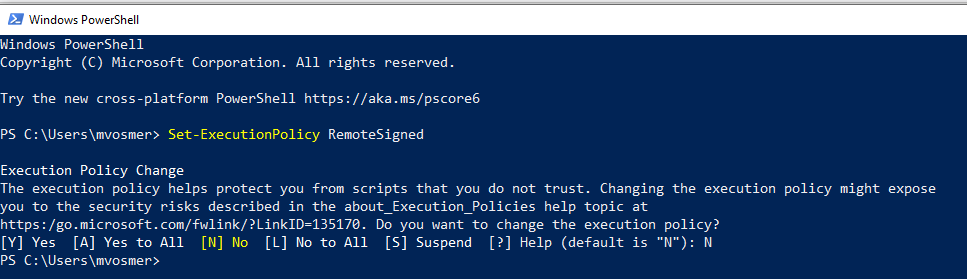
Start PowerShell as an administrator and execute the following command to set the execution policy:
Set-ExecutionPolicy RemoteSigned
Choose No.
Make sure that WinRM is set up correctly.
winrm quickconfig
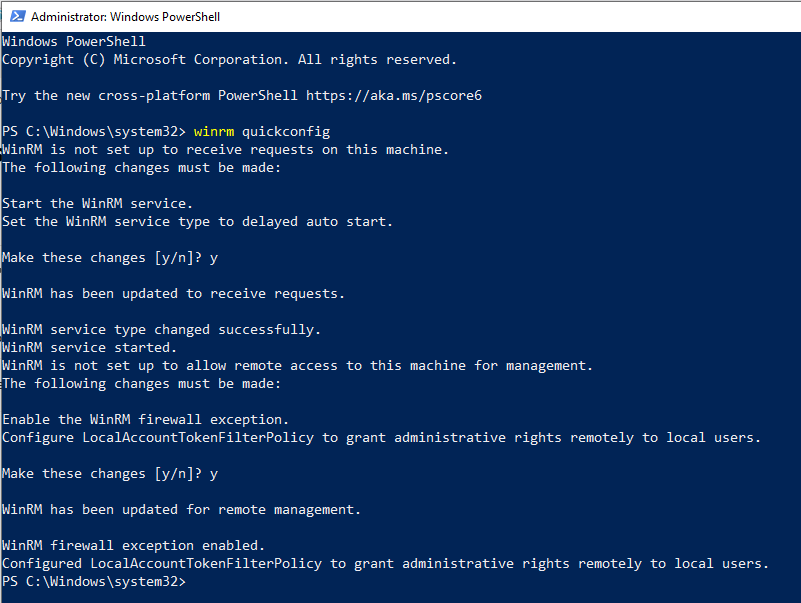
Choose y.
winrm get winrm/config/client/auth
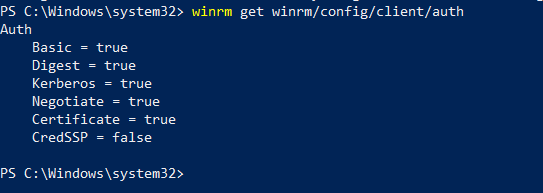
If ‘Basic’ is not set to true, run:
winrm set winrm/config/client/auth '@{Basic="true"}'
The following command can be used to display all existing application authorizations. The name of the used security group can also be identified.
Install-Module -Name ExchangeOnlineManagement

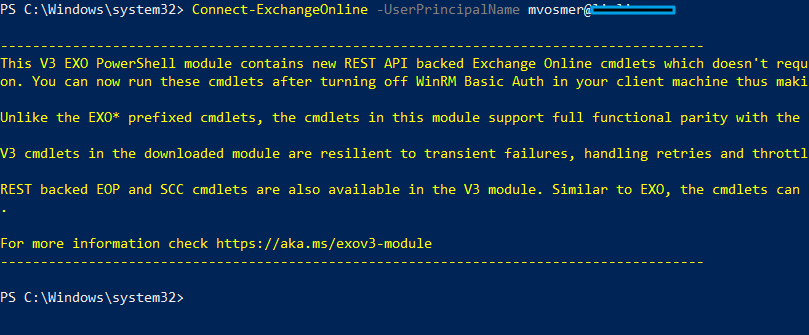
Use the following command to log in to Exchange Online as an Exchange administrator.
Connect-ExchangeOnline -UserPrincipalName adminuser@tenant.onmicrosoft.com
Creating the mail-enabled security group.
To make it easier to adjust the mailbox(es) permitted for sending later, we recommend using a Mail-Enabled Security Group.
This can either be created in the Exchange Admin Center, or by using PowerShell. We will use PowerShell.
New-DistributionGroup -Type "Security" -Name "Shareflex Mail Senders" -Alias "ShareflexMailSenders" -Members info@tenant.onmicrosoft.com,news@tenant.onmicrosoft.com

Optionally hide the group from the address list:
Set-DistributionGroup -Identity $restrictedGroup.Identity -HiddenFromAddressListsEnabled $true
You can use the PrimarySmtpAddress parameter to explicitly assign an email address to the security group, otherwise this is generated from the alias and the email domain. From the example above, this would be ShareflexMailSenders@tenant.onmicrosoft.com.
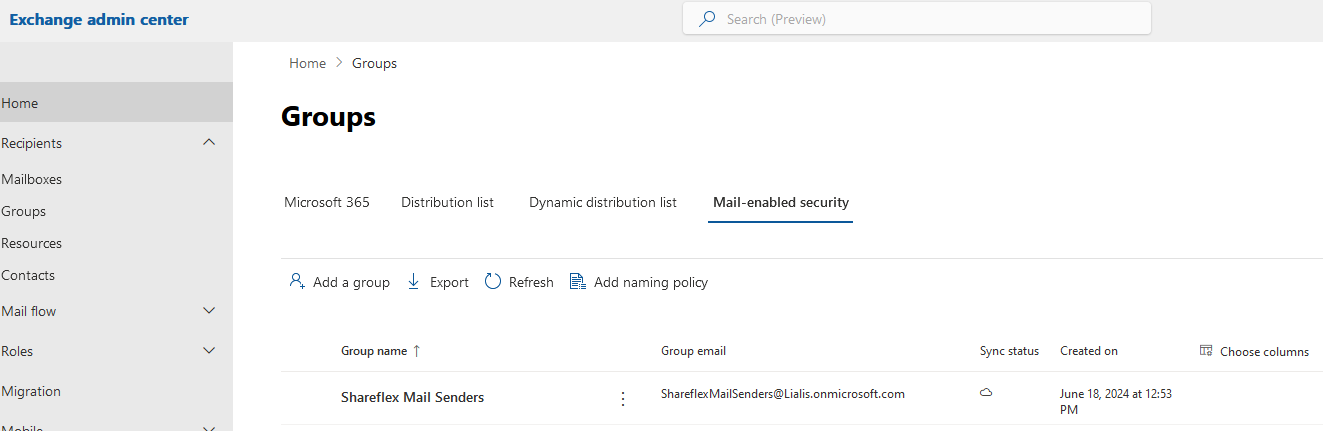
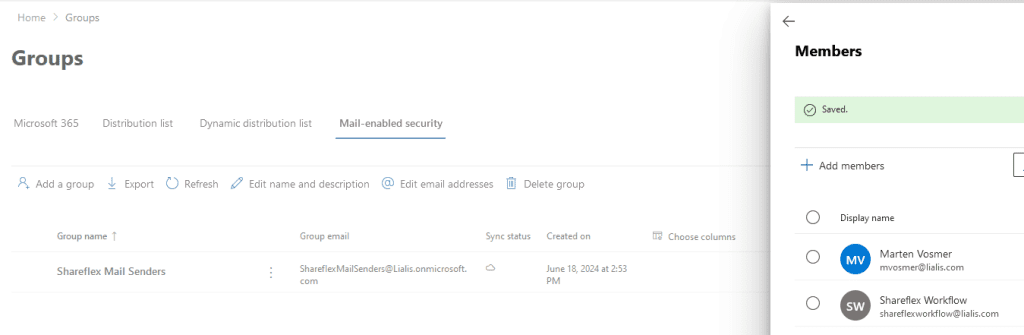
The result of the above command:
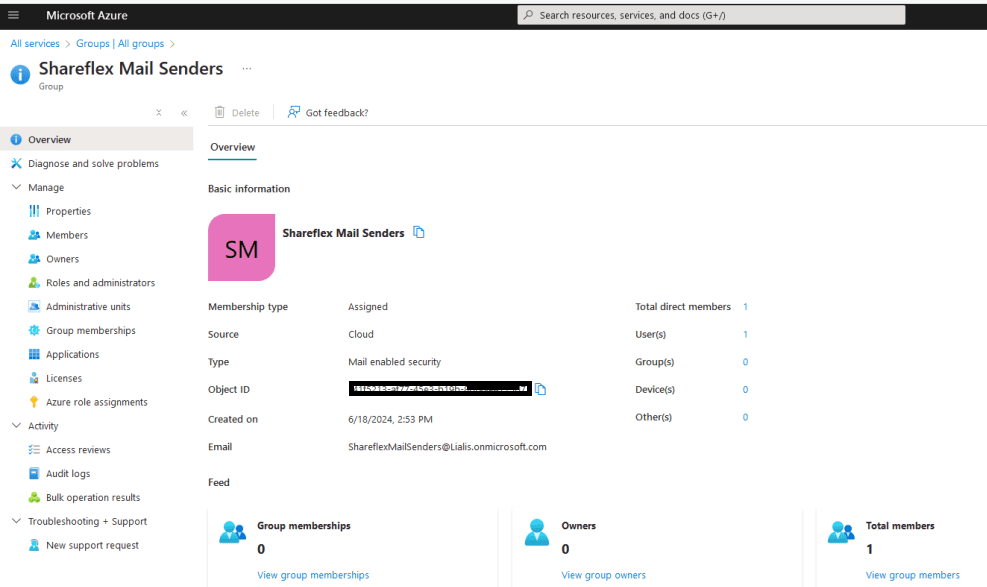
The same group is listed in Microsoft Azure:
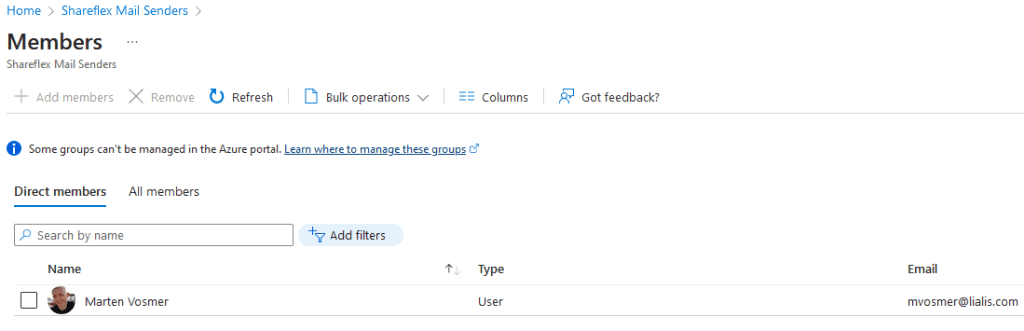
The members of above security group:
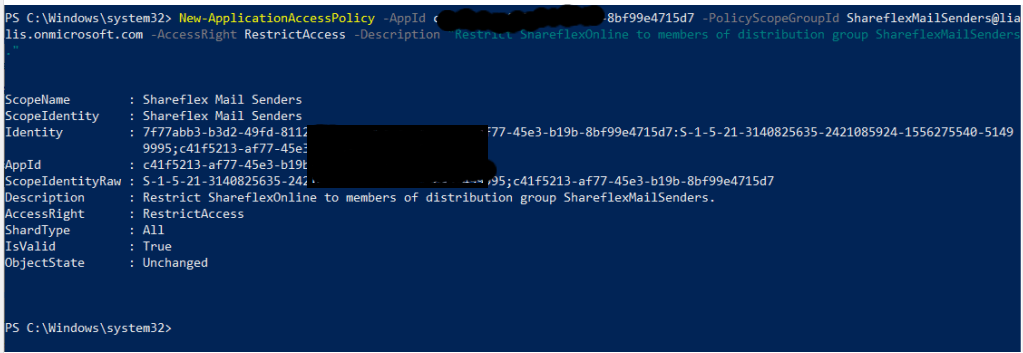
Administrators who want to limit app access to specific mailboxes can create an application access policy by using the New-ApplicationAccessPolicy PowerShell cmdlet.
You can now create the application authorization for the Shareflex online app using the security group.
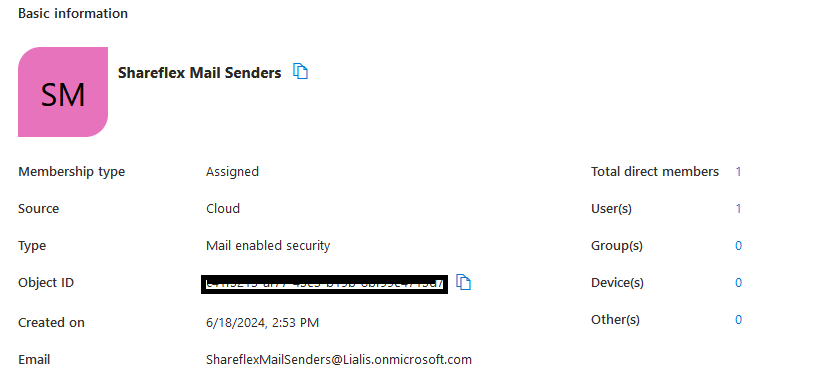
Enter the object id of your Shareflex online app as the AppId (displayed in the image above).
New-ApplicationAccessPolicy -AppId 12345678-abcd-0123-cdef-1234567890 -PolicyScopeGroupId ShareflexMailSenders@tenant.onmicrosoft.com -AccessRight RestrictAccess -Description "Restrict ShareflexOnline to members of distribution group ShareflexMailSenders."
Note that there is currently no graphical user interface in Entra ID/AAD to review the outcome of these settings.
Test-ApplicationAccessPolicy -Identity user1@tenant.onmicrosoft.com -AppId 12345678-abcd-0123-cdef-1234567890

The application access policy seems to work fine.
To test if the created policy is in effect, you can run the following command, with different e-mail addresses:
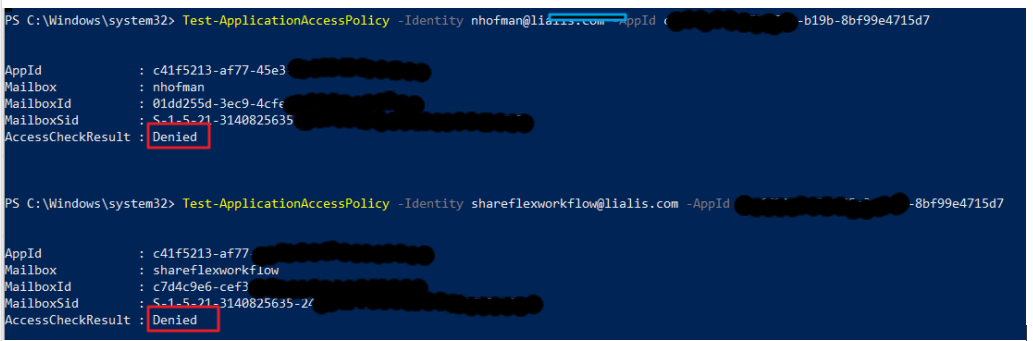
We must add the shareflexworkflow@lialis.com account to the mail-enabled security group in the Exchange Admin Center.

In the Lialis Shareflex environment we have several sites running on Shareflex Addons version 3.

Testing to check if the above protects against impersonation
The configuration is now done. Let’s use the Shareflex platform to make sure that impersonation (by using a non-whitelisted ‘from’ address) is no longer possible. In Shareflex Addons version 3 and 4 there is a GUI that allows you to instruct the Shareflex app to send emails through Microsoft Graph. Unlike version 4 of the Addons, version 3 allows you to specify the ‘from’ address, so that’s what we will be using for our tests. Note that all Shareflex sites (regardless of the Addons version) share the same app registration, so the results of this test would apply to Addons version 4 as well.
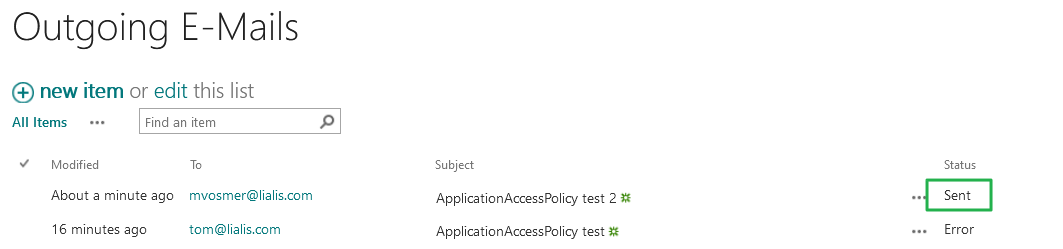
In the Lialis environment we have several sites running on Shareflex Addons version 3. In one of those sites, navigate to the Outgoing emails list.
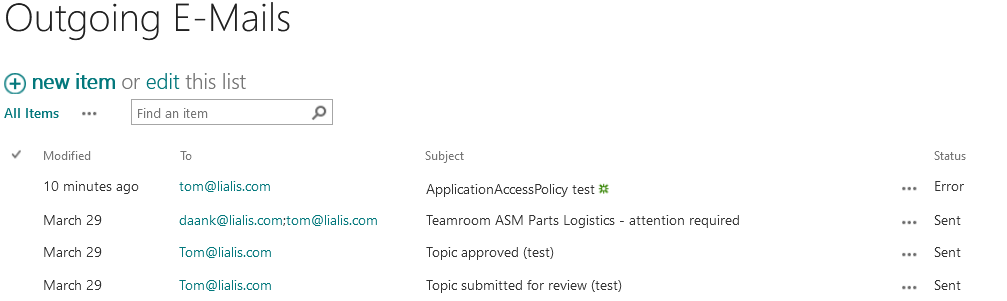
Create a new item and set the ‘from’ address to noel@lialis.com for example, or any other user that should not be allowed as ‘from’ address.

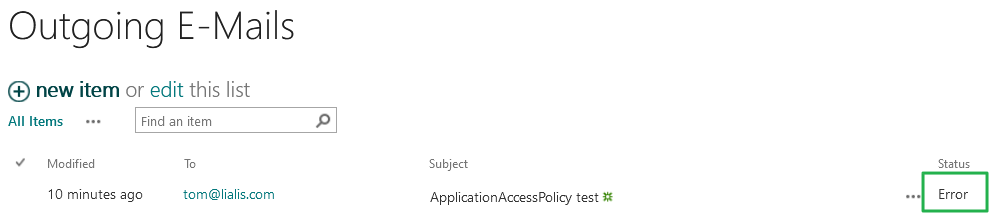
There is an Error status. Perfect.
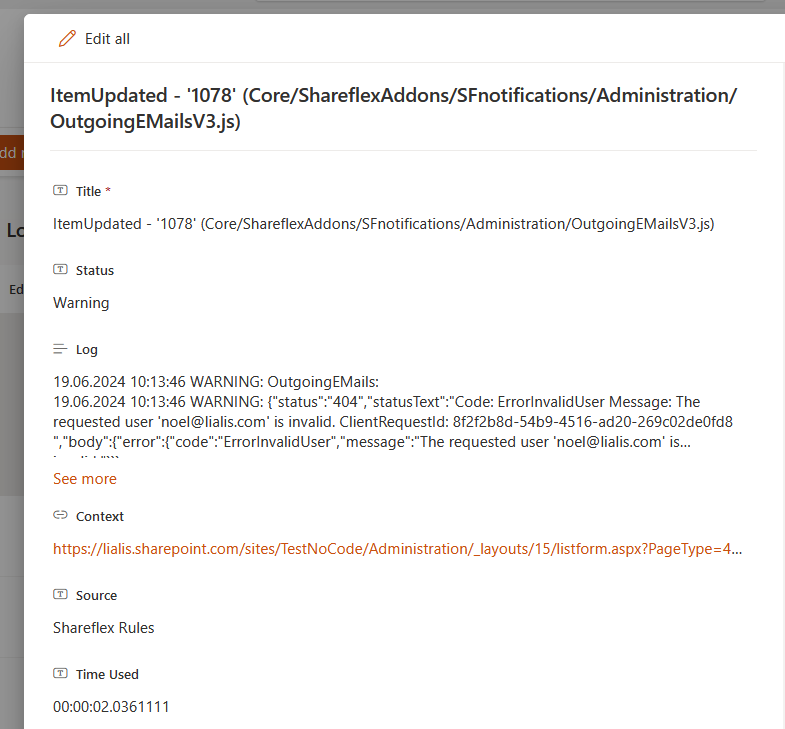
And an error log was generated in the Shareflex logs list, which contains the exact Graph error that we wanted to see.
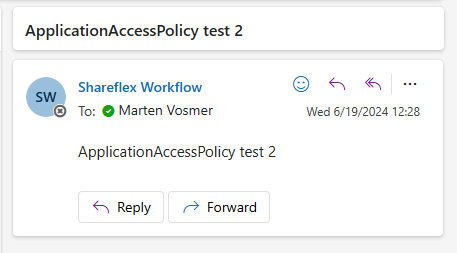
ApplicationAccessPolicy test 2, using an authorized ‘from’ address this time.
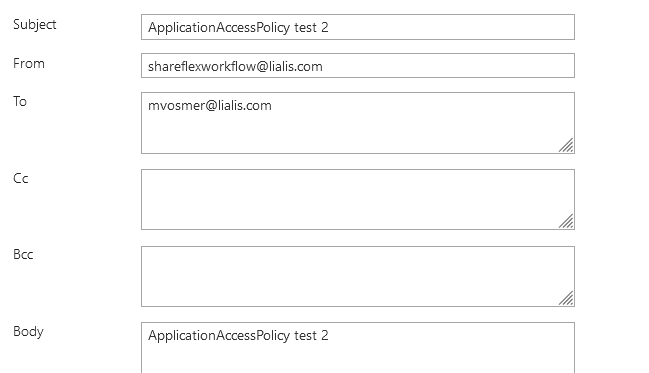
The email was successfully sent through Microsoft Graph by the Shareflex app.
And the email has arrived in Outlook.
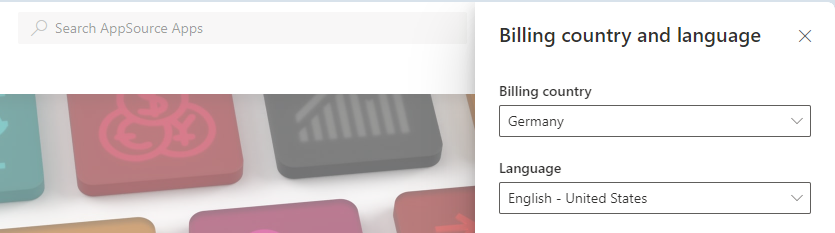
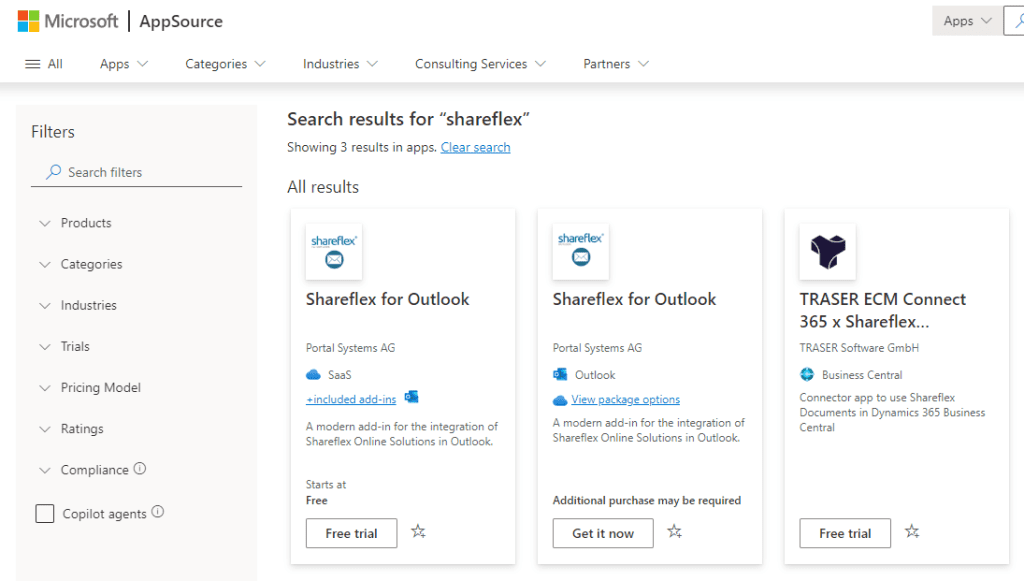
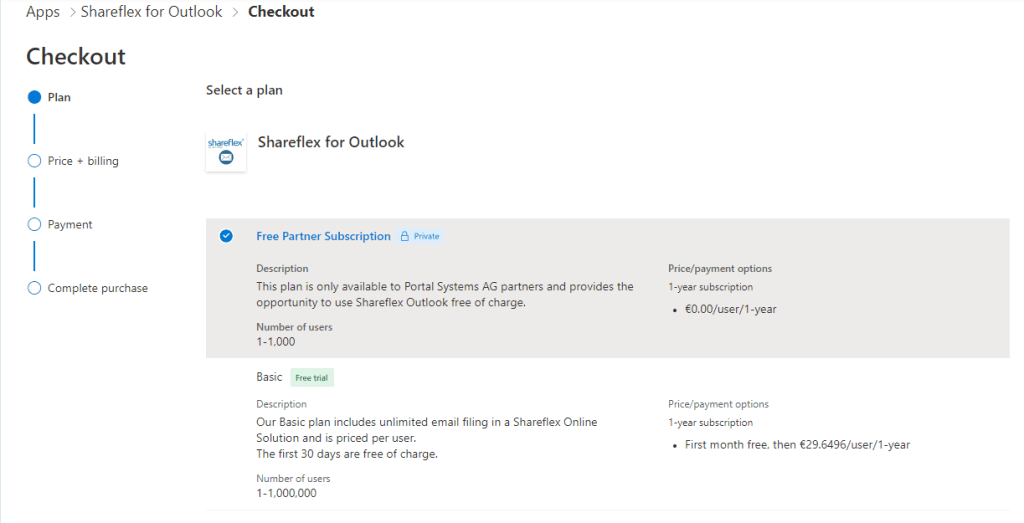
Open your browser and go to the Shareflex for Outlook page in the Microsoft AppSource.