
Administration Manual Document Control
Shareflex Quality Documents SharePoint is a pre-configured, ready-to-use Microsoft 365 SharePoint Online Quality Document Management system. It facilitates the storage, access, management, and control of quality documents and other digital content throughout their entire lifecycle, from new document creation to document revision and ultimately archiving.
Quality Documents (QM) is all about workflows and changing permissions applied to list records and library documents as they move through their life cycle. These permissions, workflows, timer jobs, and notifications make QM a very difficult application to understand and test, especially when its modified to suit customer needs. The goal of this post is to explain how these functions operate and interact with each other in high detail.
The Chrome browser is a great tool for testing QM software because it allows the use of different credentials defined in profiles, in multiple browser windows.
The image below shows the start screen of the Brave browser, where we can choose the test account we want to use for testing.
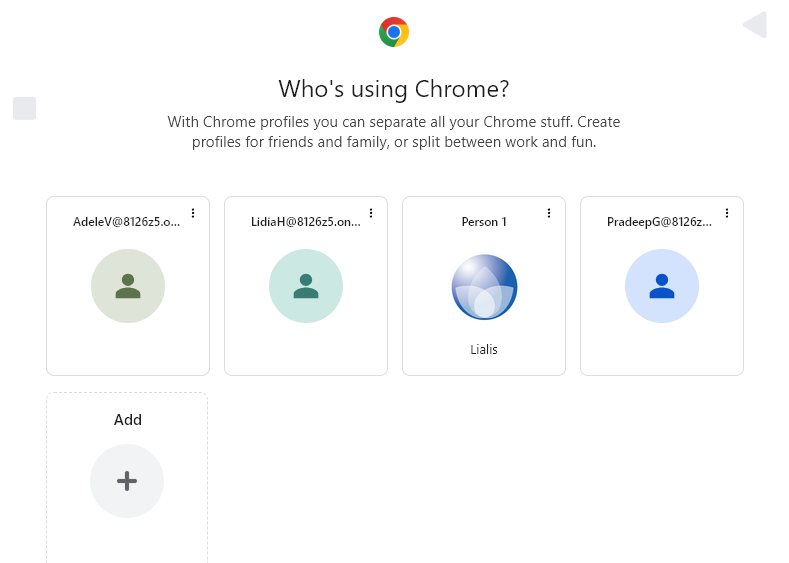
Each browser window has its own colours, making it easy to differentiate between the test accounts.
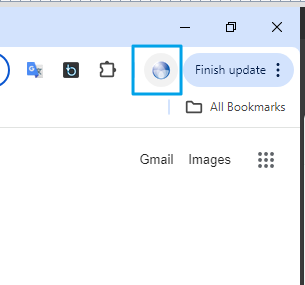
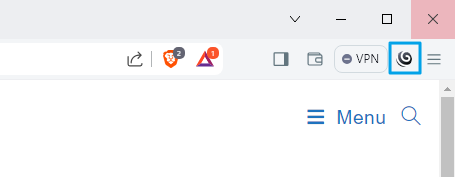
Adding the first or more profiles is very easy. Click on this icon in Chrome:
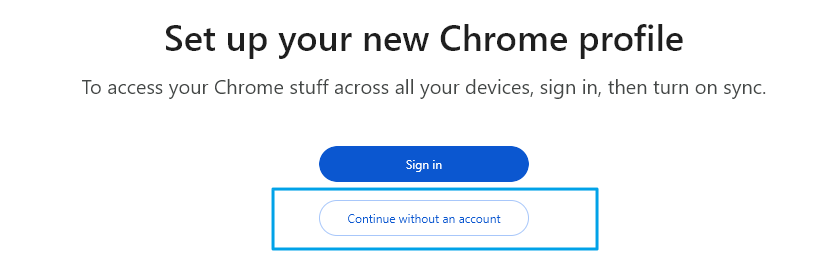
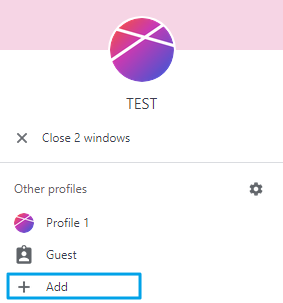
Choose + Add
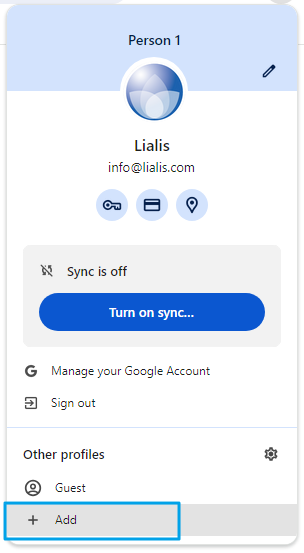
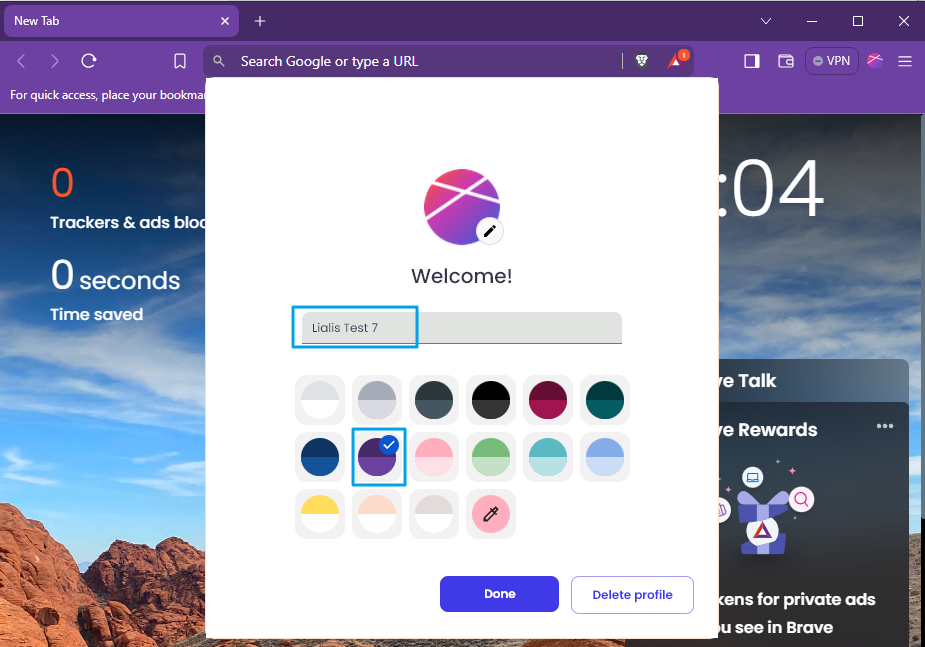
Give the profile a name and choose a colour schema.

That’s it! Enjoy fast testing with Brave.
The Brave browser is a great tool for testing QM software because it allows the use of different credentials defined in profiles, in multiple browser windows.
The image below shows the start screen of the Brave browser, where we can choose the test account we want to use for testing.

Each browser window has its own colours, making it easy to differentiate between the test accounts.
![]()
![]()
Adding the first or more profiles is very easy. Click on this icon in Brave:
Choose + Add
Give the profile a name and choose a colour schema.
That’s it! Enjoy fast testing with Brave.
This section explains how the SharePoint site content with lists, libraries, and sub-sites is constructed to run the QM application.
The application is deployed into a certain site, for example /sites/ShareflexQualityDocuments (the site name is chosen with the client). QM must be installed in a dedicated site.
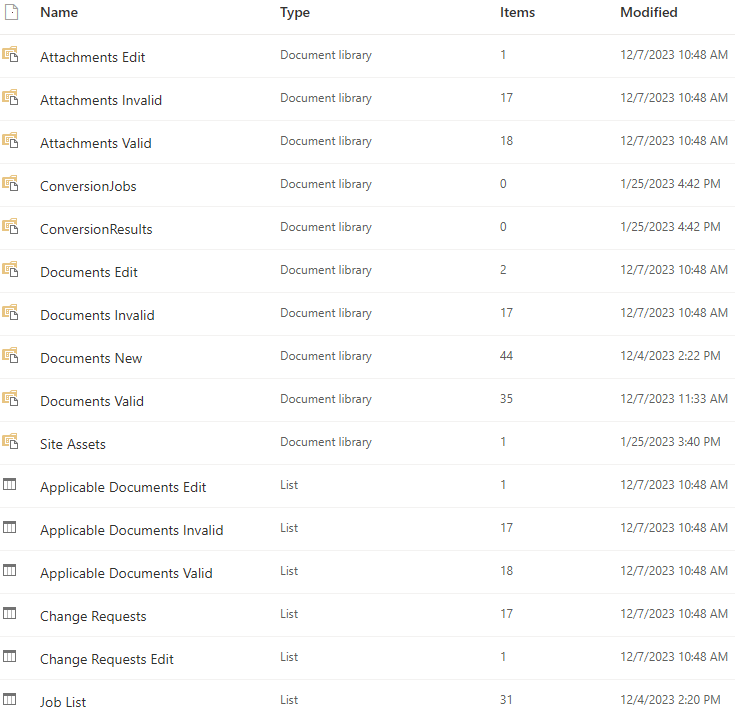
The images below display the QM lists and libraries stored in the main site, used to store approved content.
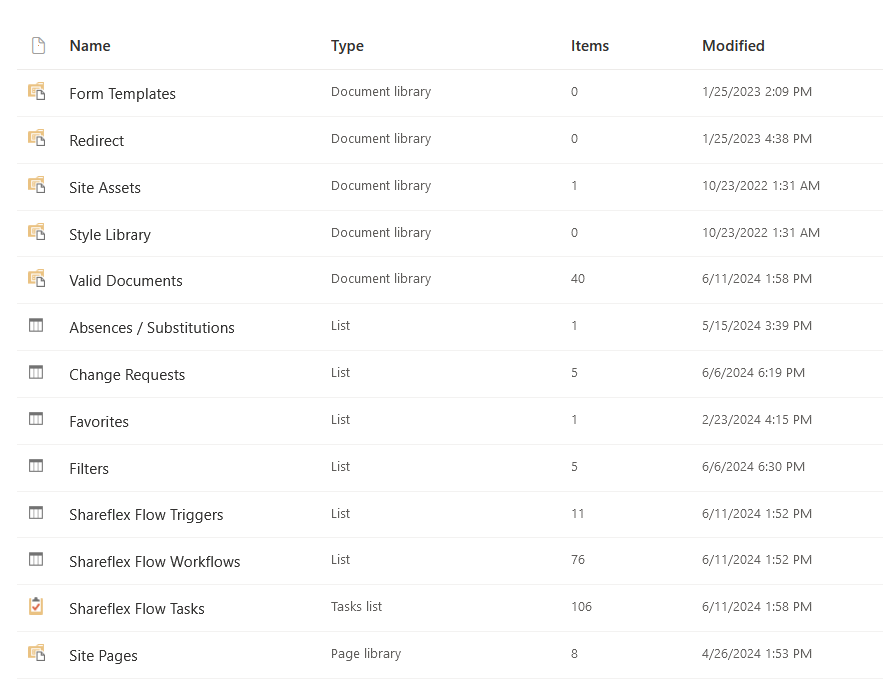
QM used content containers are explained in the list below.
- Library: Form Templates, Redirect, Site Assets and Style Library 🡪 are default and not used by QM.
- Library: Valid Documents 🡪 this is where valid documents appear when they are published in the ’30 – Publishing’ workflow.
- List: Absences / Substitutions 🡪 this is where the end users can setup how and when their work is done by somebody else, in case of absence
- List: Change Requests 🡪 this is where valid Change Requests of a valid document appear, users are capable to create change requests on valid documents
- List: Favorites 🡪 user private favourite links to records, displayed on the QM home screen
- List: Filters 🡪 user private favourite links to lists (including filters and added columns), displayed on the QM home screen
- List: Shareflex Flow Triggers 🡪 this is where all actions are stored that have triggered a workflow on valid/approved documents
- List: Shareflex Flow Workflows 🡪 this is where all workflow instances are stored that were applied to valid/approved documents
- List: Shareflex Flow Tasks 🡪 this is where the workflow tasks are stored
- List: Site Pages 🡪 home page icons and process landscape aspx files are stored here
The /sites/ShareflexQualityDocuments/Workspace hosts another set of lists and libraries which are explained below here.
In general the function of the Workspace site is to store NOT (yet) approved content. The image below display the lists and libraries in the Workspace sub-site.
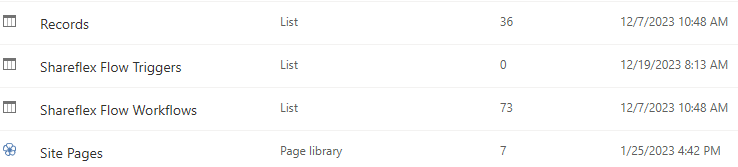
QM used content containers are explained in the list below.
- Library: Attachments Edit 🡪 the record has annex documents or files stored in this library when the record is in edit workflow phase
- Library: Attachments Invalid 🡪 annex documents or files of invalidated (older) versions of the record are stored in this library
- Library: Attachments Valid 🡪 the record has annex documents or files stored in this library when the record is in valid or approved workflow phase
- Library: ConversionJobs 🡪 when a document is converted to PDF at publication, and this is done via an external app (not the Graph API), the job is stored here
- Library: ConversionResults 🡪 the result of PDF conversions that were not done via the Graph API
- Library: Documents Edit 🡪 the main document is stored in this library when the record is in edit workflow phase
- Library: Documents Invalid 🡪 Invalidated (older) versions of the main document are stored here.
- Library: Documents New 🡪 the main document is stored in this library when the record is in new workflow phase (no document number assigned)
- Library: Documents Valid 🡪 the main document is stored in this library when the record is in valid or approved workflow phase
- Library: Site Assets 🡪 are default and not used by QM.
- List: Applicable Documents Edit 🡪 the record can have links to other approved documents or URL’s, these are stored when the record is in edit workflow phase
- List: Applicable Documents Invalid 🡪 links to other documents/URL’s of documents that are invalidated (older versions)
- List: Applicable Documents Valid 🡪 the record can have links to other approved documents or URL’s, these are stored here when the record is in valid or approved workflow phase
- List: Change Requests 🡪 the record can have links to change requests created by users, these are stored here when the record is in the valid or approved workflow phase
- List: Change Requests Edit 🡪 the record can have links to change requests created by users, these are stored here when the record is in edit workflow phase
- List: Job List 🡪 logging of jobs (like creating/uploading documents)
- List: Shareflex Flow Triggers 🡪 this is where all actions are stored that have triggered a workflow on edit documents
- List: Shareflex Flow Workflows 🡪 this is where all workflow instances are stored that were applied to edit documents
- List: Site Pages 🡪 home page icons are stored here
Do NOT add users to SPO Site settings Users and Permissions groups, this will break the QM permissions (see image below).
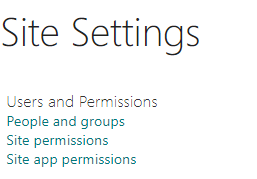
Permissions can be configured on 2 levels.
Level 1: SharePoint admin center site permissions.
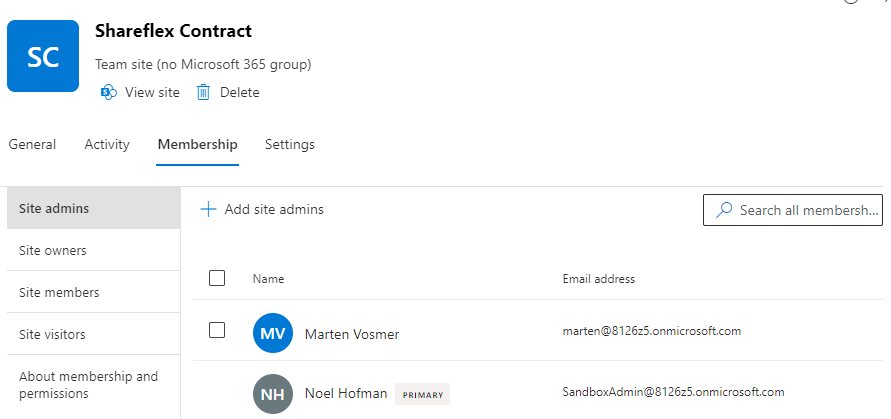
| Group | Explanation | Usage |
| SPO Site Admins | Managing the SharePoint Online site collection | Granting IT Administrators permissions to the SharePoint Online site (SPO) gives them full control over the QM content. Members of this group should use these permissions responsibly when acting as end users in QM. |
| SPO Site Owners | Power user with Full Control privileges to the given SharePoint site. Can adjust the security/permissions of the site, be able to edit pages, add web parts, create new subsites and even delete a site if he/she wishes. | It’s advised not to use this group unless absolutely necessary. |
| SPO Site members | User who has been added as a member of the site itself. This role is associated with the default “Edit” permission level, which allows users to add, edit, and delete items within the site | It’s advised not to use this group unless absolutely necessary. |
| SPO Site visitors | Users can can view all content | It’s advised not to use this group unless absolutely necessary. |
Level 2: Shareflex application permissions
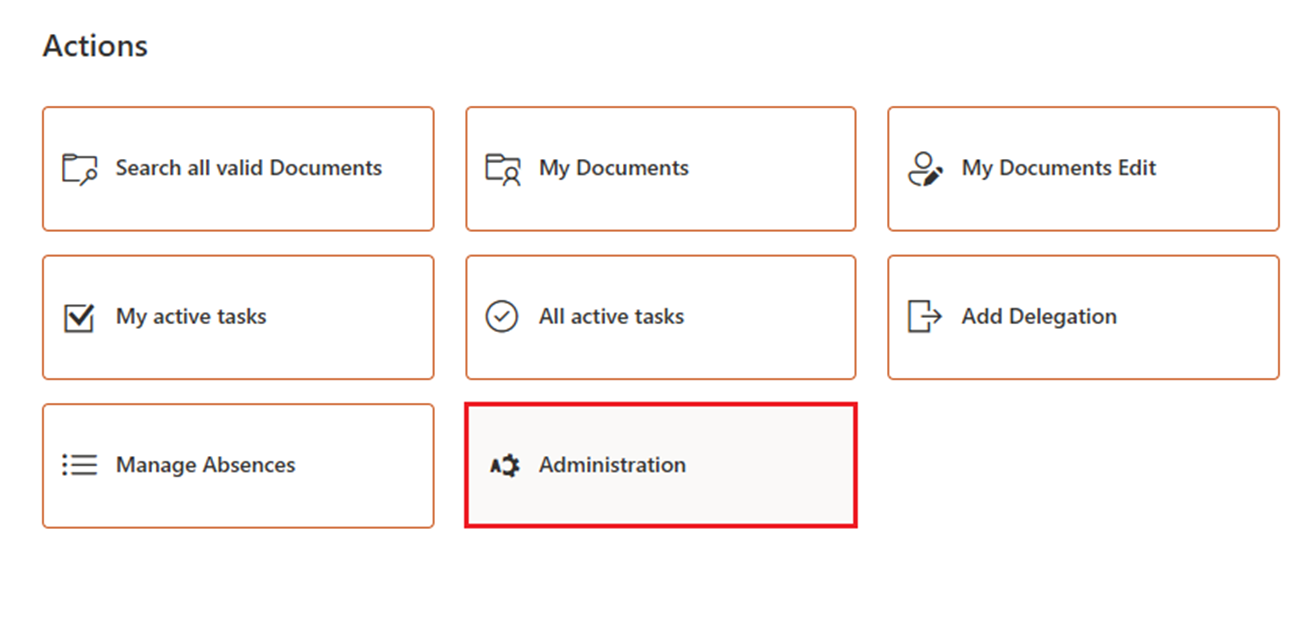
Navigate to Administration under Actions.
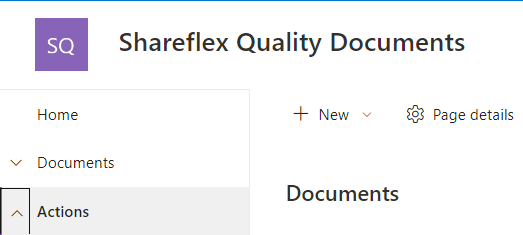
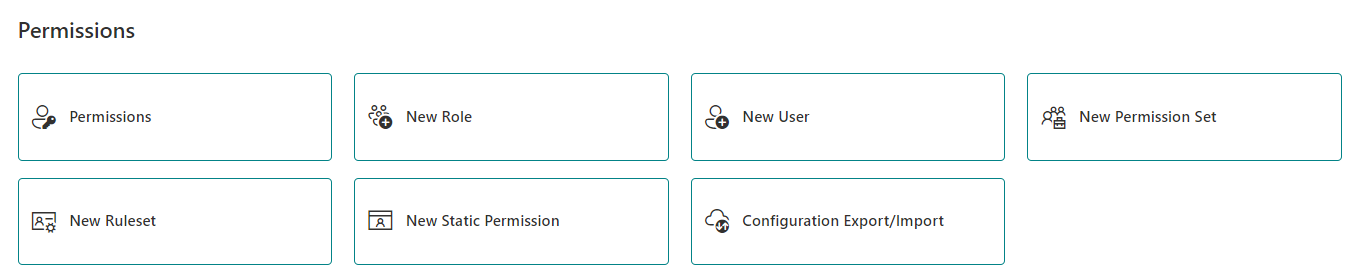
Navigate to Permissions.
The following roles are present in the QM application.
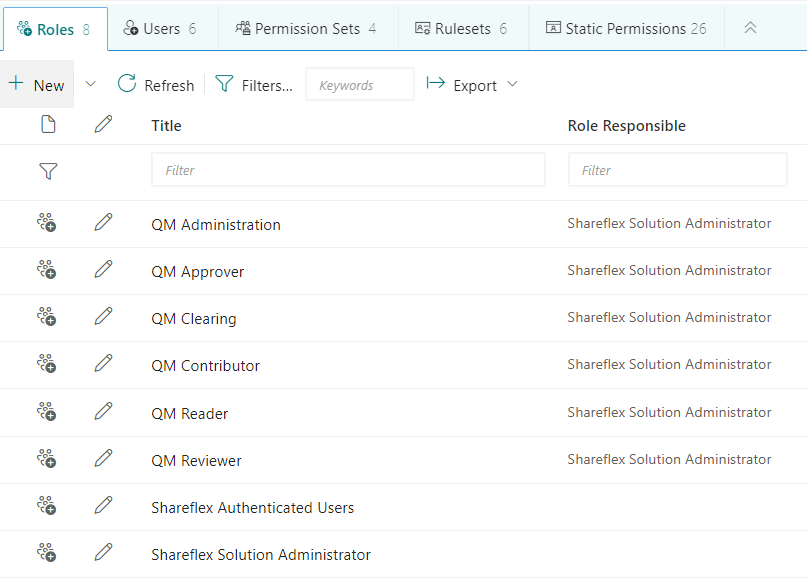
The QM application roles and privileges are explained in the table below.
| Group |
Purpose | Read Permissions | Edit Permissions | Delete Permissions |
| QM Administrator | Create/execute, edit and delete permissions in the Admin environment of the application (workflows, permissions, notifications, admin jobs) Cancel active workflows NO access to Shareflex Core (pscBAF) |
Yes | Yes | Yes |
| QM Approver | No permissions in itself, only when used as value in the Approver field.
The Approver field can hold QM Approver and/or other usernames/groups. Users in the Approver field can view all items in Edit and Valid Documents, and approve ‘Submitted for approval’ items in the Documents Edit library, for which they receive workflow task links via email. |
Edit and Valid Documents (when role is used in Approver field) | No | No |
| QM Clearing | No permissions in itself, only when used as value in the Clearing field in a Workflow definition.
The user(s)/group in the Clearing field is allowed to cancel active workflows, when the Clearing role is activated in the Workflow binding document. Administrators can always cancel active workflows. If the Clearing field is changed, the new clearing authority only applies to new workflows. Existing active workflows can only be canceled by the old clearing authority (or an administrator). |
No | No | No |
| QM Contributor | Only create or upload a new document. Editing and starting workflow capabilities is attributed to the Editor field to which the item creator is added initially. | No | No | No |
| QM Reader | Read permissions to all documents in New, Edit and Valid Documents
May approve records when used as value in the Approver field. |
Yes | No | No |
| QM Reviewer | No permissions in itself, only when used as value in the Reviewer field.
The Reviewer field can hold QM Reviewer and/or other usernames/groups. Users in the Reviewer field can view all items in Documents New, Edit and Valid, and approve ‘Submitted for review’ items in the Documents New and Edit libraries, for which they receive workflow task links via email. |
New, Edit and Valid Documents (when role is used in Reviewer field) | No | No |
| Shareflex Authenticated Users | Read permissions to all documents in Valid Documents
No access to documents under Records May approve records when used as value in the Approver field. |
Valid Documents | No | No |
| Shareflex Solution Administrator | Unlimited access, including access to Shareflex Core (pscBAF) | Yes | Yes | Yes |
On site collection level, a SharePoint user group is automatically created from each role. By default, the roles ‘Shareflex Solution Administrator’ and ‘Shareflex Authenticated Users’ are created.
The group ‘Everyone’ is added to the group ‘Shareflex Authenticated Users’.
Below are some examples how permissions are implemented.
A user with the QM Creator role can create documents in the New Documents library. This person is also the Editor of this document, and has edit permissions. Users with the QM Reader role have read permissions on this document. When a user has only the QM Creator role (and not the QM Reader role), this user can only see the documents of which he/she is the Editor.
When the Publishing workflow is started, the permissions of the Editor on the document will be updated from Edit to Read, while users in the Reviewer (e.g. QM Reviewer), Approver (e.g. QM Approver) and Confirming People field will get Read access to the item. Depending on the workflow state, these users will be able to approve workflow tasks to which they are assigned, but will not be allowed to edit the document and metadata itself.
When the document is published at the end, all users will have Read access via the Shareflex Authenticated Users group, including the Editors and Administrators. However, Administrators and Editors will be able use the Workflow actions to invalidate the document, or to check out the document to enable content change, and resubmit it via the publishing workflow.
Managing user permissions
Under the “Users” section, you can add users to the applicable role. End user permissions to QM should be managed here.

Each individual user can have one or multiple roles.
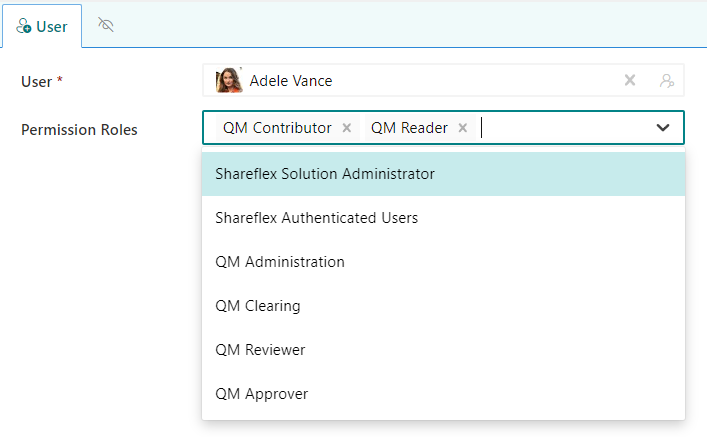
Best practice is to subsequently adjust the “Shareflex Authenticated Users” group so that only those users and groups that are relevant to the business application are authorized.
It’s possible to use MS Azure Entra Groups to assign QM application permissions to the end user groups.
By default, notifications are sent to users at different times and on different topics. For Shareflex Quality Documents, 12 Notification templates are installed by default, with 12 associated Notification rules.
The table below describes who is notified about which topics.
|
Title |
Recipient |
Description |
|
Document Checkout Editor |
Editor |
Notification of checked out documents that need to be edited. |
|
Document Number Assigned |
Editor |
Notification of documents that have been assigned a document number. |
|
Document Number Creation Rejected |
Editor |
Notification of documents that have been rejected. |
|
Document Published |
Editor, distribution list |
Notification of documents that have been published. |
|
Document Retracted |
Editor |
Notification of documents that have been withdrawn. |
|
Document Retraction Declined |
Editor |
Notification of documents that have not been withdrawn. |
|
Document Workflow Cancelled |
Reviewers, Approvers, Confirmers |
Notification of documents whose release has been cancelled. |
|
New Change Request |
Editor |
Notification of a new change request. |
|
New Task |
Task editor/assignee |
Notification of new tasks that need to be edited. |
|
Document Checkout Notification |
Editor |
Notification of all checked out documents. (not active by default) |
|
Task Reminder |
Task editor/assignee |
Reminder of open tasks. (not active by default) |
|
Task Escalation |
Task editor/assignee |
Reminder of open tasks. (not active by default) |
Email notifications cannot be sent if the outgoing email account has not been successfully configured. To configure the outgoing email account, the admin job “nf100 – Set Notifications Configuration” is available.
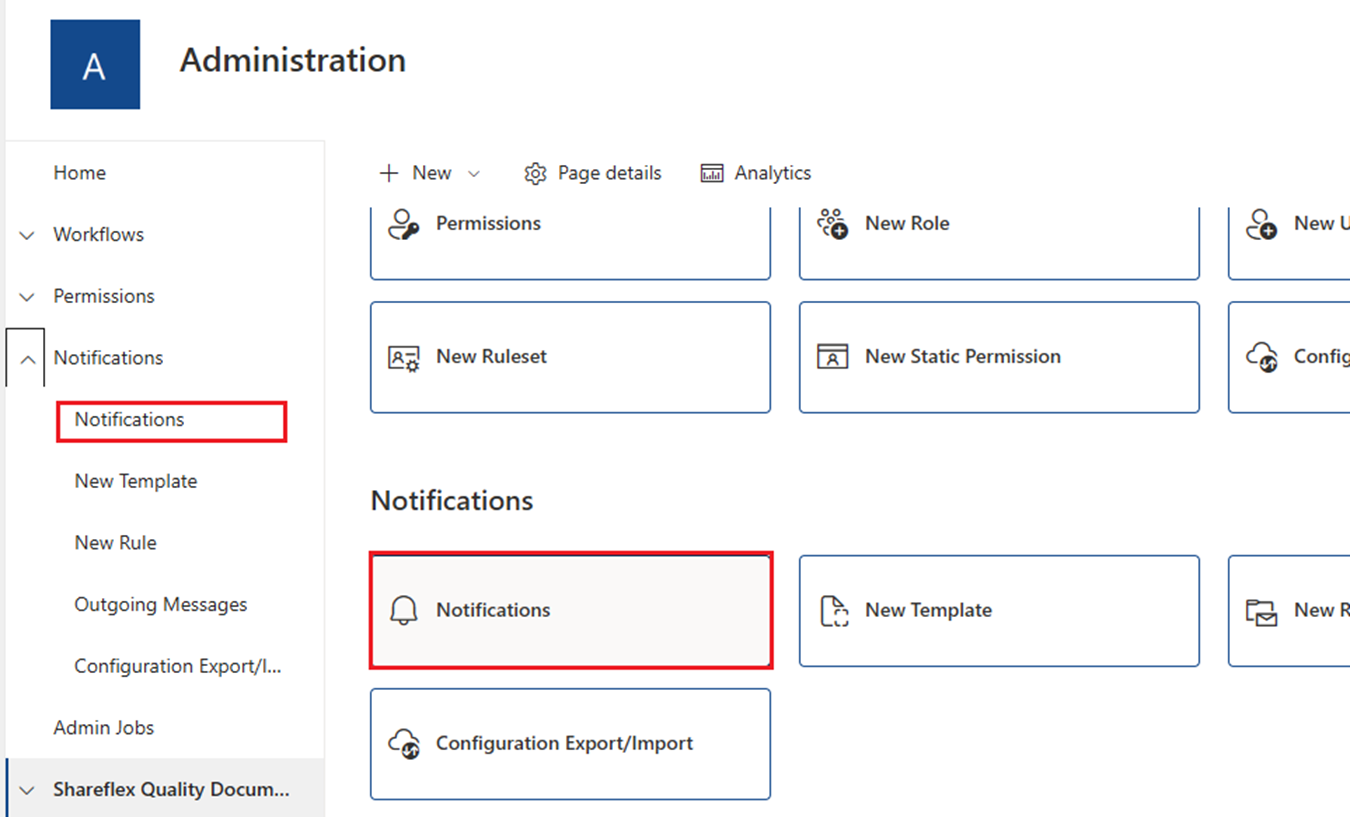
To configure Notifications, go to the Admin site and open Notifications
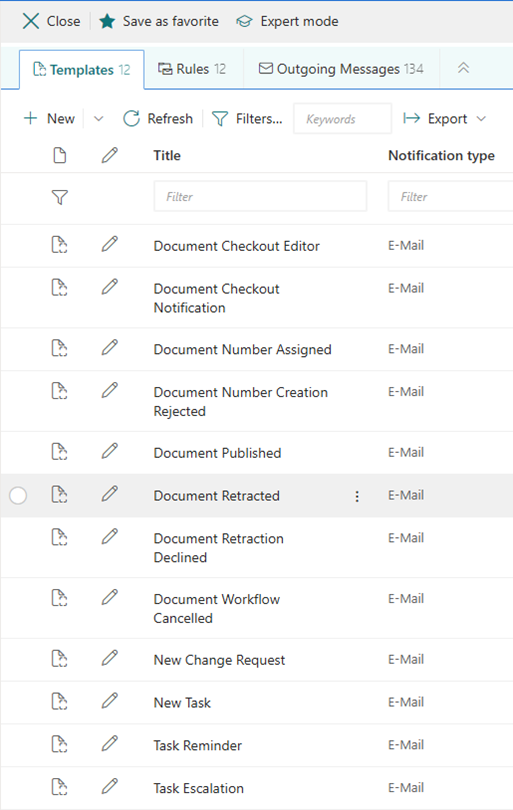
Templates
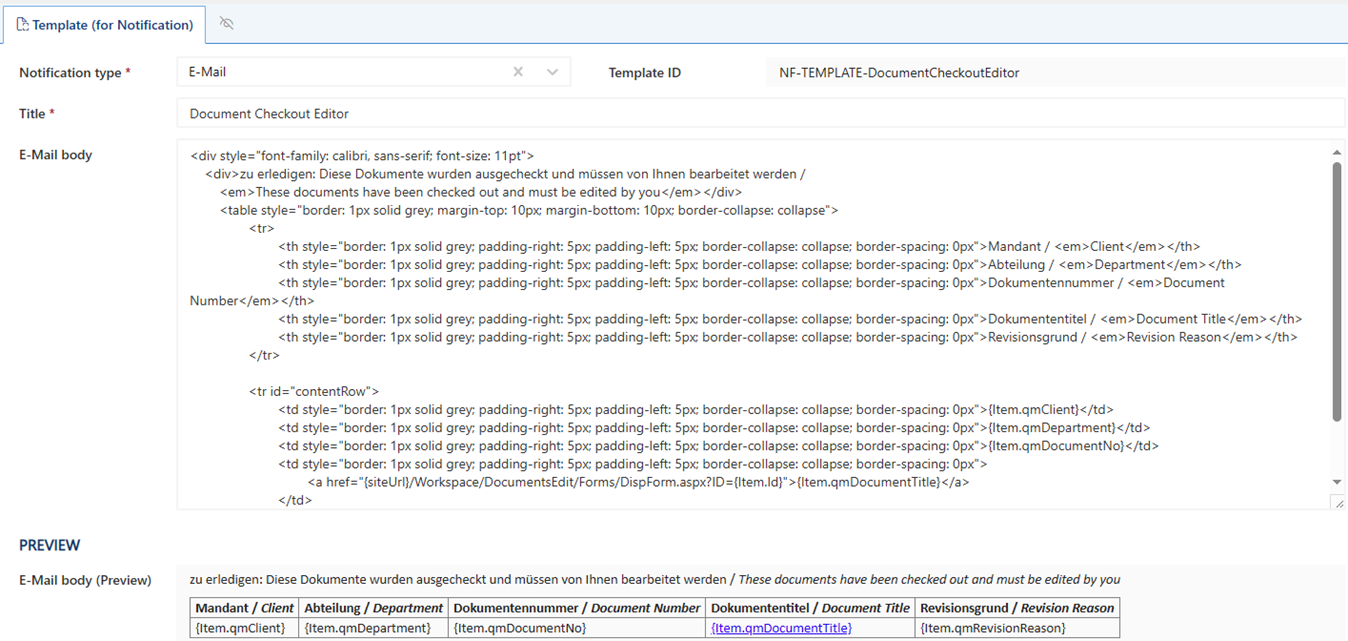
Under the Templates tab, you will find the pre-formatted emails that can be sent.
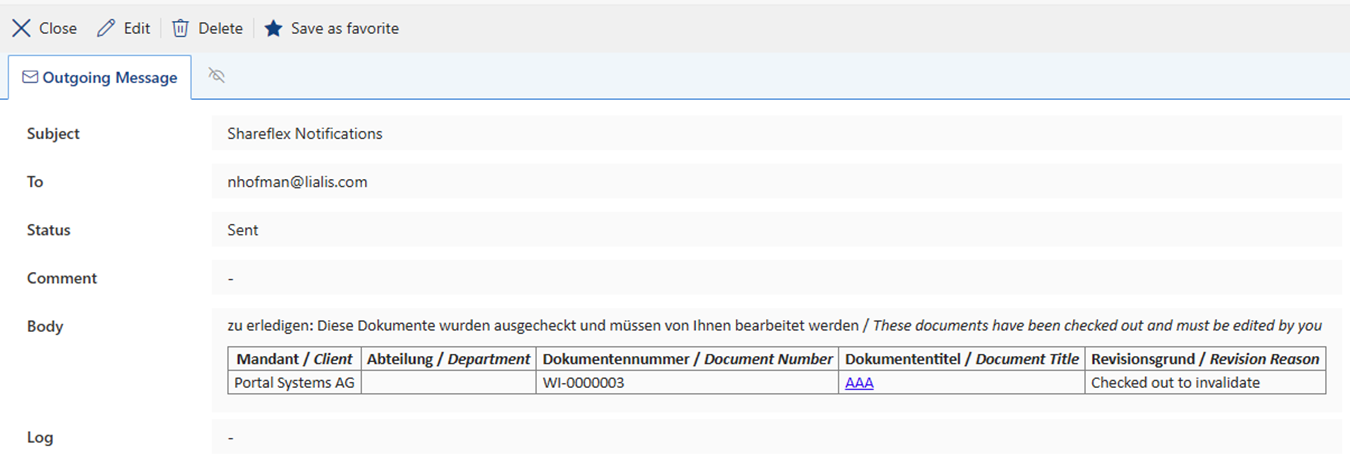
Example of the Document Checkout Editor email:
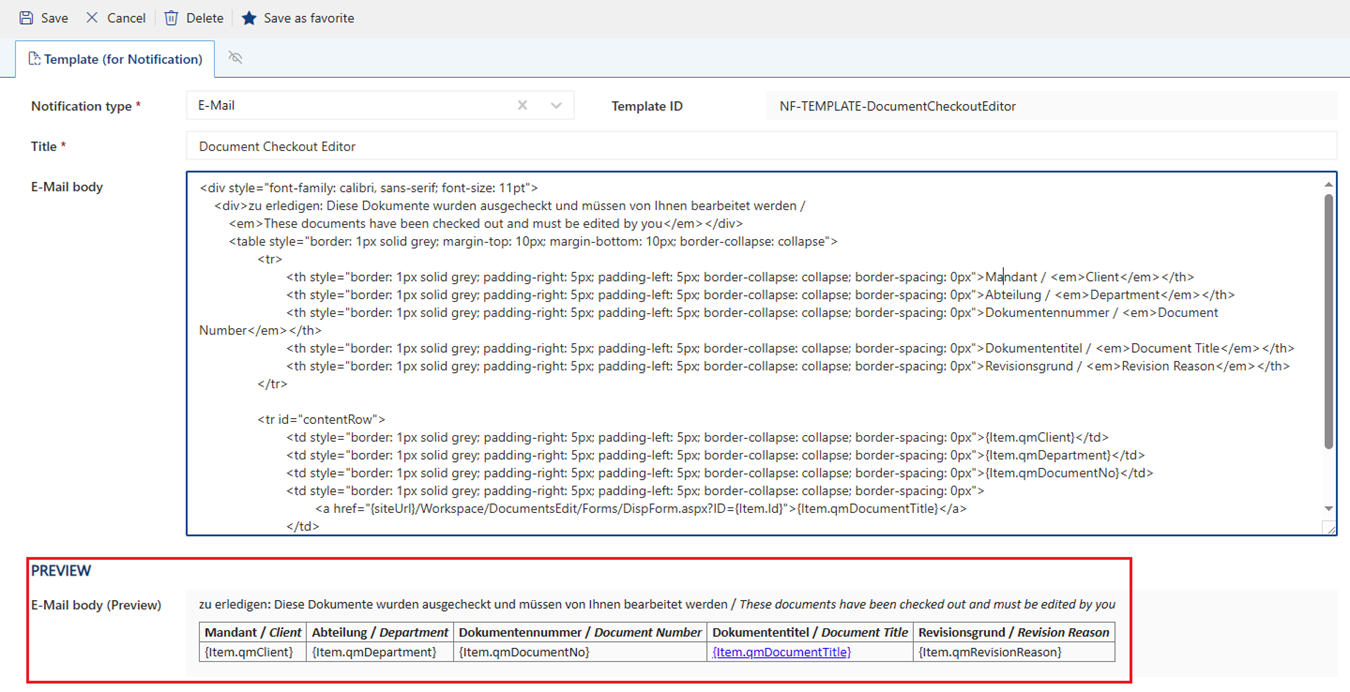
You can use an existing template or create a new one. When creating a new template, you can copy the content of an existing template and adjust it to your means. A preview of the email body is displayed at the bottom.
Important is that the email has this exact HTML format, and that the property id=’contentRow’ is specified exactly. No further attributes may be added to the <tr> tag. Upper and lower case letters are important!
You can include placeholders and some simple functions (for instance for current date and time).
It is also possible to use header and footer text. For this to work, 2 functions must be implemented in ShareflexNotifications_CUSTOM.js
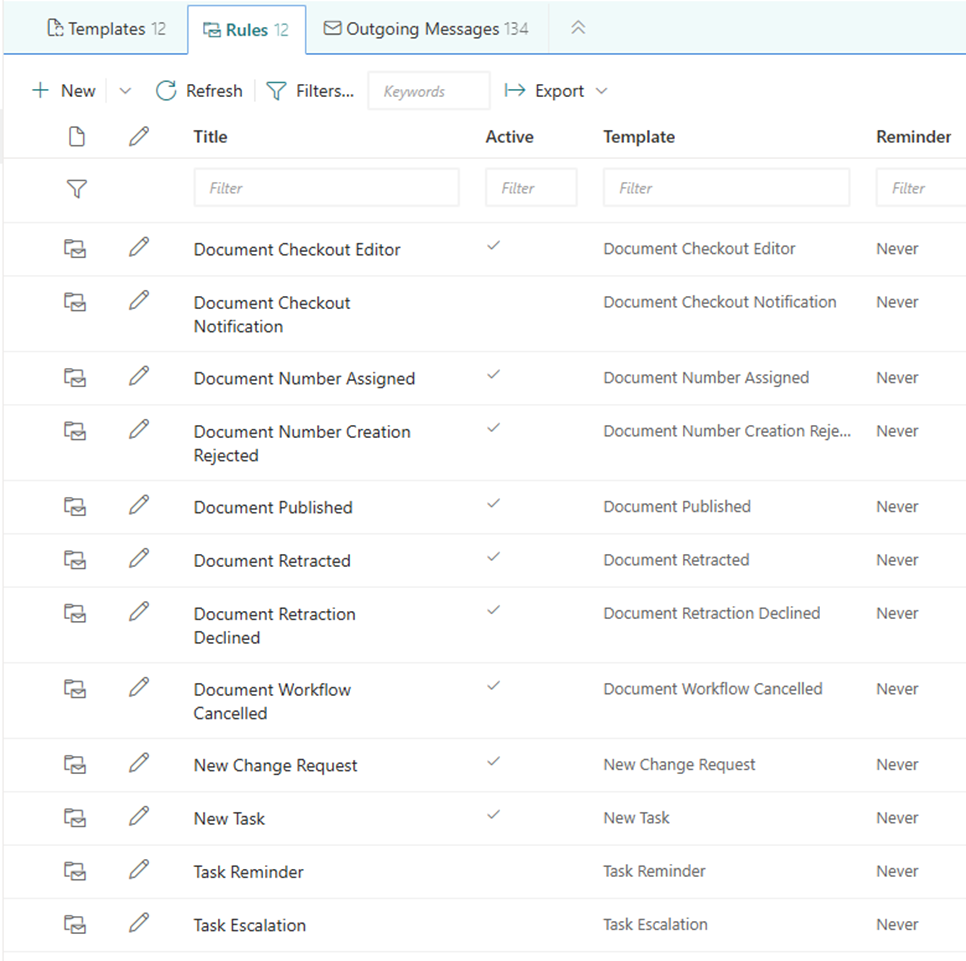
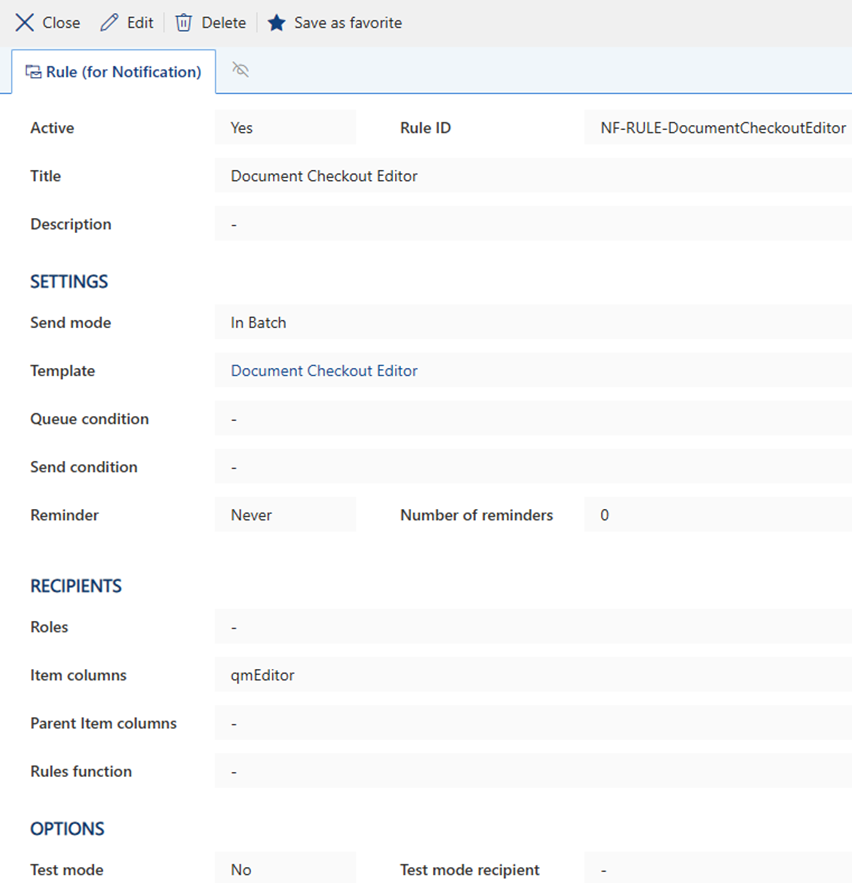
Rules
For each Template, a notification rule is defined that specifies when the email is queued and sent. These notifications rules allow notifications to be configured flexibly. Shareflex Solutions administrators can specify when a notification should be sent, who should be notified, what should be notified about and what template should be used for the notification.
Shareflex Quality Documents Online provides different rules by default to notify different people about different events. It uses the Shareflex Notifications API whenever a document or task is created, updated or deleted to create an entry in the Shareflex Notifications Queue Jobs list.
By default, the Shareflex Notifications Timer Job processes the entries in the Queue Jobs list once per day. During processing, the Shareflex Notifications API creates entries in the Shareflex Notifications Queue to store notifications for the future and sends notifications for due Shareflex Notifications Queue entries. The sending is logged in the Outgoing Emails list.

Only active rules are checked. Inactive rules are not processed.
Notifications are sent ‘In Batch’ by default (i.e. via the timer job). Messages are added to the message queue. All these queued messages are sent at once at a specific time once a day and will be logged in the ‘Outgoing Messages’ list. When multiple messages are queued for one recipient, these messages will be combined and sent in one message.
Queue conditions are evaluated when an entry is added to the queue. Only if the condition is met will the entry be added to the queue.
Sending conditions are evaluated at the time of sending. This is relevant for task notifications, for example. This ensures that an email is only sent for tasks that have not yet been completed ($weTaskStatus != ‘Completed’)
If no condition is specified, the entries will be created or sent in any case. An exception applies in that no notification will be sent if the context element does not (or no longer) exist.
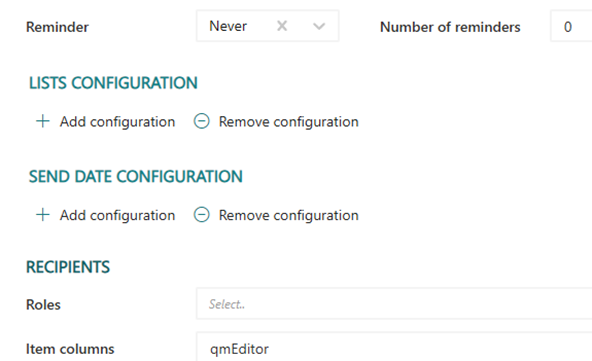
You can configure that a certain number of reminders are sent at certain intervals (daily, weekly, monthly, annually).
In the Rules function, you can specify a Shareflex Rules function that returns the recipients of the notifications. This function can be implemented in the ShareflexNotifications_CUSTOM.js file, which can be found in the Site Collection Defaults configuration library within the Shareflex Core configuration web page in the Custom/ShareflexAddons/SFnotifications subfolder.
Use the Test mode to check the recipient configuration. Test mode prevents real recipients from receiving unnecessary or misleading emails during the testing phase and thus increases user satisfaction. In addition, test mode can be used to check whether the rule works as expected.
In addition, there is a global test mode that determines the recipients according to the rule configuration, but the entries generated in Outgoing Notifications are not sent, but only created in the “Draft” status. This allows the recipient configuration to be checked.
The global test mode is activated via the ShareflexNotifications_CONFIG.js file in the Shareflex Core configuration website in the “SiteCollectionDefaults” configuration library in the “/Custom/ShareflexAddons/SFnotifications” subfolder.
In edit mode, the following options can be configured to define a more specific notification configuration:
- List Configuration – the list(s) in which the items for which notifications are to be sent are managed. Whether you can configure any list, depends on the Shareflex application that you use.
- Send Date Configuration – the date at which the notification should be sent.
If rules are adjusted, these adjustments have no effect on existing queue entries. To do this, the queue must be updated with the Admin Job nf201 – Update Notification Queue.
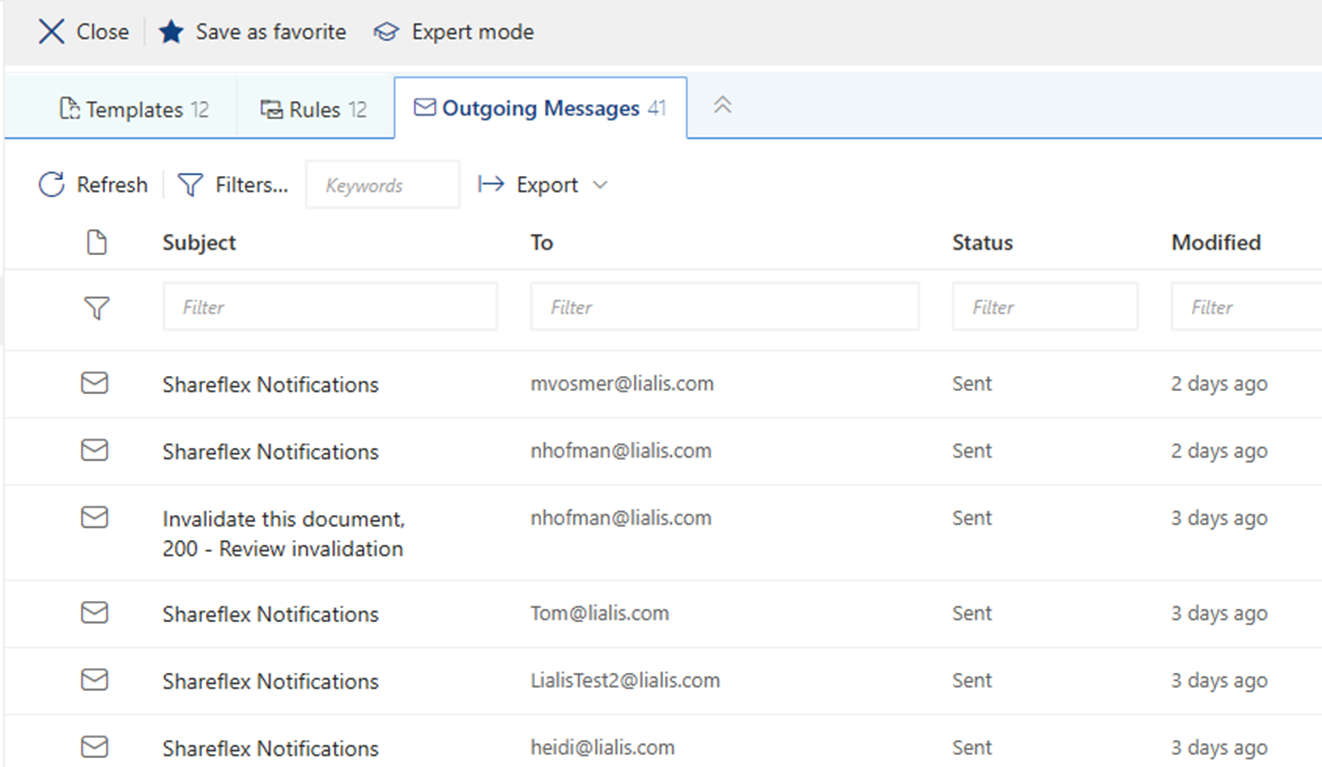
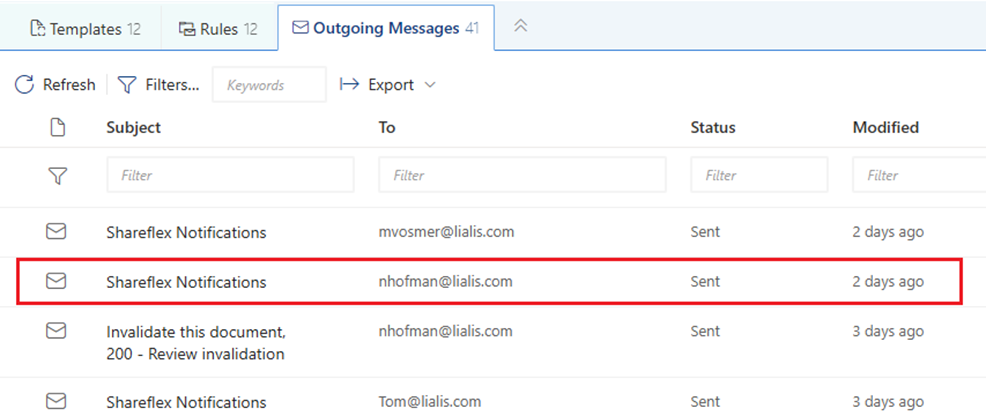
Outgoing Messages
The Outgoing Messages list provides detailed insight into the notification processes and enables efficient management of the message flow. The main functions of this list are
- Recording of every single notification sent by the system.
- Detailed information about the time of sending and the recipient of the message.
- Information about the current status of each notification, including whether it was sent successfully or if there were any problems.
- Enables quick intervention in case of errors or delays in the sending process.
- Ensures transparency in corporate communications.
- Support in compliance with internal policies and external regulatory requirements.
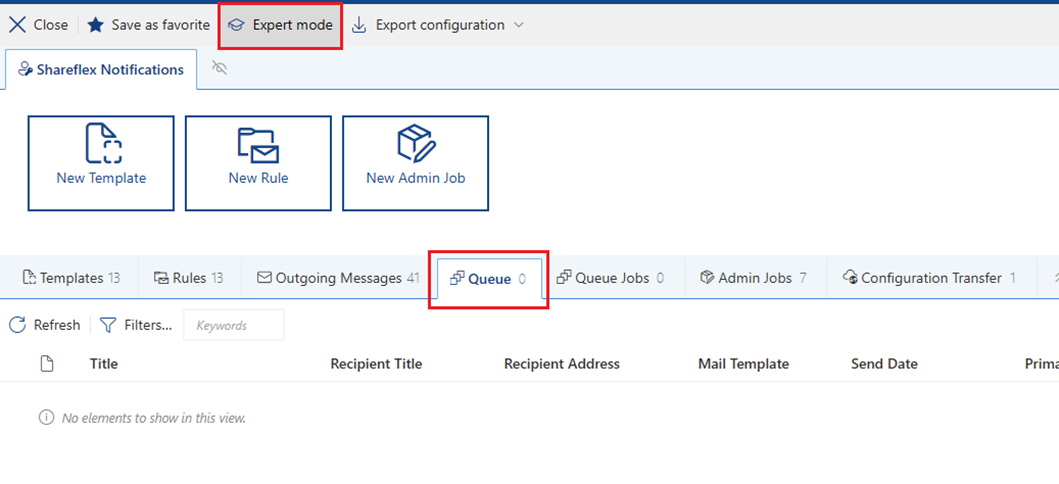
Sent status can be Draft (message created, but not sent yet), Sending, Sent, Error. In case of Error, the Shareflex Solution Administrator can use the information in the “Log” column to determine the cause and resolve the issue. Possible steps include checking the “Logs” list within the Shareflex Core configuration web page and running the admin job nf900 – Send pending emails to resend.
To view the current message queue, click the ‘Expert Mode’ button.
Example
Template for checked out document
Rule for checked out document
Mail notification in Outgoing Messages
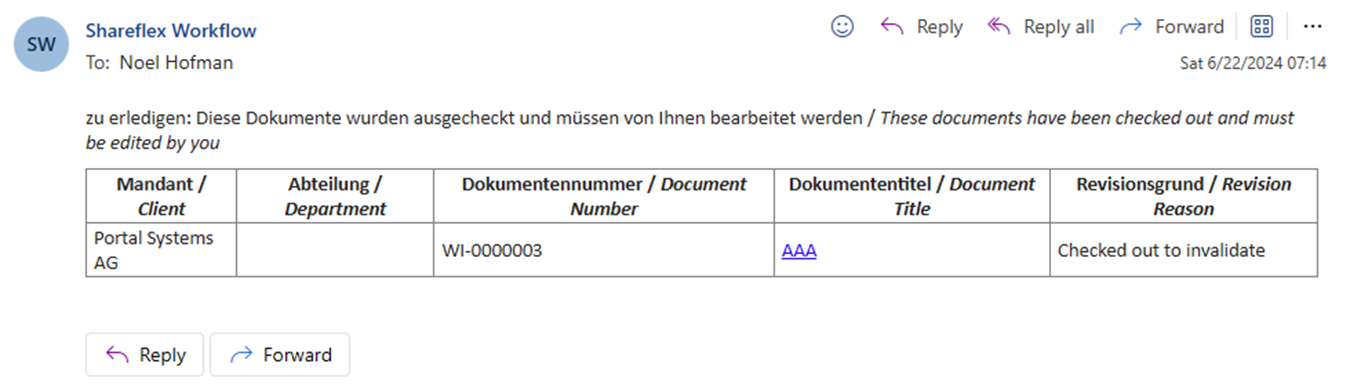
Mail in Outlook
Admin Jobs
nf100 – Set Notification Configuration
To enable notifications, a valid Sender account must be entered. This account needs to have a MS Exchange Online license. When running this job, the following file will be updated: Shareflex Core à Custom/ShareflexAddons/Sfnotifications/ShareflexNotifications_CONFIG.js
If you do not run this job, all outgoing e-mails will remain with status ‘Pending’
nf200 – Process Notification Queue
Run this job to directly send notifications that are pending and waiting for the Shareflex Notifications Timer Job that runs once a day.
nf201 – Update Notification Queue
Run this job to update pending notifications when notification rules have been updated.
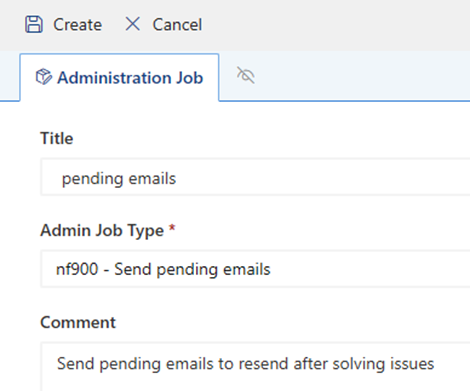
nf900 – Send Pending Emails
Run this job to send notifications that were not sent correctly (status “Error”, or “Sending”)
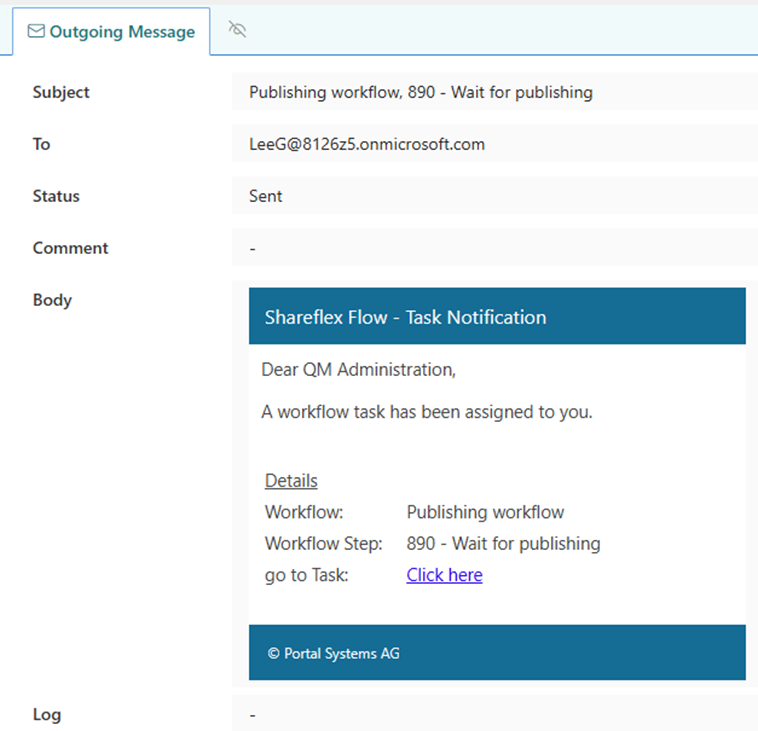
Workflow Task Notifications
Task notifications that are directly sent when a workflow task was updated, are NOT processed by the timer job, and are NOT defined in Notifications. These notifications are triggered within the workflow itself, by the ‘Send notification’ option.
The role of QM Administration is needed to manage the content in this section.

This section provides lists where metadata and files are stored, which are referenced on the main form, such as choice lists. Each part is explained in the sections below.
Templates
The templates set here are used in the QM solution.

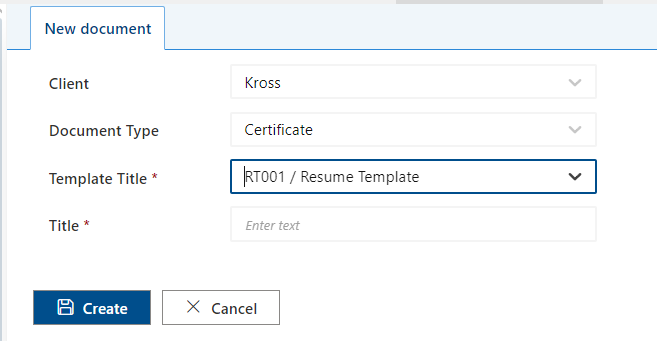
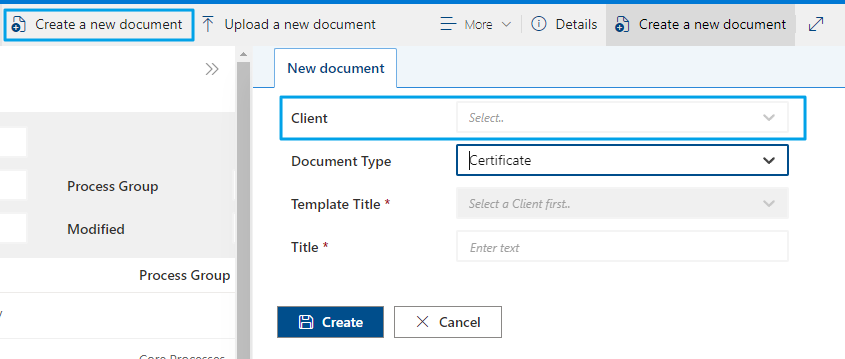
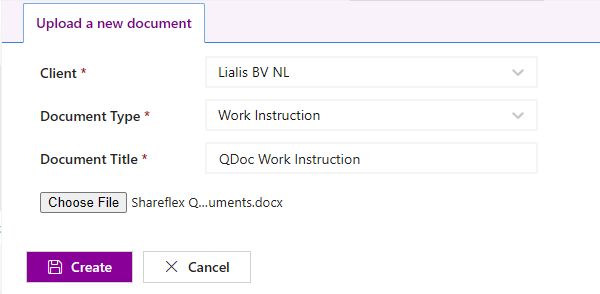
The templates displayed in the New Document dialog are related to the Client and Document Type selection, for example:
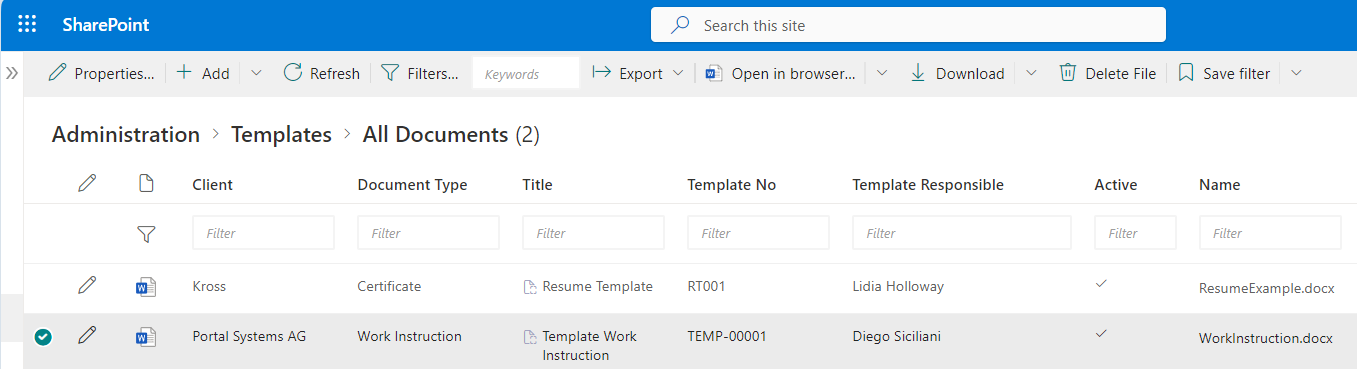
The templates configuration list under Administration, is displayed below:
A template configuration is displayed in the image below:
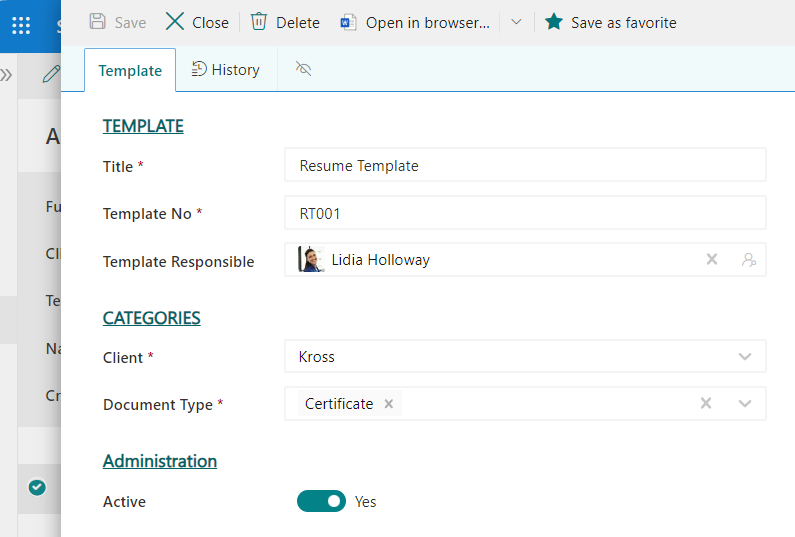
In this example, the Word template is only displayed when the user chooses the client Kross and Document Type Certificate.
In the default QM, the Template Responsible has no function. It’s possible to create a role set that allows the person(s) designated as template responsible to only edit their own templates.
Document Types
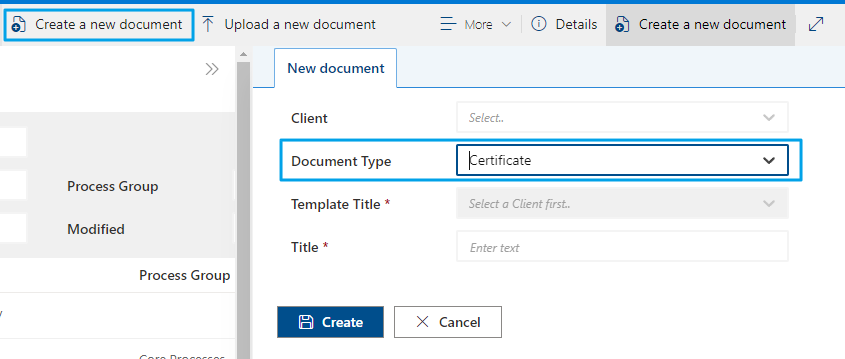
The document type is chosen by the end user when creating a new document (from a (Word) template) or uploading a file.
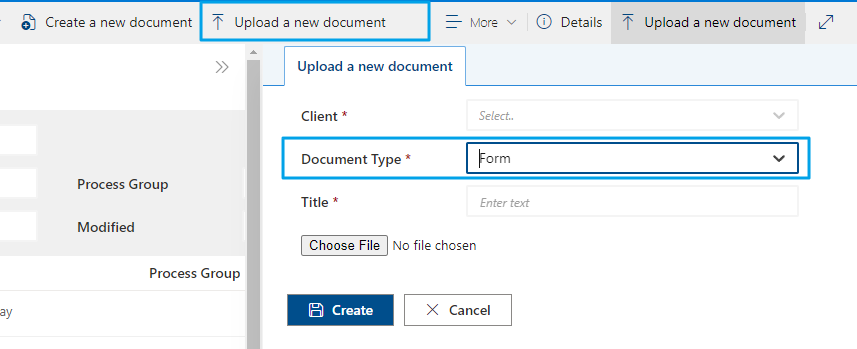
The document types are managed under the Administration \ Document Types of QM.
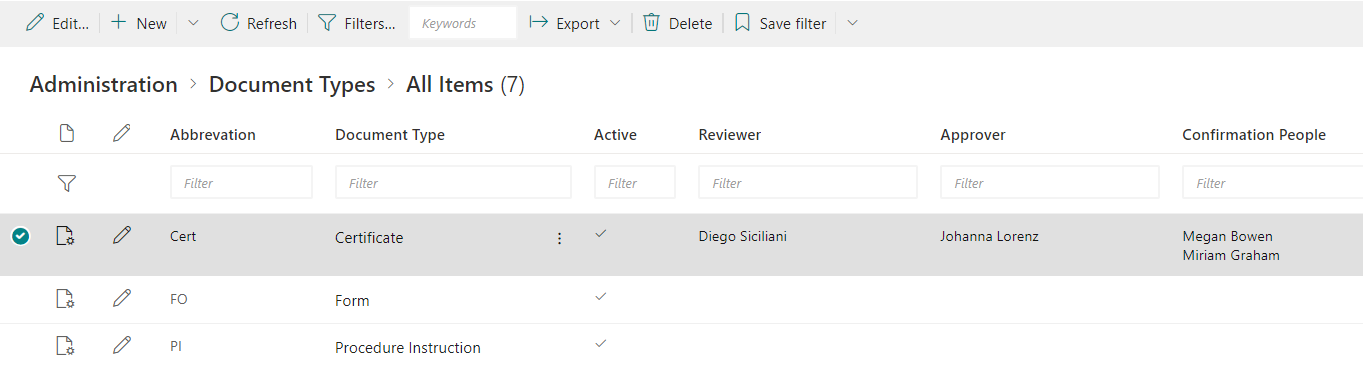
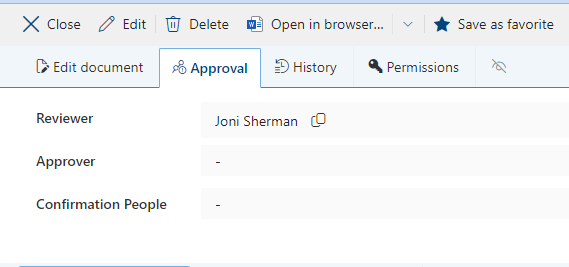
Each document type has the option to set the Reviewer, Approver, and Confirmation users. These users may then be used by default as approvers in the QM document form, either fixed or pre-filled and editable by the document owner. In the default QM solution, however, the document type approvers are not utilized in the QM document approval fields.
Clients
Clients are managed under the Administration \ Clients of QM.
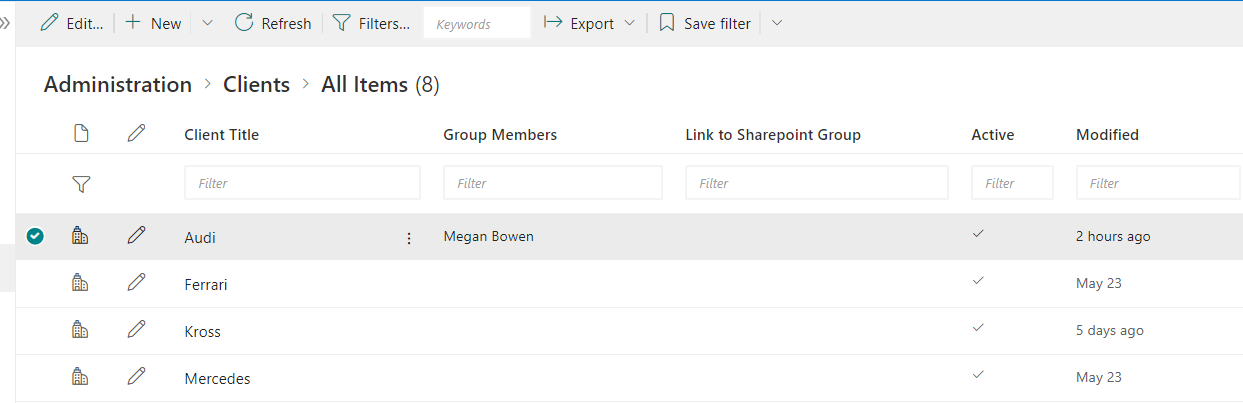
The Group Members field has no function in the default QM solution. A possible function of the Group Members could be to display only the client name in the below two forms (Create a new document or Upload a new document) when the logged-in user is listed in the Group Members field.
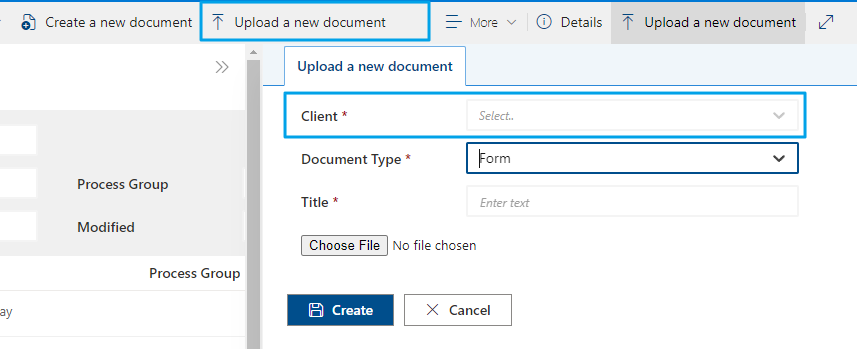
The client list values are used by the below two forms.
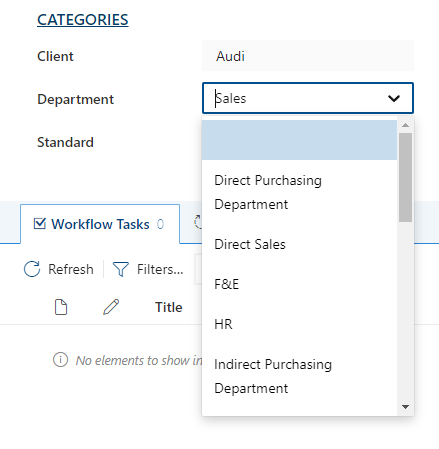
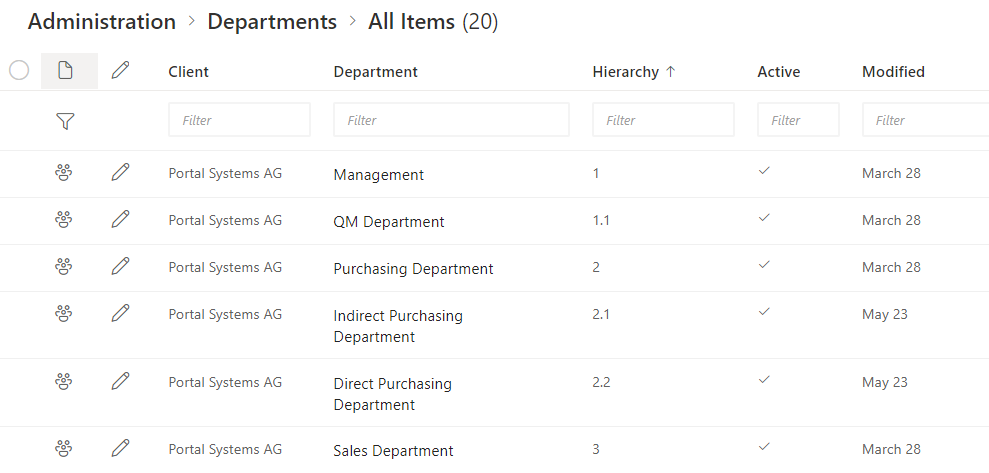
Departments
Processes
The Process Group and Process can be selected on the QM form. The values displayed under Process are related to the Process Group selection, for example.
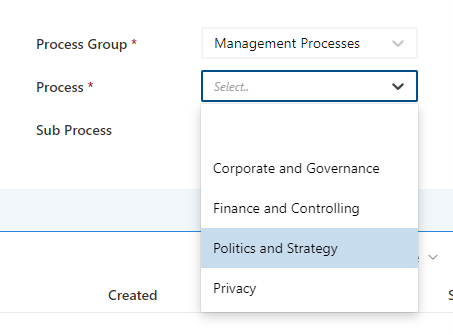
The Process Groups and Processes are maintained under the Administration part of the QM solution. The hierarchy number is used to set the keyword to be a Process Group (1) or a Process (1.1) belonging to the Process Group.

Standards
“In the Standards fields, users can select multiple standards applicable to the QM document.
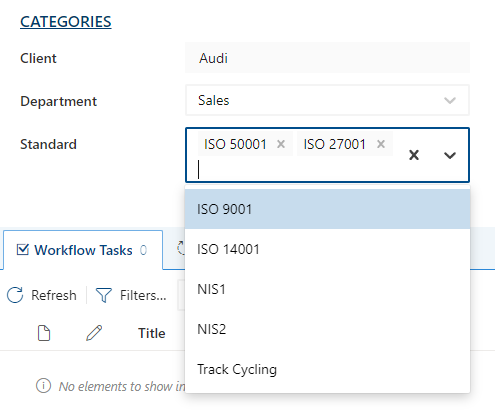
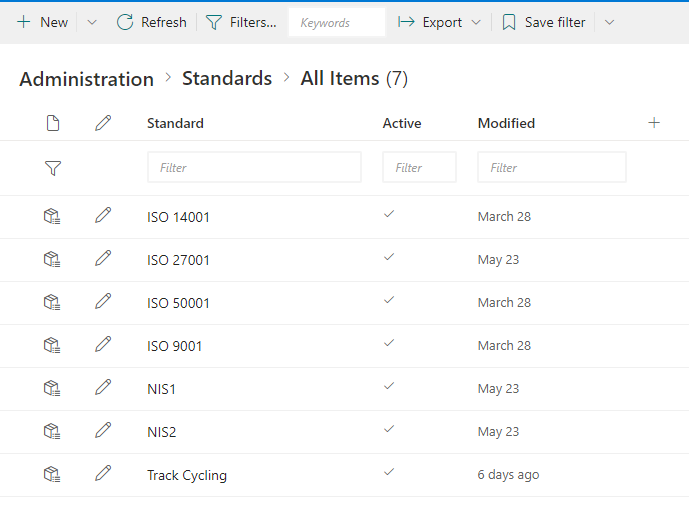
The Standards values are managed under Administration Standards.
When workflows run on documents, permissions are constantly updated: for instance, at some workflow status, a document should only be editable by the author, at another status, all users should be able to read the document, etc. During the QM deployment, these workflows and matching permission sets are deployed as well. This means that, besides assigning roles to users, nothing needs to be changed in the default permissions to make the workflows work.
This section describes how pre-configured permissions interact with the workflows.
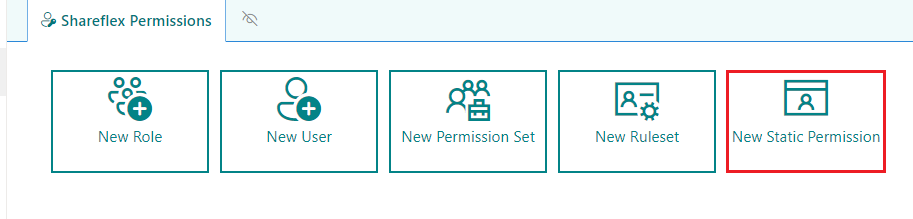
Static Permissions are permissions given over websites and lists/libraries. If you want to set standard permissions for a document library or list, you should use Static Permissions. The permissions are granted independently of metadata. If you define/activate Static Permissions, you automatically abort inheritance.
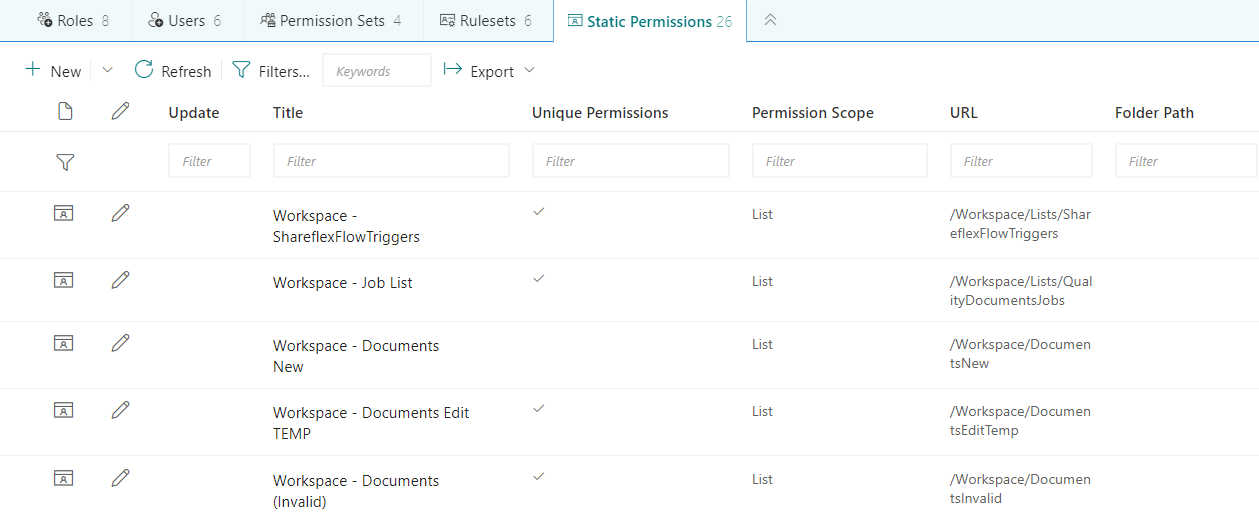
For example, the static permission below will add QM Administrator with Contribute permissions, and QM Contributor with Contribute without delete permissions to the existing permissions of the Jobs list.

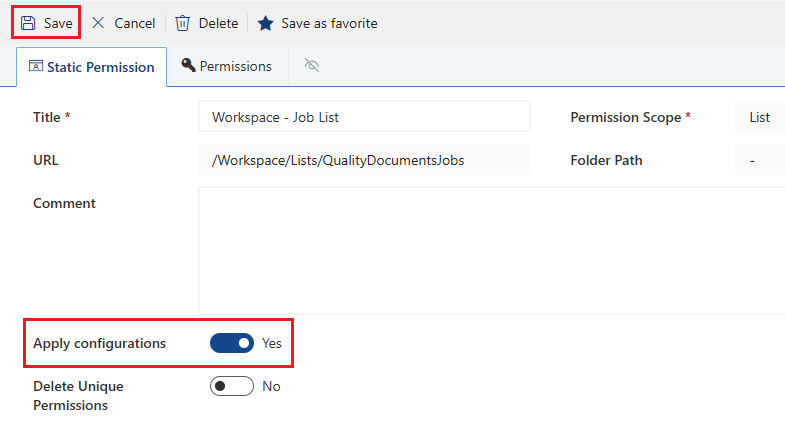
To apply static permissions, open the Static Permission item in edit mode, enable Apply configurations, and click Save.
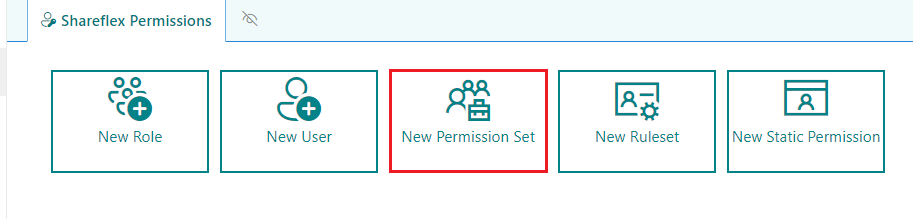
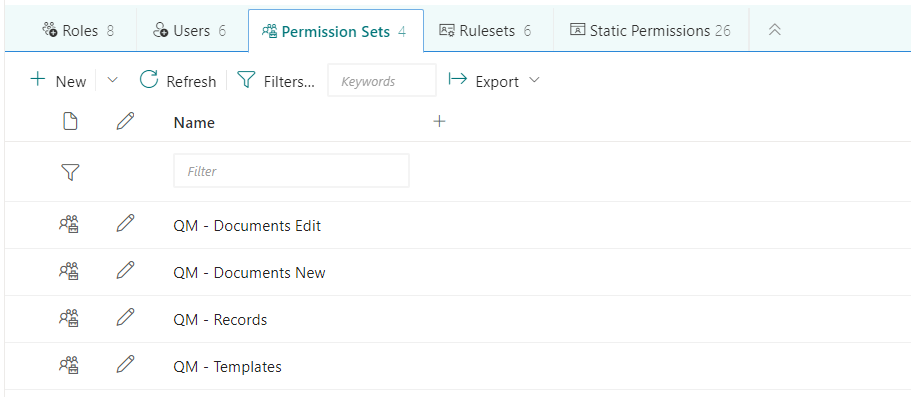
While a Static Permission acts on a site, library or list, a Permission Set acts on an item within a list/library. A permission set is a collection of users/roles/groups with associated permissions. The implementation a permission set is triggered by a linked rule (see Ruleset, below). A few permission sets are pre-defined in QM.
The configuration of the first permission set “QM – Documents Edit” is displayed in the image below.
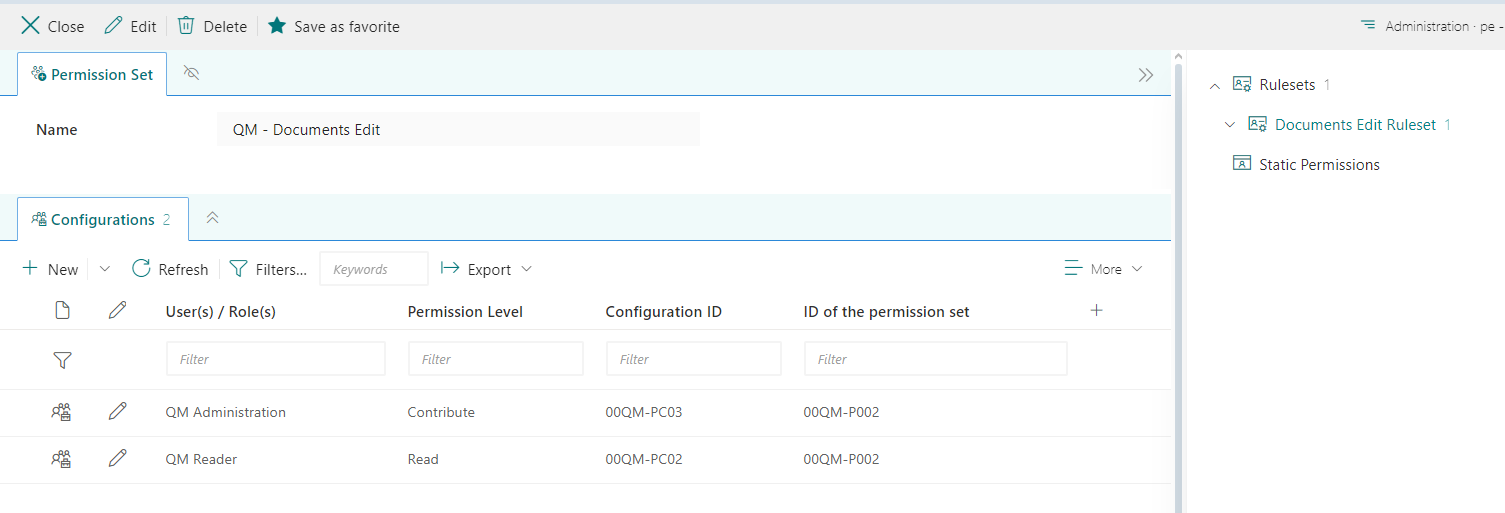
Although the naming suggests that a permission set should be associated with the libraries of the same name, this is not necessarily the case.
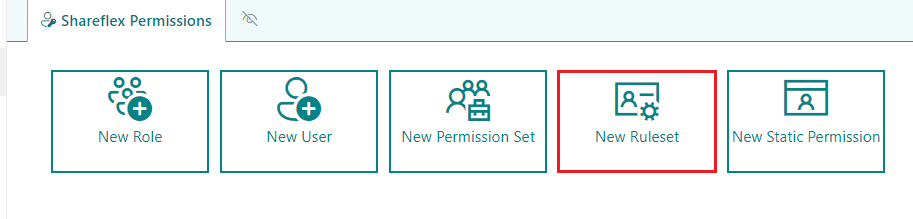
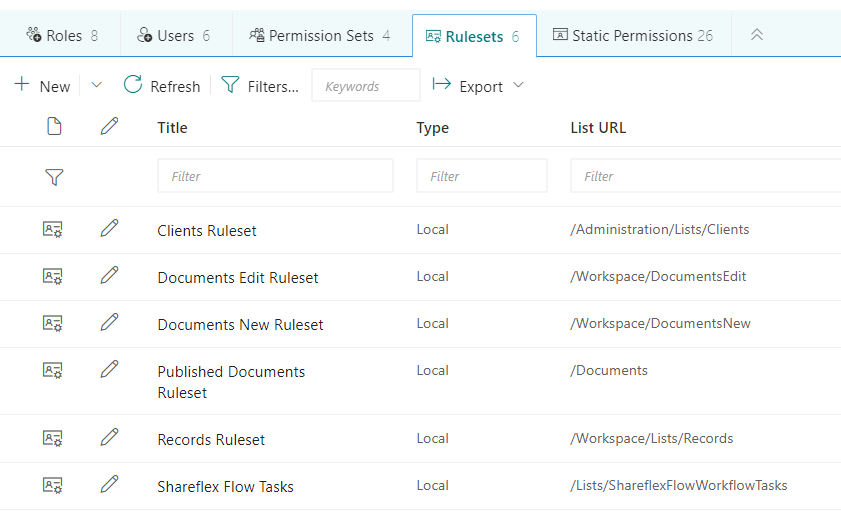
A Ruleset is a set of permission rules that is applied to an item as soon as an item is created or updated. A local ruleset is associated with a single list or library, a global ruleset with multiple lists.
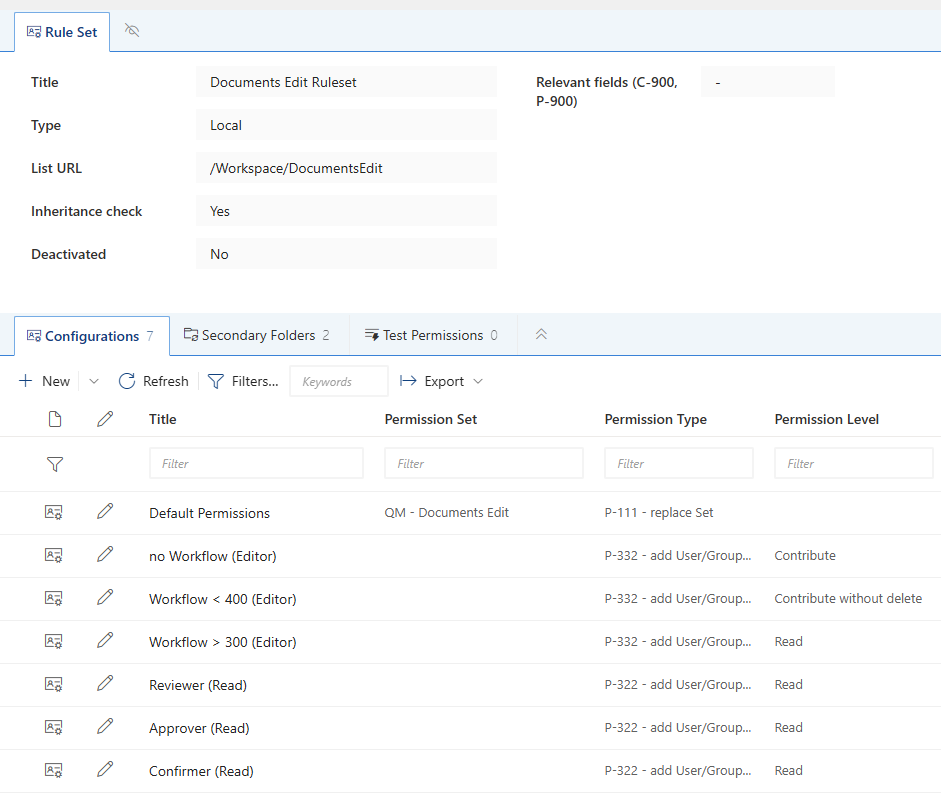
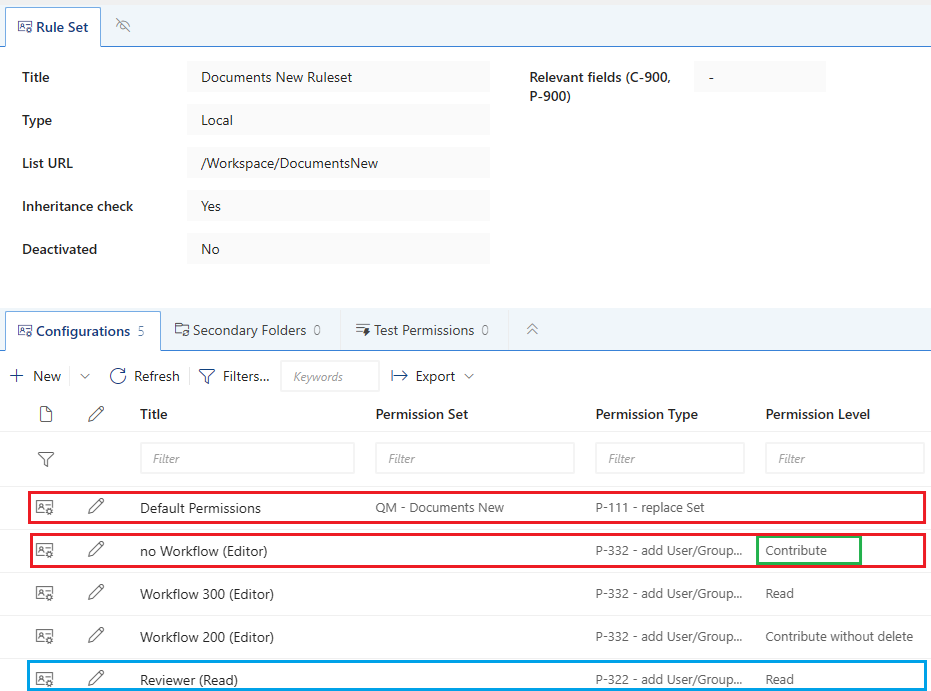
In the default version of QM, permission-relevant metadata is monitored. If a change is made to the fields by the processor, the permission rules are checked and applied. An example rule set is displayed in the image below:
A permission rule within a ruleset defines:
- when these permissions are set (Condition Type: a field value, formula, or function result),
- what permissions are set for the created/updated item, and
- how these permissions are set (Permission Type: add or remove permission, permission set, role, or user)
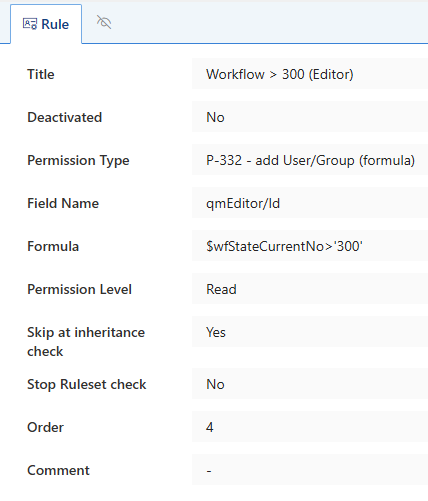
For example, if an item in the Publishing workflow has been reviewed and is then forwarded to the Approver (Step 400), the rule below takes effect: the item permission of the qmEditor user is set to ‘Read’:
- when –> Workflow Number is larger than 300, which is the case
- what –> Permission Level ‘Read’ for field qmEditor
- how –> Add (or replace) the permission
Each time that an item changes, the ruleset is being executed. All rules within the associated ruleset are reviewed in order, and executed when the conditions fit. Rules that do not meet the condition (‘when’), are skipped. The rules ‘Reviewer (Read)’, ‘Approver (Read)’ and ‘Confirmer (Read)’ are so-called ‘dynamic’ rules that do not specify a ‘when’, and are therefor applied unconditionally.
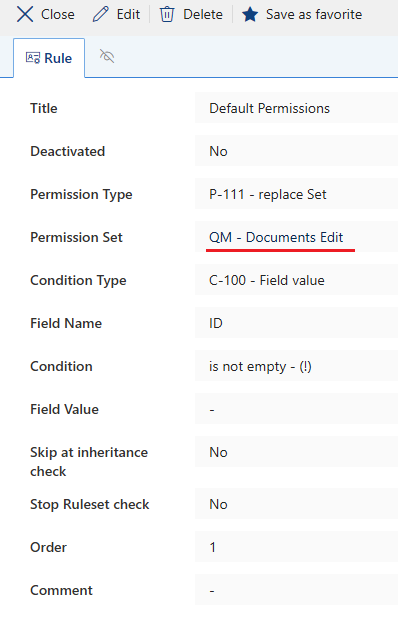
To clarify the difference between a permission set and a ruleset, take a look a the first rule in the Documents Edit Ruleset: ‘Default Permissions’. This rule takes effect when fieldname ‘ID’ is not empty (which is from the moment that the item is created, and every time it is updated after that). The rule replaces the current permission on the item with the permissions defined in Permission Set ‘QM – Documents Edit’: so it replaces the current permissions with QM Administration (Contribute) and QM Reader (Read).
Because this rule is at the top of te rules list, it is executed first. Subsequent rules (including the abovementioned dynamic rules) will further adjust the item permissions.
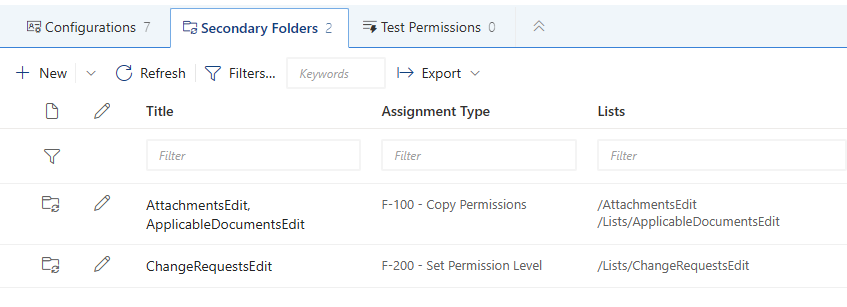
Many rulesets, like the “Documents Edit Ruleset”, also contain a configuration for inheriting permissions to the secondary lists:
With respect to permissions and workflows, the following general rules apply:
- Tasks can be edited by the editor and the administrators
- Documents in progress can be edited by the editor until the workflow starts, then read
- QM readers can read everything
- Approvers can read the documents in which their names are stored
- Files can only be read by the Administrators, Contributors and Readers
- Published documents can only be read
- The administration area can be edited by the administrators and read by everyone else
Library Permissions
Documents New (inherited from /Workspace)
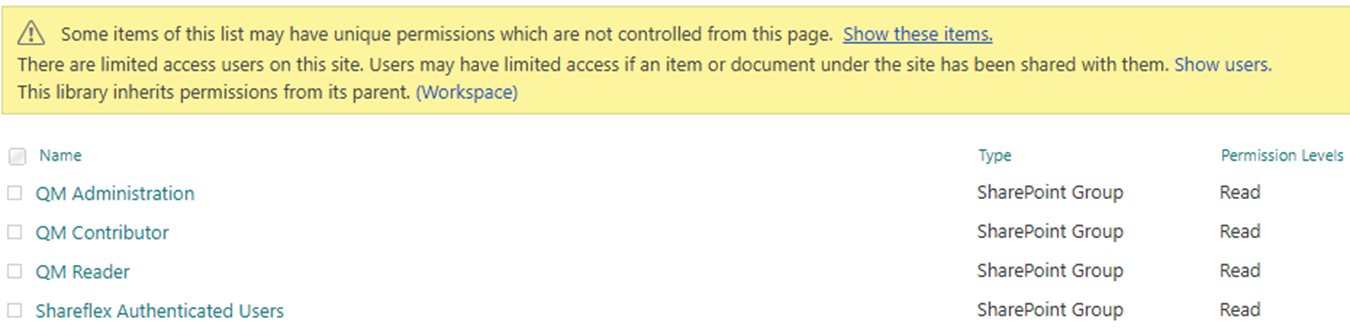
Documents Edit (unique)
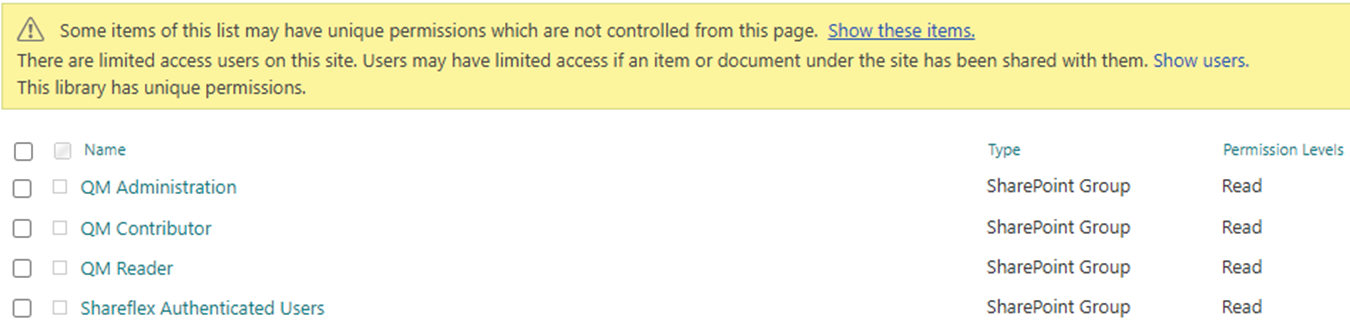
Documents Valid (inherited from root)

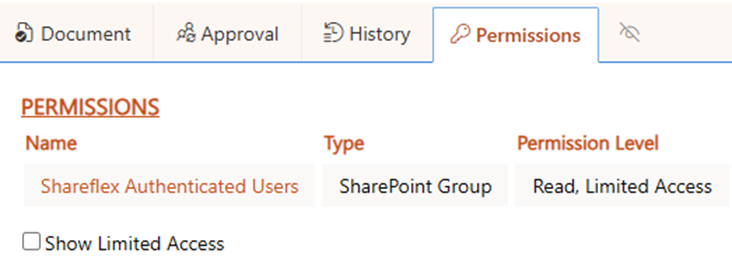
Shareflex Authenticated Users
Any user that can login to the SP site, has access to the Document libraries in QM, via the ‘Shareflex Authenticated Users’ group. This group has Read permissions on the libraries (but not necessarily on the library items).
In the Documents New and Edit libraries, item level permissions are not granted to Shareflex Authenticated users. This means that a Shareflex Authenticated User can only see items where access was granted via the Editor, Reviewer, Approver or Confirmer field. Other items are invisible to this user.
In the Valid library, a Shareflex Authenticated User can view all items.
Item Permissions at Workflow Stages
The lifecyle of a Shareflex document starts with the creation in the Documents New library. The Numbering workflow passes this document to the Documents Edit library, and the Publishing workflow moves the document to the Documents Valid library.
The permissions on the item in the different stages are as follows:
When the document is in Documents New:
- QM Administration – Can Edit
- QM Reader – Can View
- Shareflex Admins – Owner
- Reviewer field (eg. QM Reviewer) – Can View
- Editor field – Can Edit, until the Numbering workflow is started, then Can View
When the document is in Documents Edit:
- QM Administration – Can Edit
- QM Reader – Can View
- Reviewer field (eg. QM Reviewer) – Can View
- Approver field (eg. QM Approver) – Can View as soon as Publishing workflow is started
- Confirmation People (eg. QM Confirmer) – Can View as soon as Publishing workflow is started
- Editor field
- No workflow: Can Edit some metadata and main document, and delete the item
- Workflow step 300 – Review: Can Edit some metadata, but cannot edit main document, nor delete the item
- Workflow step 400 – Approve or 500 – Confirm: Can View
When the document is in Documents Valid:
- Shareflex Authenticated Users – Can View
- In Documents Valid, everybody has View permissions, including Administrators. Users/roles are enabled to perform actions on valid documents, like the Editor who can check out the document (thereby moving the document to the Documents Edit library)
- Users can only check out their own document (Editor field)
- Any user can start the ‘Start Training’ workflow.
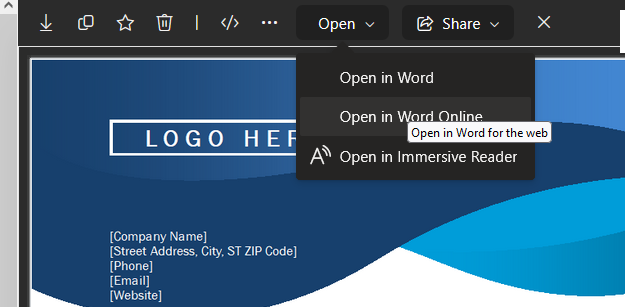
If enabled at the SharePoint Online site level, end users can share new and edit documents in QM with others inside the company to cooperate on the content, for example.
It’s not possible to share valid documents in QM because the content cannot be altered.
The document can be shared with anyone in the organization for co-editing with MS Office programs. The person does not need to have edit access to the Quality Documents solution.

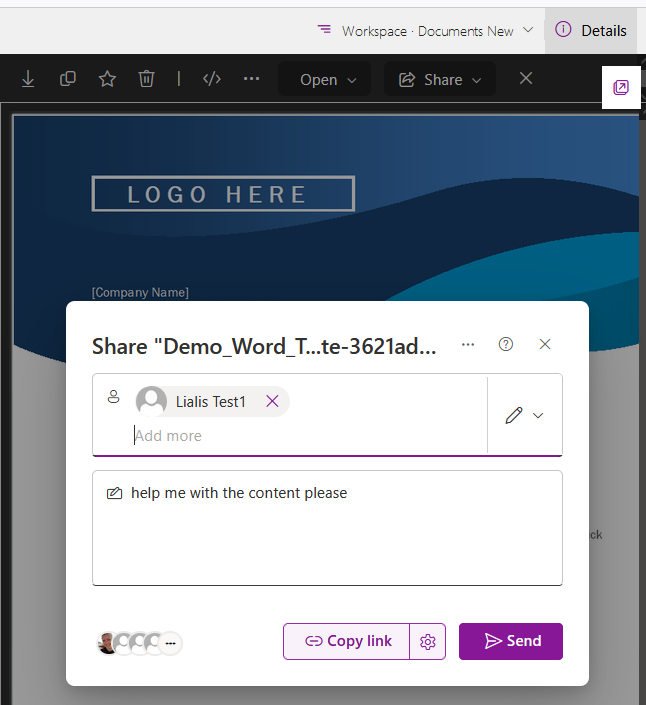
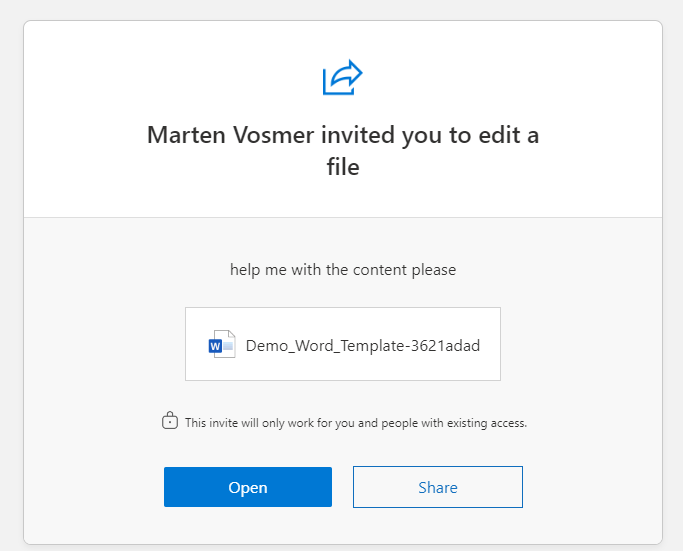
The user who has been invited will be notified by email that they are requested to work on the content of a specific document.
The co-editing feature in MS Office is very handy. Each user can see where others are working in the document, and changes made by each user are displayed in real-time.
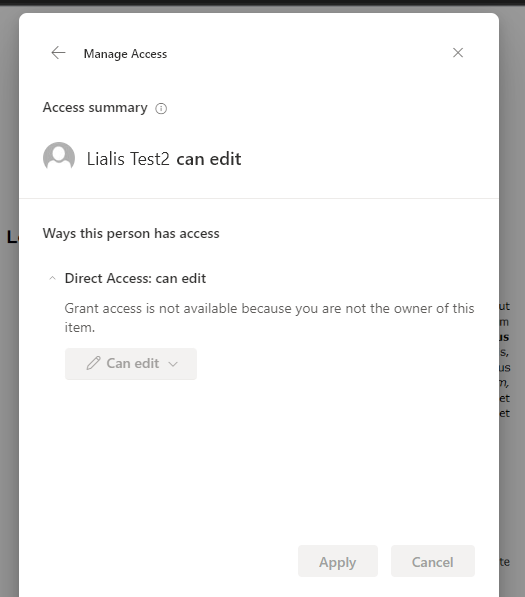
The person with whom the document has been shared can also edit the document metadata (title and so forth).
When a document is shared with someone, this user will also see the record in the QM Edit or New Documents list. For example:

Once shared, the author of the document cannot retract the sharing; these options are greyed out.
When a document is submitted for Document Numbering workflows, for example, the sharing will be removed. If editing in the edit document phase is needed, the author has to share the document with colleagues again.
Navigate to Administration under Actions.
Choose All Workflows

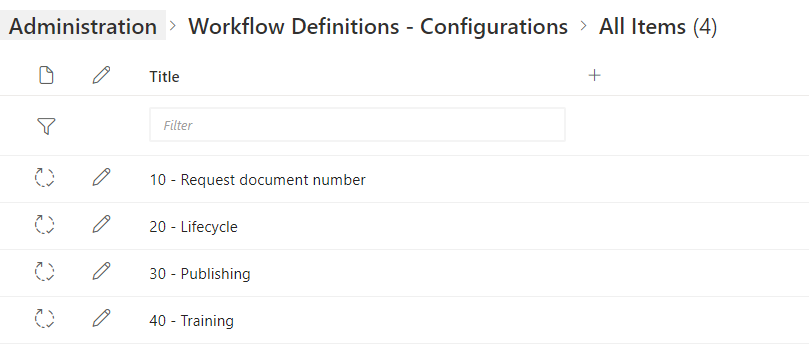
The QM application contains 4 main workflows listed below.
- 10 – Request document number 🡪 initiated from the Documents New library (/Workspace/DocumentsNew)
- 20 – Lifecycle 🡪 initiated from the Documents Valid library (/Documents) or the Records list (/Workspace/Records)
- Checkout Document can be initiated from the Documents Valid library, or the Records list
- Invalidate Document is initiated from the Records list
- Resubmission is initiated from the Records list
- 30 – Publishing 🡪 initiated from the Documents Edit library (/Workspace/DocumentsEdit)
- 40 – Training 🡪 initiated from the Documents Valid library (/Documents)
Create or upload a new document
The process starts with a user creating an item in the New Documents library. Only users with the QM Contributor role see and can use these New Document buttons.
![]()
The item has no Workflow Status yet. Only the Documents New ruleset is applied. 3 Rules have matching conditions and are executed:
- Because the field name ‘ID’ is not empty (which is always true), the current item permissions are replaced with the permissions defined in the ‘QM – Documents New’ permission set
- Because the workflow number field is empty, the Editor will get Contribute permissions on the item
- The Reviewer field gets Read permissions to the item.
Now the Editor can start the Numbering workflow.
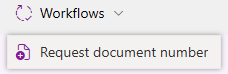
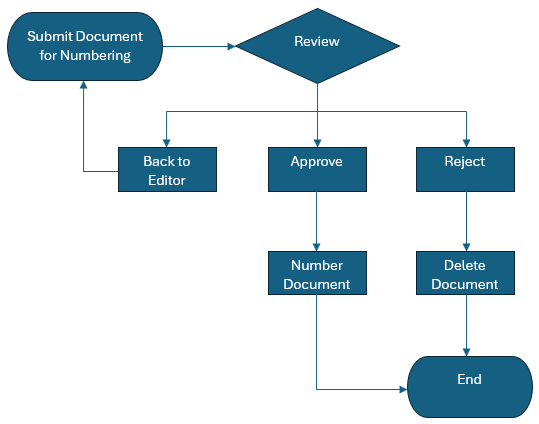
This straightforward workflow will be used to outline the processes the document will undergo.
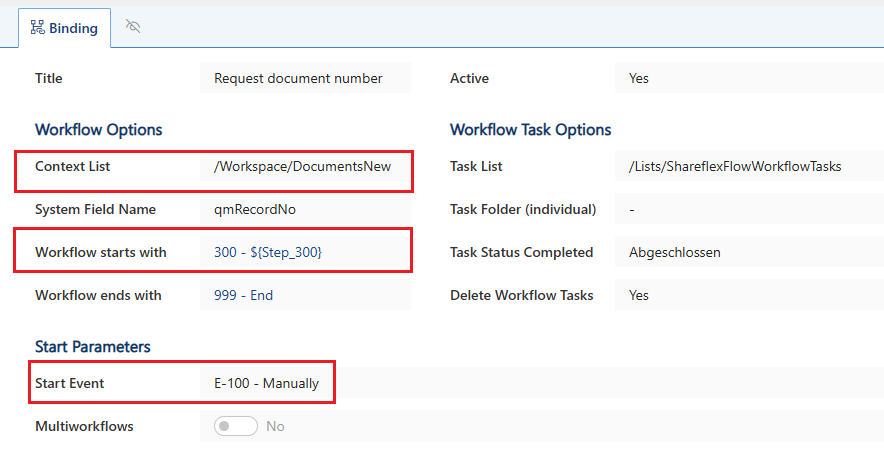
Workflow: 10 – Request document number
In a Workflow Binding, you can see to what list(s) the workflow applies (Context List), what is the first step in the workflow (Workflow starts with), and how the workflow is triggered (Start Event)
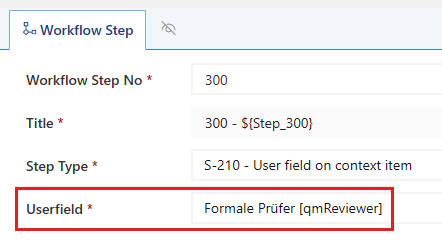
Each Workflow Step specifies what user(s) get the Workflow task (approve, decline, etc.) assigned at that stage
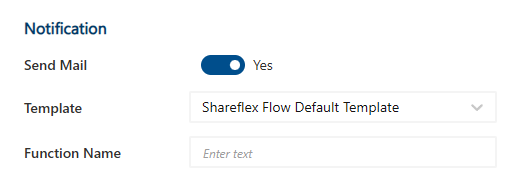
If someone is assigned a task at this step, it is also possible to enable notifications here. The assignee will then receive a mail with a link to the workflow task. By default, this notification is disabled, because it’s easier for the assignee to open the ‘My Active Tasks’ link from the homepage.
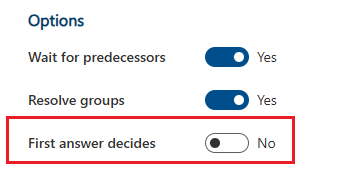
If multiple (or a group of) reviewers is assigned to a task, by default all reviewers must complete the task before the item is moved to the next stage. By activating the ‘First answer decides’ switch, the decision of the first reviewer moves the item to the next step.
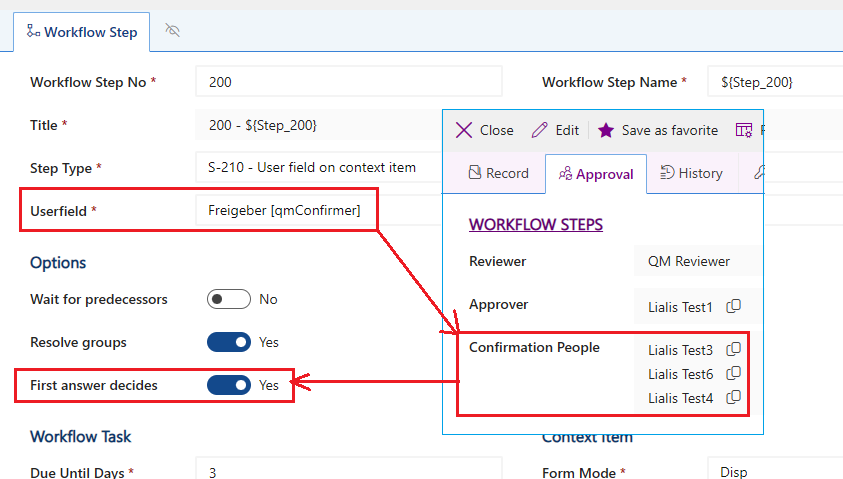
This is an example of a workflow step from the Publishing workflow, where there are multiple confirmers, and only the response of the first confirmer is relevant for the next workflow step.
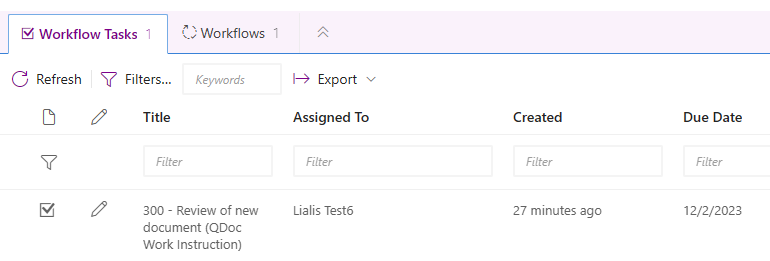
At the bottom of the item, the assigned user will see a Workflow Task
The Reviewer opens the Workflow Task, and has 3 options to choose from:
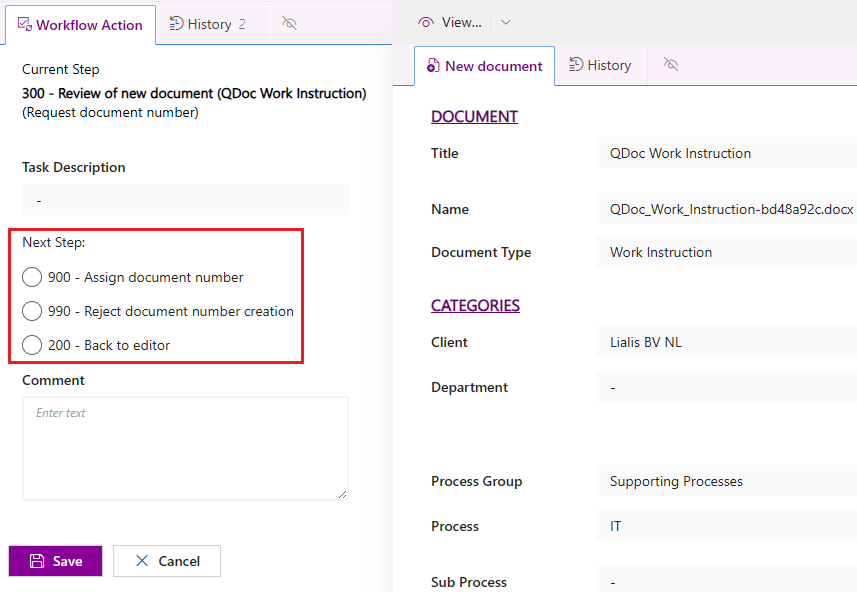
When a choice is made and the item is saved, the workflow status is updated on the item, new permissions are applied, and a new workflow task is assigned to the next assignee.
Workflow: 30 – Publishing

Logically, Workflow 30 (Publishing) follows Workflow 10. After the item has been assigned a document number, the item is moved from Documents New to Documents Edit and a record is created in the Records list. In the Documents Edit library, a button is available to manually start Workflow 30 – Publishing. In this workflow, the Reviewers, Approvers, and Confirmers play a role to get the item published, and move it from the Documents Edit library to the Documents Valid library.
Workflow: 20 – Lifecycle
The lifecycle workflows are used to republish or invalidate existing, valid documents.
Documents may be manually checked out to update the content, and then republished via the Publishing workflow. Or documents may be manually invalidated when they are not relevant anymore.

You can check out a document from the Documents Valid library as well as from the Records list. Checked out documents are visible in the Documents Valid library with a checked-out icon:
![]()
And there is a message on the item:

To invalidate a document, you have to go to the Records list.
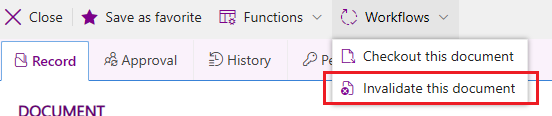
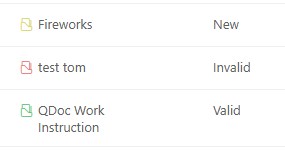
Invalid documents are visible in the Records list with a red-coloured instead of a green coloured icon:
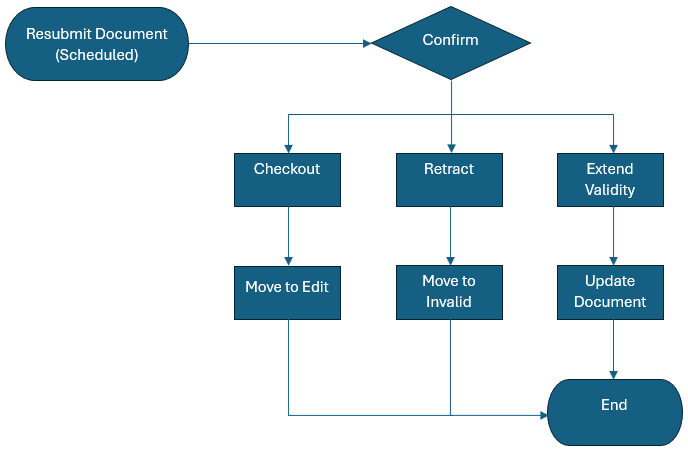
Documents have a limited validity. An automatic resubmission workflow is started one month before a documents validity date is exceeded. The editor receives an email and a task to checkout or retract the document, or extend its validity.
Workflow: 40 – Training
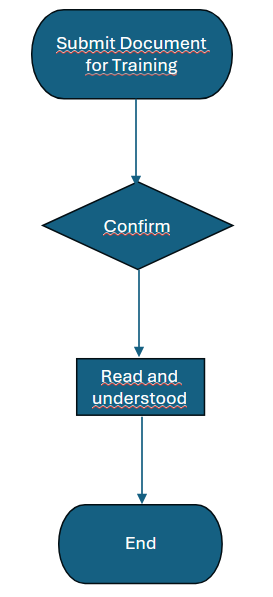
When the field ‘Training Mandatory’ – set in Documents Edit – is active, the workflow is automatically started.
Training participants receive a link to the Workflow task, that they can close by selecting the ‘Read and understood this document’ option.
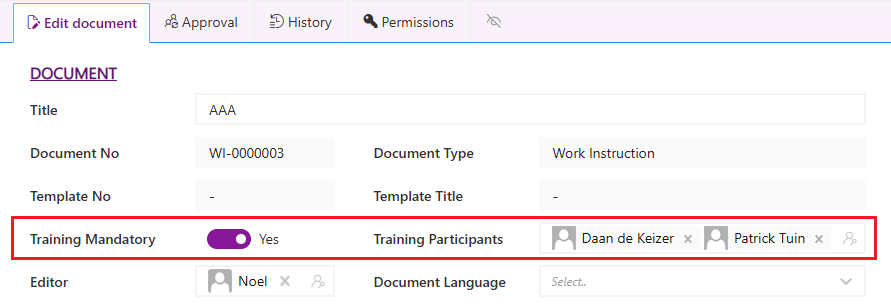
It is also possible to start the training workflow manually, from the Documents Valid item.
Documents that are currently in the Training workflow are visible in the Documents Valid library with a checked-out icon:
![]()